The purpose of this article is to explain how you can create and add apparel fixtures in the DotActiv software. We also unpack how clothing images should be prepped before importing and how to pack products behind each other.
These fixtures are used for the apparel industry to merchandise items that are hung on a display.
Adding An Apparel Container
As you would build a new gondola to add fixtures when working with FMCG goods, the same applies to apparel. Instead of referring to it as a gondola, we refer to it as an apparel container.
With your DotActiv software opens, ensure you are in the ‘Space Planning’ tab. Next, click on ‘Apparel Container’ in the ‘Shelf Planning’ section.
Once you add the apparel container, you can add your fixtures.
Please note that you cannot add any fixtures until you first create an apparel container. The ‘Apparel Fixtures’ option will be greyed out until you do.
Adding Apparel Fixtures
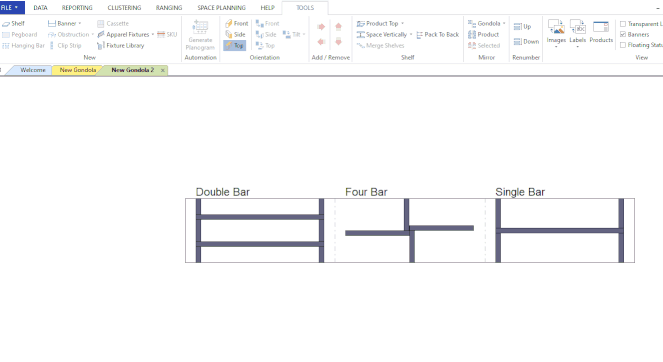
There are five different types of apparel fixtures available in the DotActiv software:
- Single Bar;
- Double Bar;
- Four Bar;
- Circular Bar; and
- Tables.
The number of bars on each fixture will determine which products are placed there.
For example, a single bar will carry one style of clothing but perhaps in different colour variations. You can use a four bar to display two different styles that can be worn together (offering a customer an outfit idea).
Once you have added one of the three fixtures to the container, you can toggle between the ‘Front’, ‘Side’ and ‘Top’ view to see your merchandise from different angles.
Adding A Single Bar
To add a single bar, click on the ‘Apparel Fixtures’ icon and select ‘Single Bar’ from the drop-down menu. Next, click on the apparel container to add the fixture.
Adding A Double Bar
To add a double bar, click on the ‘Apparel Fixtures’ icon and select ‘Double Bar’ from the drop-down menu. Next, click on the apparel container to add the fixture.

Adding A Four Bar
To add a four bar, click on the ‘Apparel Fixtures’ icon and select ‘Four Bar’ from the drop-down menu. Next, click on the apparel container to add the fixture.

If you click on the ‘Apparel Fixtures’ icon without selecting an option from the drop-down menu – the default will be a single bar.
Adding a Circular Bar
To add a circular bar, click on the ‘Apparel Fixtures’ icon and select ‘Circular Bar’ from the drop-down menu. Next, click on the apparel container to add the fixture.
As you can see above, the Circular Bar opens in ‘Top’ view. You will most likely use this view when merchandising products on it.
To find out how to create and add Table fixtures in DotActiv, please read this article.
Editing Apparel Fixture Attributes
To edit the attributes of either of the four apparel fixtures, right-click to open up a context menu. Select ‘Properties’ to open the properties window.
Next, select ‘Apparel Fixture Attributes’ from the left-hand panel. In the ‘Attributes’ block, you can edit the following:
- Bar Thickness;
- Bar Offset; and
- Height Offset.
Apparel Fixtures And The Fixture Library
The apparel fixture feature is also compatible with the Fixture Library.
To save any of the four fixtures to the fixture library, first, right-click on the fixture. From the context menu, select ‘Save As Fixture’. Then, give it a name.
If you open the Fixture Library, it is now available under the sub-heading ‘Apparel Fixtures’.

Once you’ve created your apparel fixtures, the next step is to add your products. We included an example below of how clothing images should be taken and prepped before importing.
Example
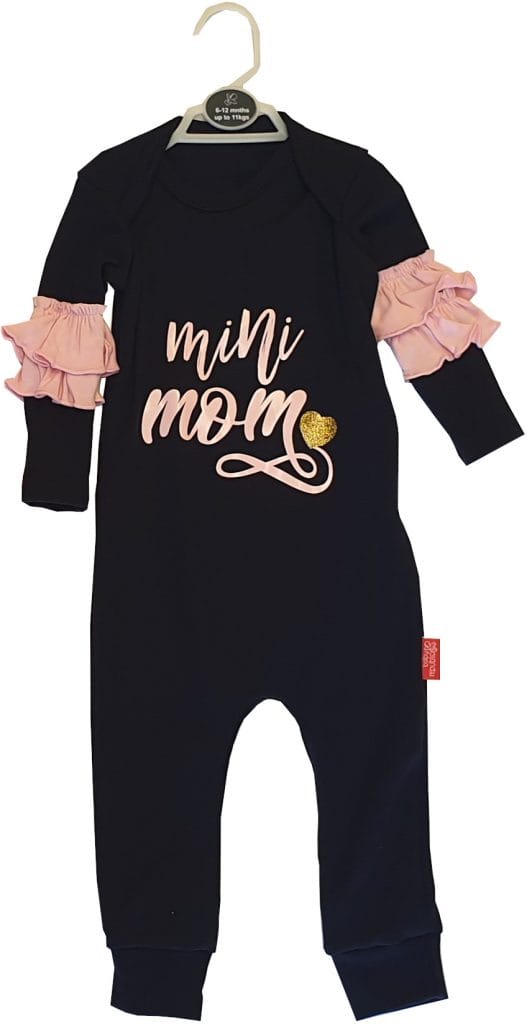
Below is an example of how apparel images should be taken to get the desired result. Notice that the image includes the clothing hanging on a hanger as it would be hanging in the store and it also has a white background.
How To Pack Clothing Products Behind Each Other
When merchandising clothing products, often the products are placed behind one another when you would like the clothes to be orientated to the front, for customers to see the full product. Clothing products are commonly placed on hanging bars.
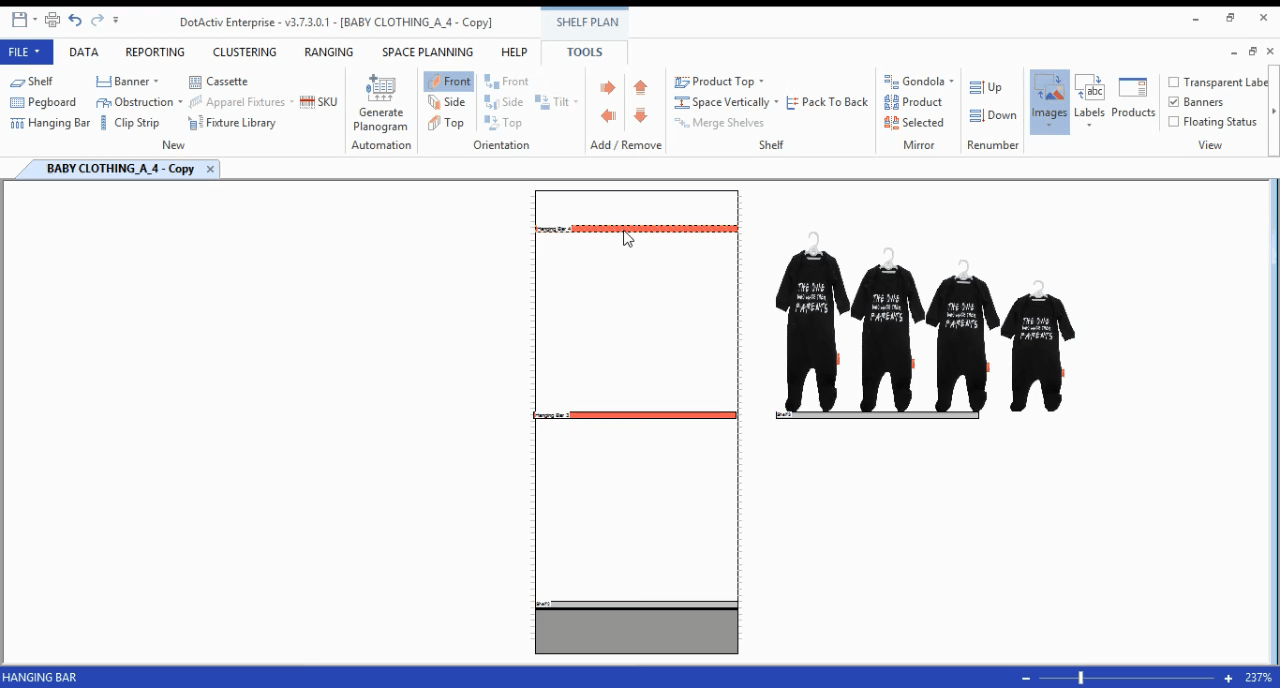
The first step would be to pack the hanging bar manually. Then, you start by placing your largest size on the hanging bar at your desired location. Please see the GIF below as an example.
If you have several products to place on the hanging bar, start by packing the hanging bar left. Then, place the biggest sizes on the planogram, pack the hanging bar evenly and then manually. Please see the example below.

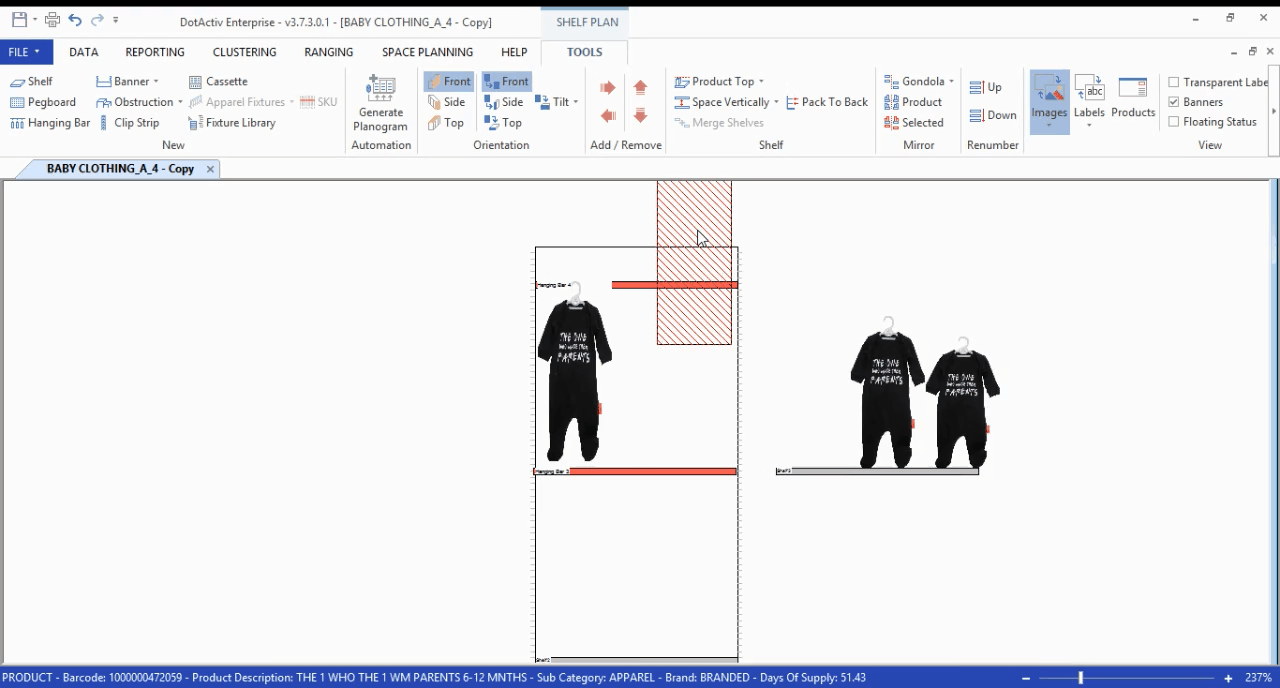
Next, pack the sizes, largest to smallest, from back to front, on top of the largest size placed on the hanging bar. To be as precise as possible when placing the smaller sizes on top of the larger sizes to not let the larger sizes protrude on the sides, copy the already placed products’ X position, place the smaller size onto the hanging bar and then paste the X position in. Please see the example below.
If it is requested that the products should be placed on side facings on the hanging bars, pack the hanging bars left, place the products on the hanging bar according to the sizes either largest to smallest or smallest to largest, and select the side facing tab on the orientation section. Space the products evenly and add facings as needed.
Should the above steps not work for you, please create a support ticket and our DotActiv support team will assist you in uncovering the issue.