This article will help you setup DotActiv integration with Activ8 for planogram communication.
Set Connection Settings
Navigate to Administration, and then Application Settings in the left menu bar.
If this menu item does not exist, you may not have permission to change these settings.

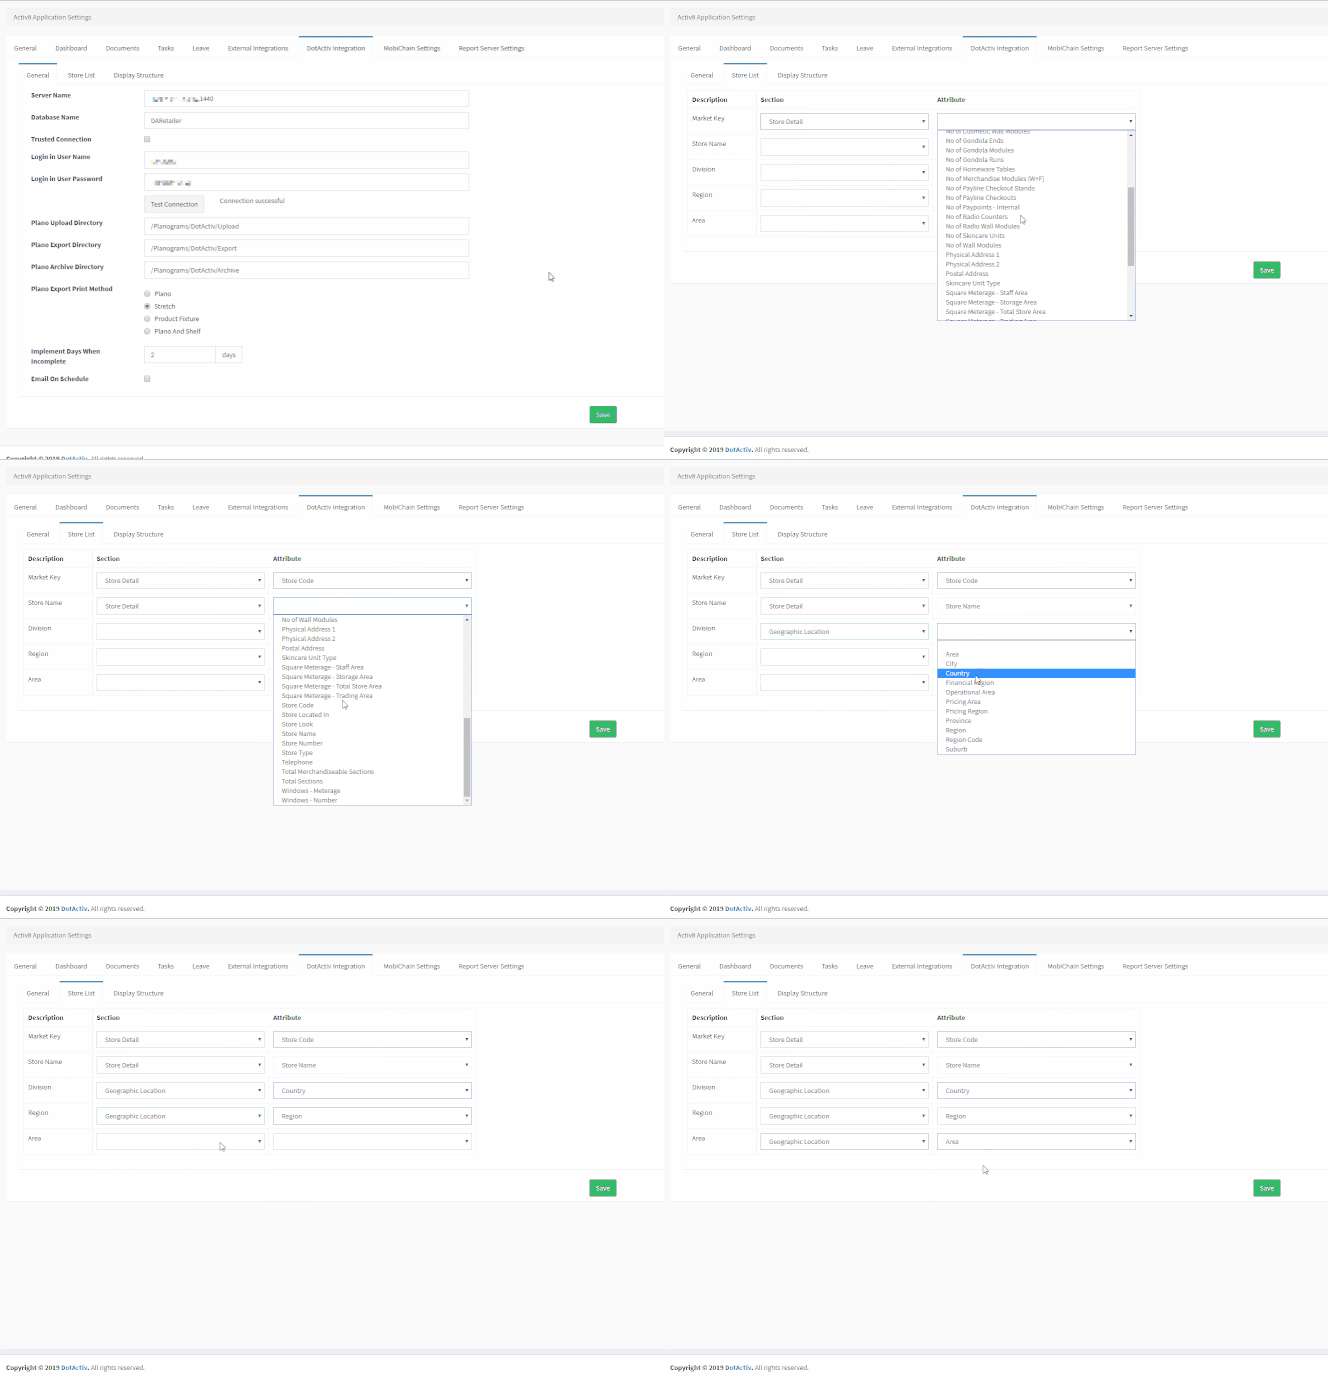
On the ‘DotActiv Integration’ tab under the ‘General’ sub-tab, complete the initial section that relates to the database connection details. You will require the server address (and port if necessary), the database name as well as login credentials.
If the web server agent running Activ8 has access to the database directly, you may select ‘Trusted Connection’ instead of setting credentials for login.

Once you have completed the required details, click ‘Test Connection’ to ensure that the details provided work as intended. If the connection is successful, save the settings and refresh the current page to apply the changes.
Set Additional General Settings
The remainder of the settings on the ‘General’ sub-tab will dictate how planograms are imported, communicated and exported. The Upload, Export and Archive directories are physical storage folders for the planograms and can be set as relative or direct paths.
These folders will generally have been setup during the installation process as they require access permissions by the web server agent. Additionally, the Export Print Method sets the default printing method when exporting the planograms, but this can be changed at print time by the user.
If the ‘Implementation Date’ for the imported planograms has not been set, we can set a default value from the import date by selecting the ‘Implement Days When Incomplete’ setting.
Finally, the ‘Email on Schedule’ setting allows the setup of a scheduled email to users containing the list of imported planograms for each store. By default, users will receive a notification for each planogram and store contribution, but this setting will limit this to the selected schedule.
Set Store List Mapping
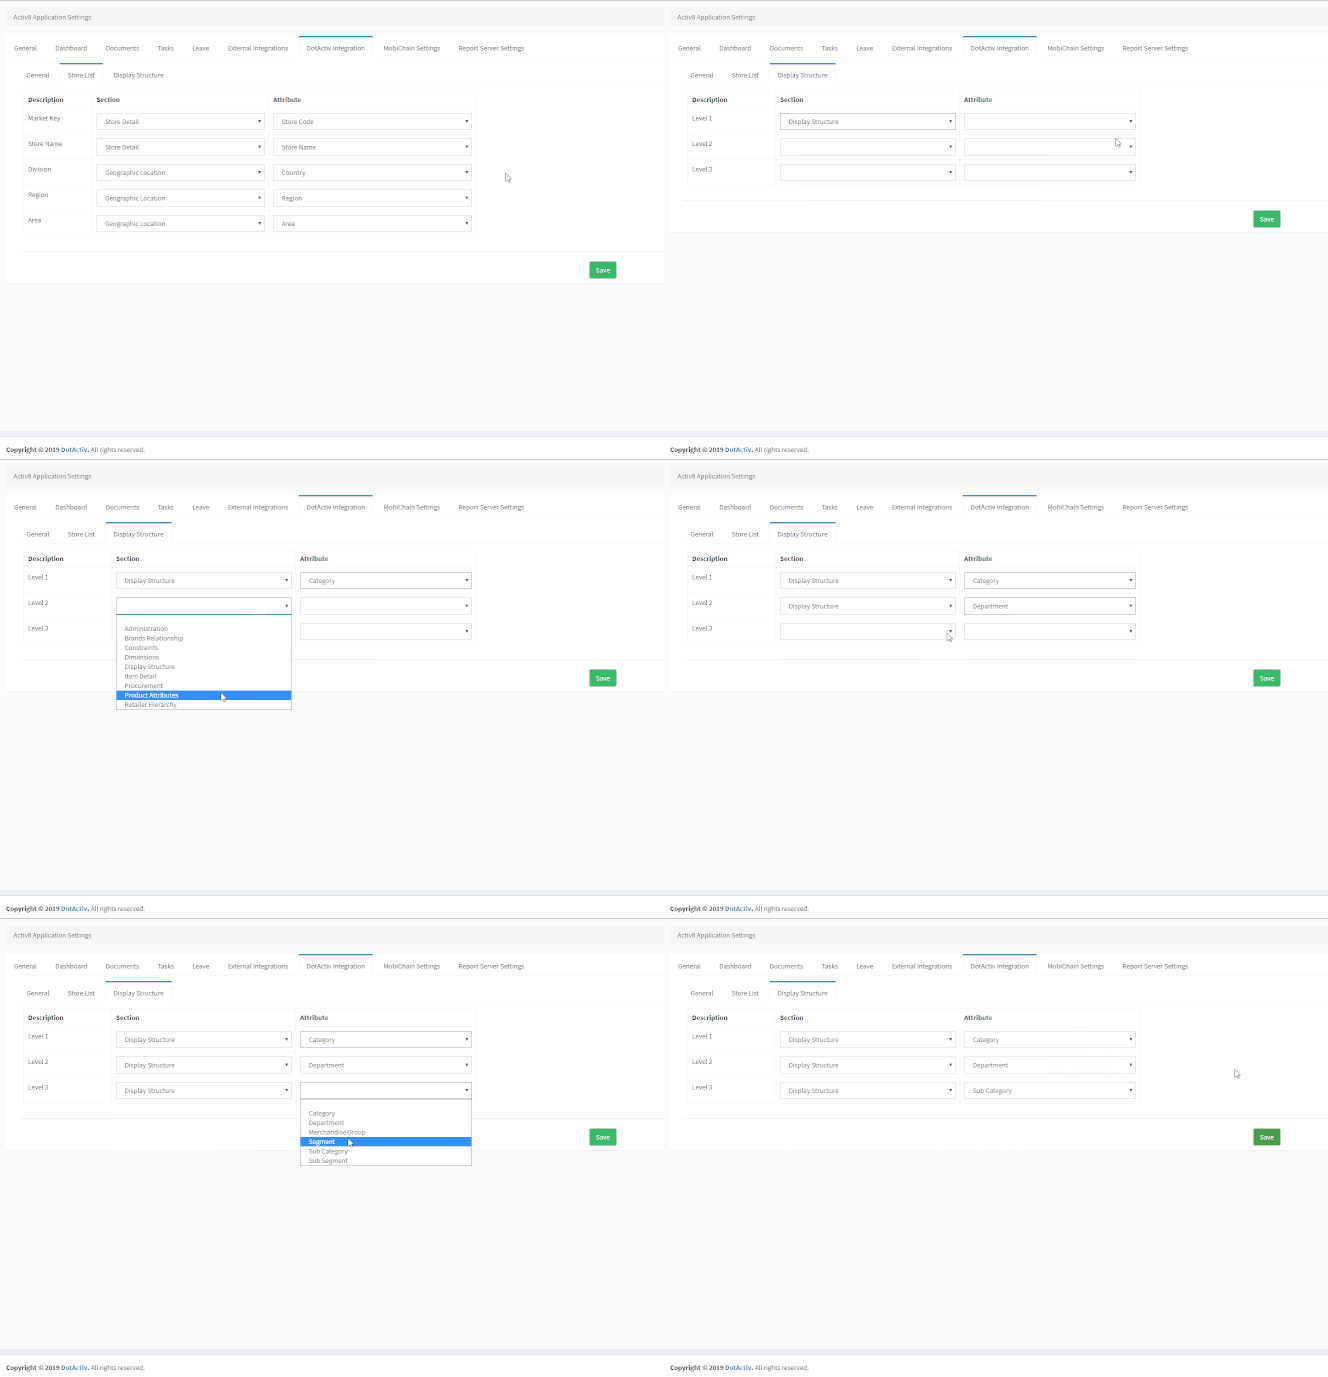
On the ‘Store List’ sub-tab, select from the drop-downs the options that best match each description for the store detail. This controls how stores are identified and displayed to users within the Activ8 system.

Set Display Structure
On the ‘Display Structure’ sub-tab, select from the drop-downs the options that best match the desired tree display structure for planograms. This setup will dictate how planograms are grouped hierarchically and displayed for implementation or export.

Save the settings to apply the changes.
The DotActiv Integration settings are used in conjunction with DotActiv Import Utility to effectively communicate store planograms to the responsible persons.
Please see the DotActiv Import Utility article here for more information on importing planograms for communication.
