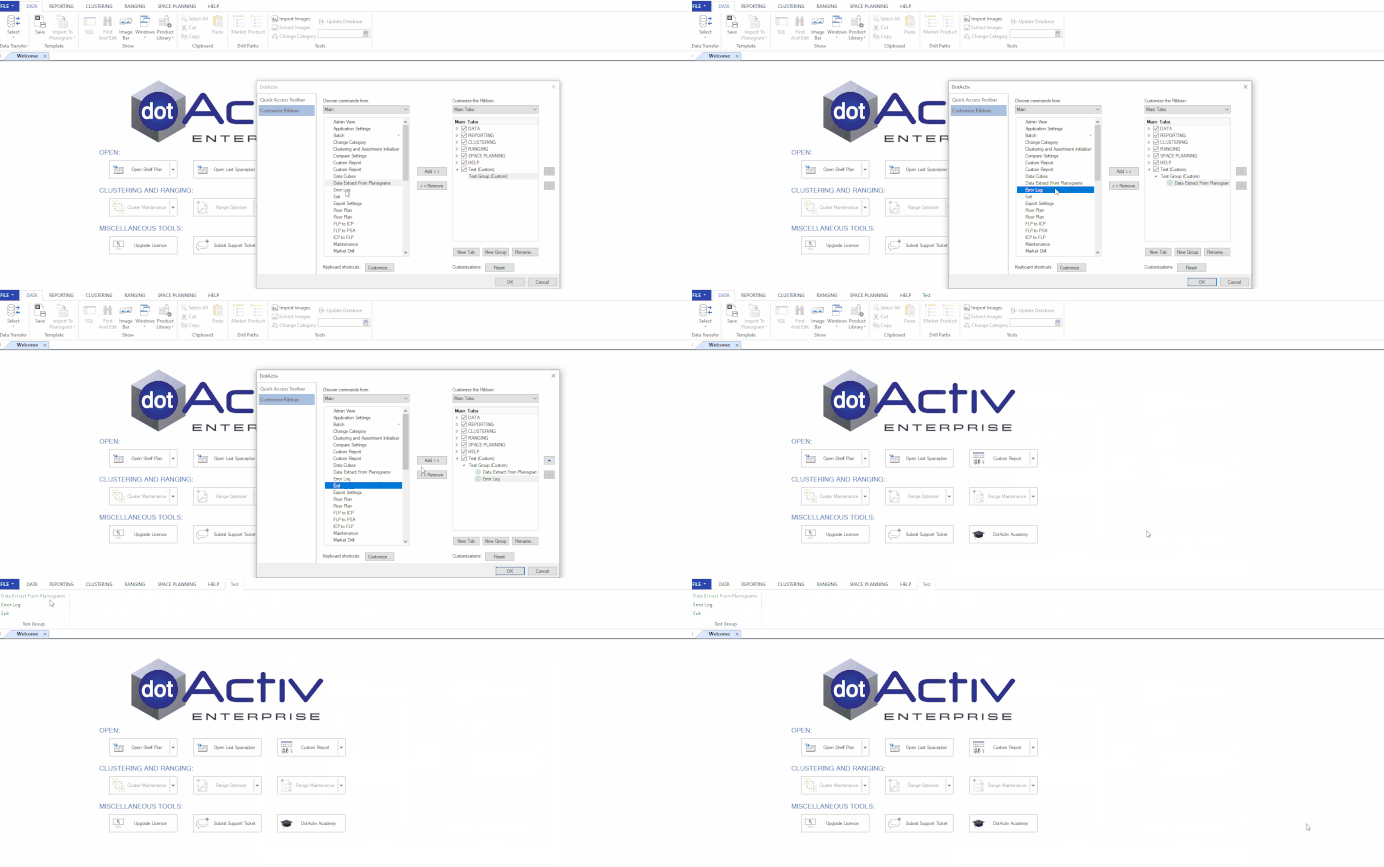
The purpose of this article is to explain how you can customise the ribbon found in DotActiv software. If you only use certain tabs in DotActiv, you can reduce the number of options in the ribbon.
Customising Your Ribbon
After opening DotActiv, right-click on the ribbon. Doing so brings up a context menu with a few options.

Click on the ‘Customise the Ribbon…’ option as seen below.

A window will pop up giving you options to create, rename and hide tabs in the ribbon.

Hiding Tabs
To hide a tab from the ribbon, untick the checkbox to the left of the ‘Main Tabs’ options. This will hide the tabs on your DotActiv application.

To retrieve a tab, right-click on the ribbon to reopen the pop-up window and tick the checkboxes.
Creating Tabs
To create a new tab or ribbon, click on the ‘New Tab/New Group’ button at the bottom of the pop-up window.

A New Tab or Group will appear. You can click on it and rename it by clicking on the ‘Rename’ button. You can also move it up and down the list to position it in the ribbon.
Adding Custom Commands
To add custom commands to your created tab, click on ‘New Group’ in your created tab. Next, select the command you would like in your tab from the left-hand side section and click on the ‘Add>>’ button.

Once you’re happy with what you added, you can click ‘OK’.

If you want to change your ribbon back to its default view, you can click the ‘Reset’ button and it’ll default back to the original view of DotActiv.
