The purpose of this article is to explain how you can create a supplier, retailer, customer or prospect profile in Activ8. We also unpack how you can archive and unarchive each.
Using The Address Book
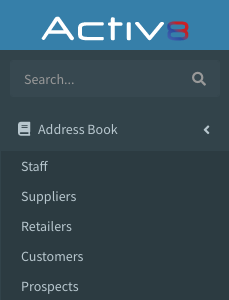
If you want to create a supplier, retailer, customer or prospect profile in Activ8, you need to do it through the ‘Address Book’ section.
After logging into Activ8, navigate to this section in the left-hand panel.

Adding A Supplier
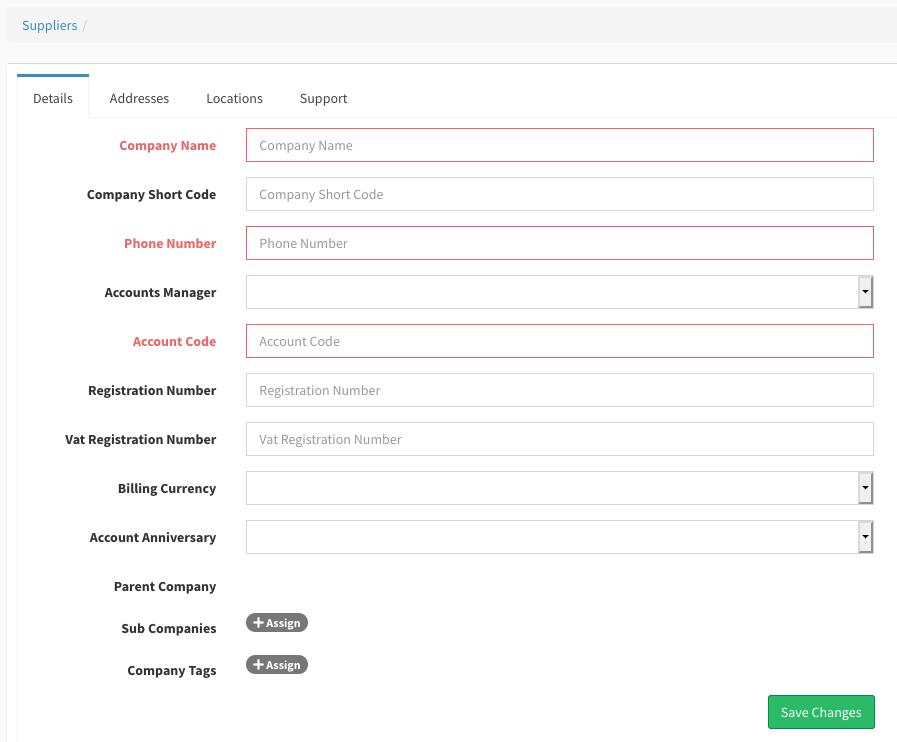
After clicking on ‘Suppliers’ and then the blue ‘+Add Supplier’ button, you need to fill in all the necessary details in the various tabs.
In the ‘Details’ tab, you need to fill in:
- Company Name;
- Phone Number; and
- Account Code.

These are the bare minimum to create a supplier profile before you can save it. It’s advisable that you include as much information as possible.
Archiving And Unarchiving A Supplier
If you want to archive a specific supplier, first locate the one you want in the ‘Suppliers’ section of the ‘Address Book’ section.
Next, click on it to open it. In any of the tabs, you will find a red ‘Archive Company’ button located at the bottom of the page.

Click on it to archive the supplier. You will be prompted to confirm that you want to archive the supplier. If you click ‘Yes’, the record will move from the ‘Active’ to the ‘Archived’ section.

If you want to unarchive the supplier, open the supplier record. In any of the tabs, you will find a blue ‘Restore’ button located at the bottom of the page.

Click on it to unarchive the supplier. A notification will pop up confirming that you have restored the supplier record. It will now return to the ‘Active’ section.
Adding A Retailer
After clicking on ‘Retailers’ and then the blue ‘+Add Retailer’ button, you need to fill in all the necessary details in the various tabs.
Similar to suppliers, in the ‘Details’ tab, you must fill in:
- Company Name;
- Phone Number; and
- Account Code.
Archiving And Unarchiving A Retailer
The process of arching a retailer is the same as archiving a supplier.
If you want to archive a specific retailer, first locate the one you want in the ‘Retailers’ section of the ‘Address Book’ section.
Next, click on it to open it. In any of the tabs, you will find a red ‘Archive Company’ button located at the bottom of the page.
Click on it to archive the retailer. You will be prompted to confirm that you want to archive the retailer. If you click ‘Yes’, the record will move from the ‘Active’ to the ‘Archived’ section.

If you want to unarchive the retailer, open the retailer record. In any of the tabs, you will find a blue ‘Restore’ button located at the bottom of the page. Click on it to restore the retailer record to the ‘Active’ section.
Adding A Customer
After clicking on ‘Customers’ and then the blue ‘+Add Customer’ button, you need to fill in all the necessary details in the various tabs.
Again, in the ‘Details’ tab, you need to fill in:
- Company Name;
- Phone Number; and
- Account Code.
Archiving And Unarchiving A Customer
If you want to archive a specific customer, first locate the one you want in the ‘Customers’ section of the ‘Address Book’ section.
Next, click on it to open it. In any of the tabs, you will find a red ‘Archive Company’ button located at the bottom of the page.
Click on it to archive the customer. You will be prompted to confirm that you want to archive the customer. If you click ‘Yes’, the record will move from the ‘Active’ to the ‘Archived’ section.

If you want to unarchive the customer, open the customer record. In any of the tabs, you will find a blue ‘Restore’ button located at the bottom of the page. Click on it to restore the customer to the ‘Active’ section.
Adding A Prospect
After clicking on ‘Prospects’ and then the blue ‘+Add Prospect’ button, you need to fill in all the necessary details in the various tabs.
Fill in the required information, including at the bare minimum:
- Company Name;
- Phone Number; and
- Account Code
Archiving And Unarchiving A Prospect
If you want to archive a specific prospect, first locate the one you want in the ‘Prospects’ section of the ‘Address Book’ section.
Next, click on it to open it. In any of the tabs, you will find a red ‘Archive Company’ button located at the bottom of the page.

Click on it to archive the customer. You will be prompted to confirm that you want to archive the customer. If you click ‘Yes’, the record will move from the ‘Active’ to the ‘Archived’ section.
If you want to unarchive the prospect, open the prospect record from the ‘Archived’ section. In any of the tabs, you will find a blue ‘Restore’ button located at the bottom of the page. Click on it to restore the customer to the ‘Active’ section.
