The purpose of this article is to provide a step-by-step guide to creating and adding a questionnaire or checklist to a task in Activ8 software.
Creating A Questionnaire
If you would like to create a new questionnaire, click on the ‘Questionnaire’ tab in the left-hand sidebar and then click on ‘Questionnaires’.

Once Activ8 has opened on the ‘Questionnaire’ tab, click on ‘+ New Questionnaire’.

Next, fill in a name for the questionnaire and a description. Once you are ready to add specific questions, click on ‘New Section’.

Write down the question section you would like to add first and click ‘Save’. Once you have added all of the questions, click ‘Save Questionnaire’ or alternatively, you can ‘Cancel’.

Adding A Questionnaire
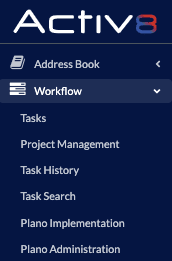
To add a questionnaire to a task, click on the ‘Workflow’ tab in the left-hand sidebar and select ‘Tasks’.
Next, click on the task that you would like to add the questionnaire to. Once the task is open, click on the ‘Questionnaire’ tab and click on ‘None Selected’. Now, choose the questionnaire you’d like to use.

Click on the green plus to add a questionnaire to the task.
A green pop up message will appear at the top of the task to confirm that the questionnaire has been assigned to the task.

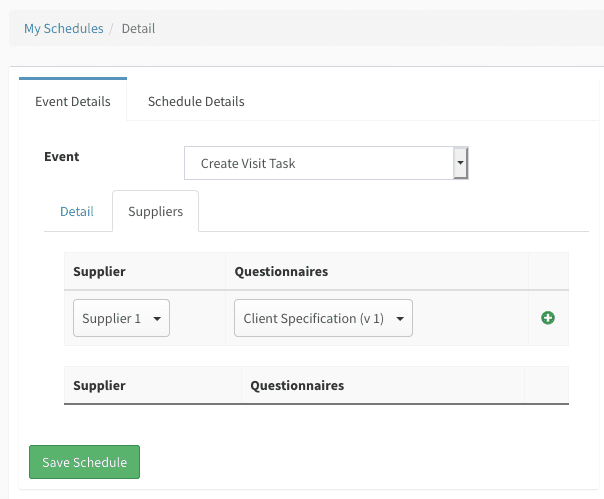
If you want to add a questionnaire to a schedule, navigate to the ‘Suppliers’ tab. Once there, select the supplier and questionnaire from the drop-down lists.
Creating A Checklist
If you want to create a new checklist for a task, click on the ‘Workflow’ tab in the left-hand panel and then on ‘Tasks’.
Either create a new task or open an existing one. Once you have filled in all your task details, click on the ‘Checklist’ tab next to the ‘Detail’ tab.
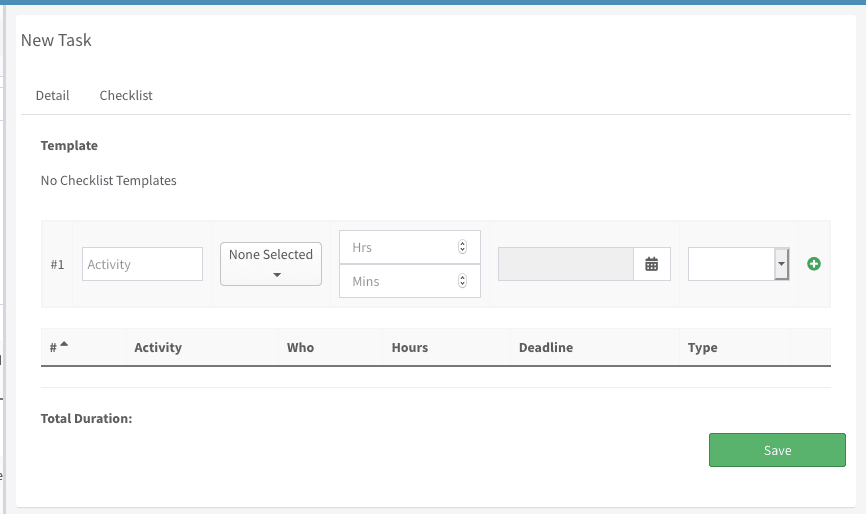
Doing so takes you to the above window where you can create your checklist.
You can then add the activity, assigned user, estimated time, deadline and type of task to the checklist. To add a new checklist item, click on the green + button.
Once you have completed the checklist, click ‘Save’ to save the checklist and revert back to the ‘Detail’ tab to save and publish your task.
Saving A Checklist As A Template
If you’d like to save a checklist as a template, click on the task that currently uses the checklist.
Next, click on the ‘Checklist’ tab. On the far right, there is a green ‘Save As Template’ button.
After clicking on ‘Save As Template, you can give your checklist a name.

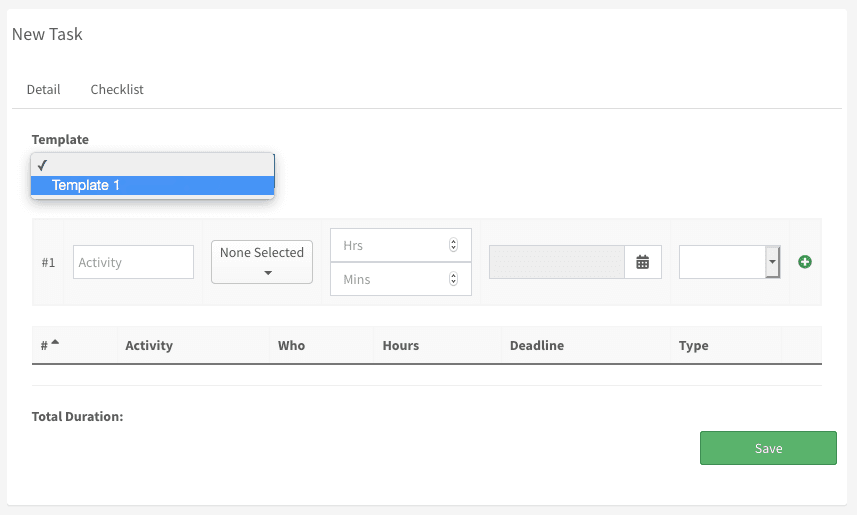
The next time you want to use the checklist in a task, navigate to ‘Checklist’ tab and find it in the drop-down menu below ‘Template’.
Deleting A Checklist Template
If you would like to delete a checklist template that you no longer use, you can simply do so by clicking on a task that does not have a checklist and then on the ‘Checklist’ tab.
Select the template that you would like to delete from the list and then simply click on ‘Delete’, as seen below.

Editing A Checklist
To edit a checklist, first, navigate to the task that contains it.
Next, go to the ‘Checklist’ tab. Here, you can click on the ‘Edit Checklist’ button.

Doing so allows you to make any changes to the deadline or content of the task.
If you want to add an activity to the task, fill in all the necessary information and then click on the green plus. If you want to remove any activities from the task, click on the red minus button next to the activity.
Once you have made changes, click on ‘Save’.
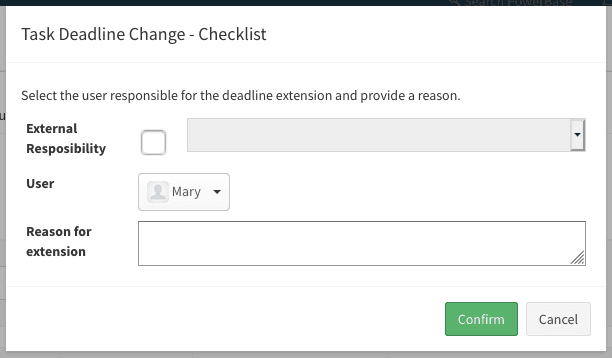
If the added activity extends the task, a ‘Task Deadline Change – Checklist’ window will appear where you must select the user responsible for the deadline extension.
