This article will provide you with a step-by-step process on how you can update the database.
If there is information in the display structure that has not been populated or information you would like to edit, you can do this by updating the database.
There are two ways to update the database. You can either update the database in the DotActiv software directly or you can update it by importing a CSV to the database.
Please note that the frequency of the update will be dependent on your needs. You can learn more about how DotActiv approaches data integration in this article linked here.
The repercussions of not updating the database when adding new or changed information will cause the information to be lost and not reflected when the information is linked to a fixture or report.
Updating through the DotActiv Software
Open the DotActiv software and navigate to the ‘Data’ tab. Click on SQL in the ‘Show’ section and choose the environment that you would like to update: Markets or Products.
Next, select the relevant view, right-click on it and click on ‘View Data/Images’.
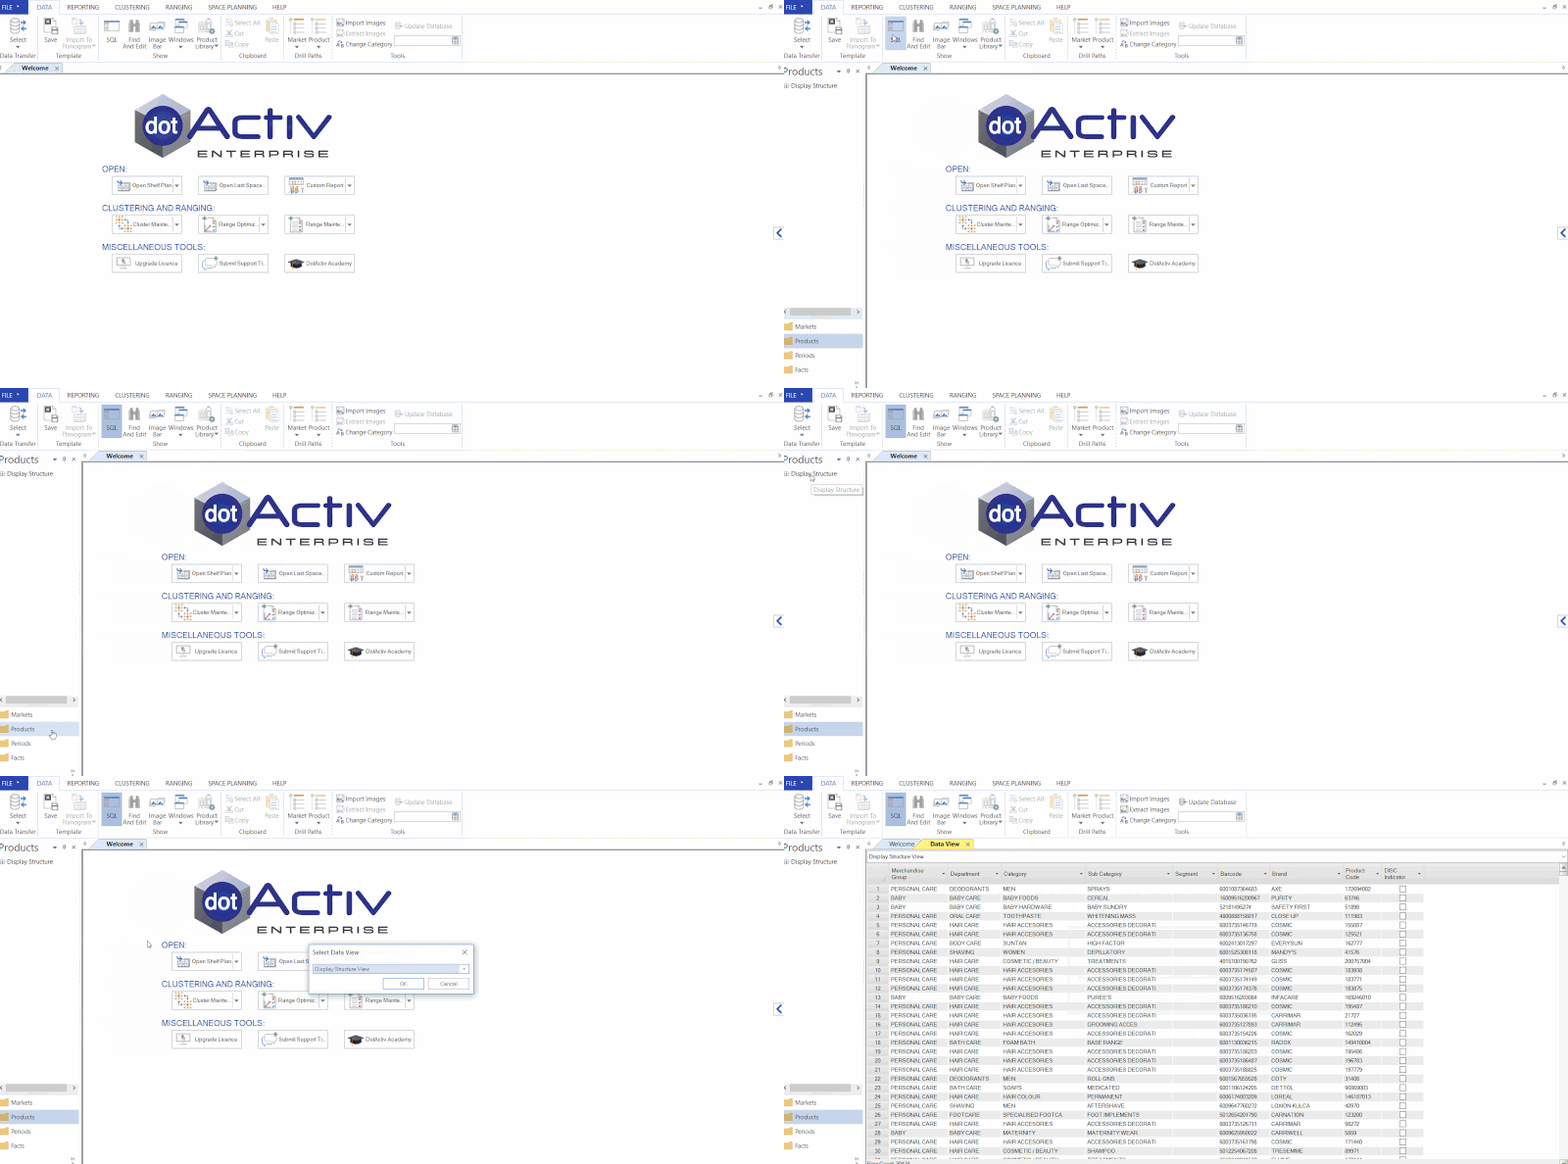
This will open a ‘Data View’ grid.
Here, you can now use the drop-down section in the relevant column to filter to the product detail you would like to update.

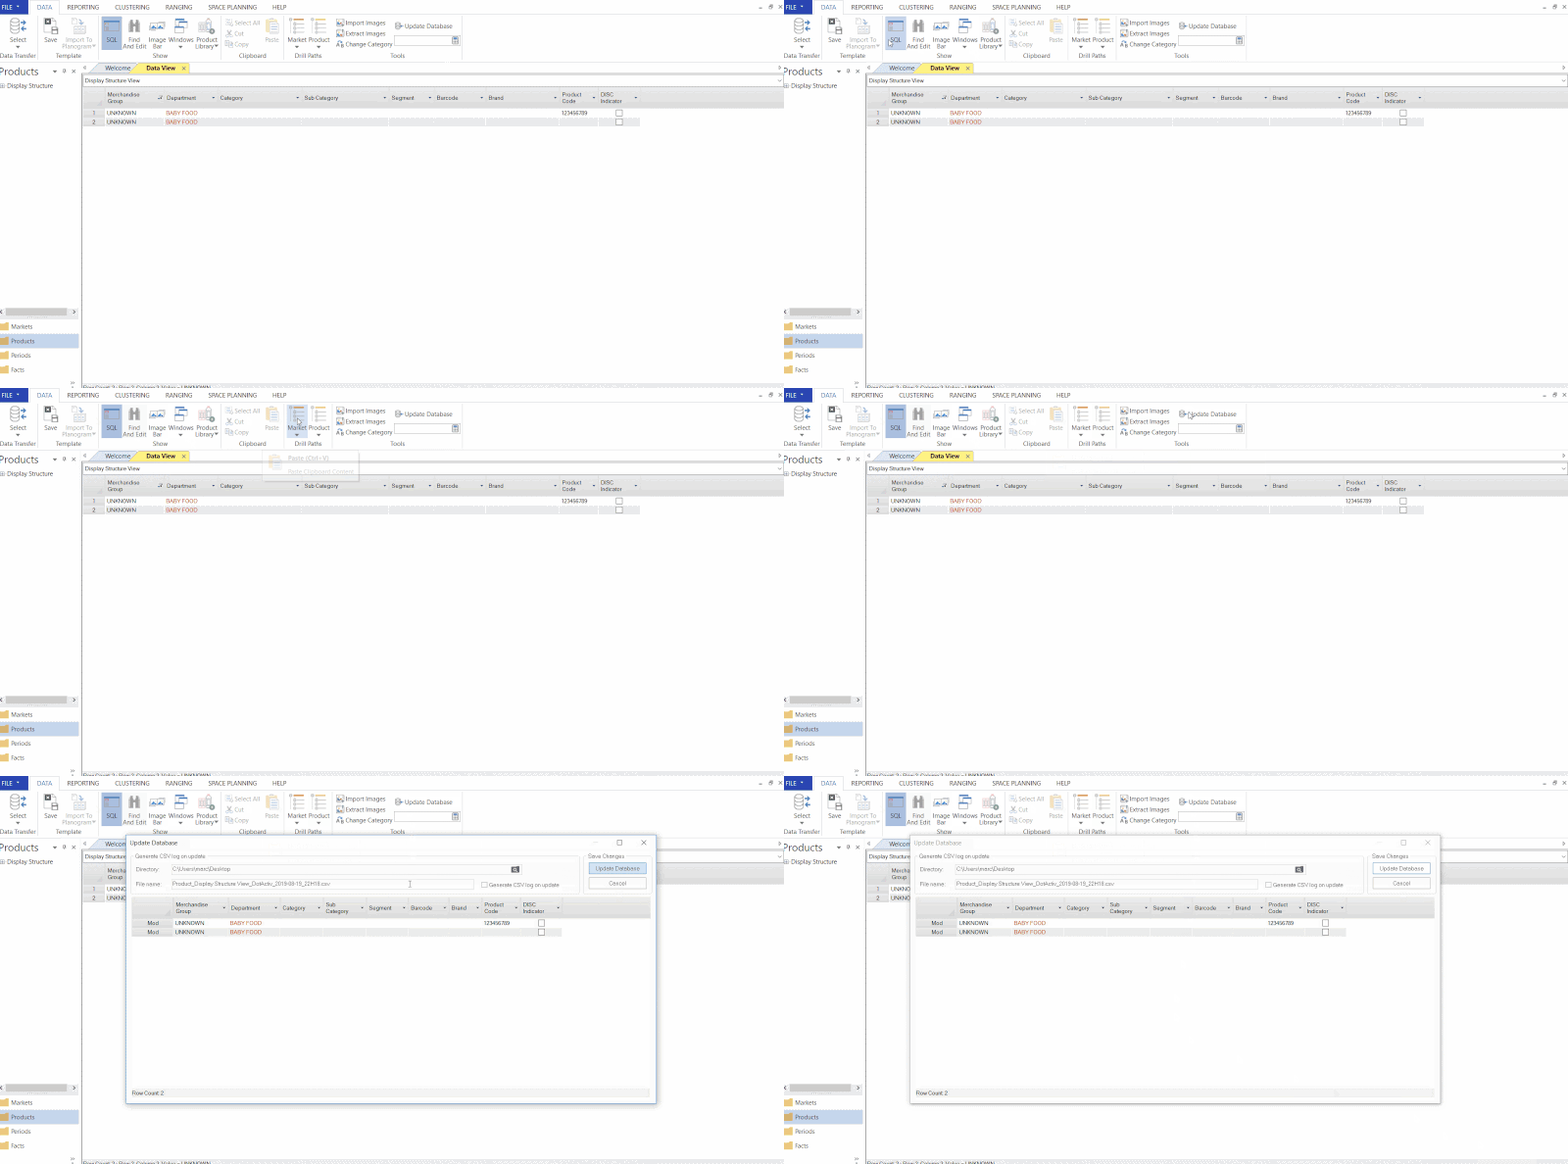
Type in the changes you want to make. Once a change has been made it will be highlighted in red.

In the ‘Data’ tab under the ‘Tools’ section, click on ‘Update Database’.
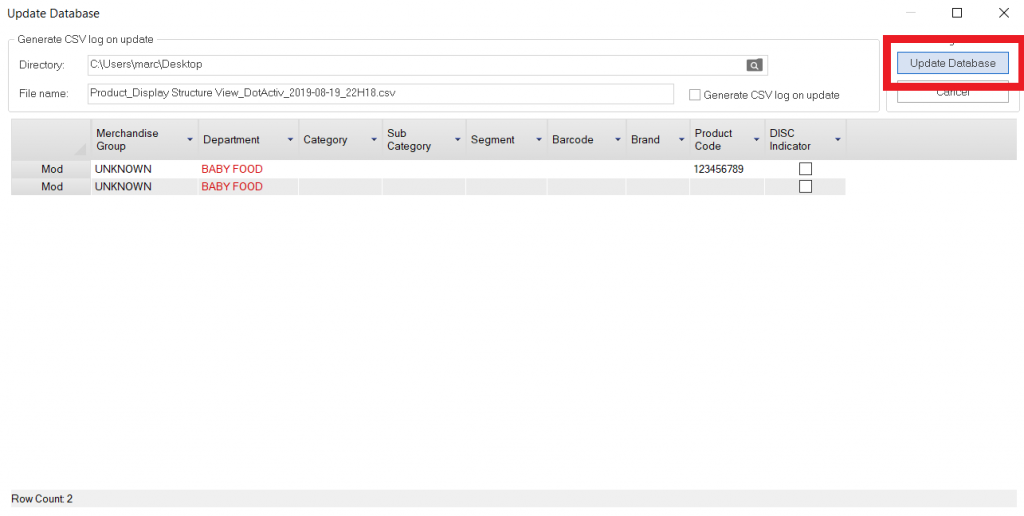
This will open an ‘Update Database’ window, showing you all pending changes.
Click on ‘Update Database’ once you have confirmed that all pending changes are correct.
Please note that before importing any data to the database, you should ensure that it is correct. Adding any information to the database that was not previously there can compromise the integrity of the data.
Updating Using A CSV
It is important to make sure that the CSV you want to use to update the database is clean. Make sure there are no duplicates, no missing information in the columns and that all spelling is correct.
How To Update Using A CSV
After opening the DotActiv software, click through to the ‘Data’ tab, then on ‘Select’ in the ‘Data Transfer’ section. Once there, click on ‘CSV to Database’.
Doing so will open the ‘Import’ window. Click on ‘Open file’ and navigate to the CSV. Click on ‘Open’.
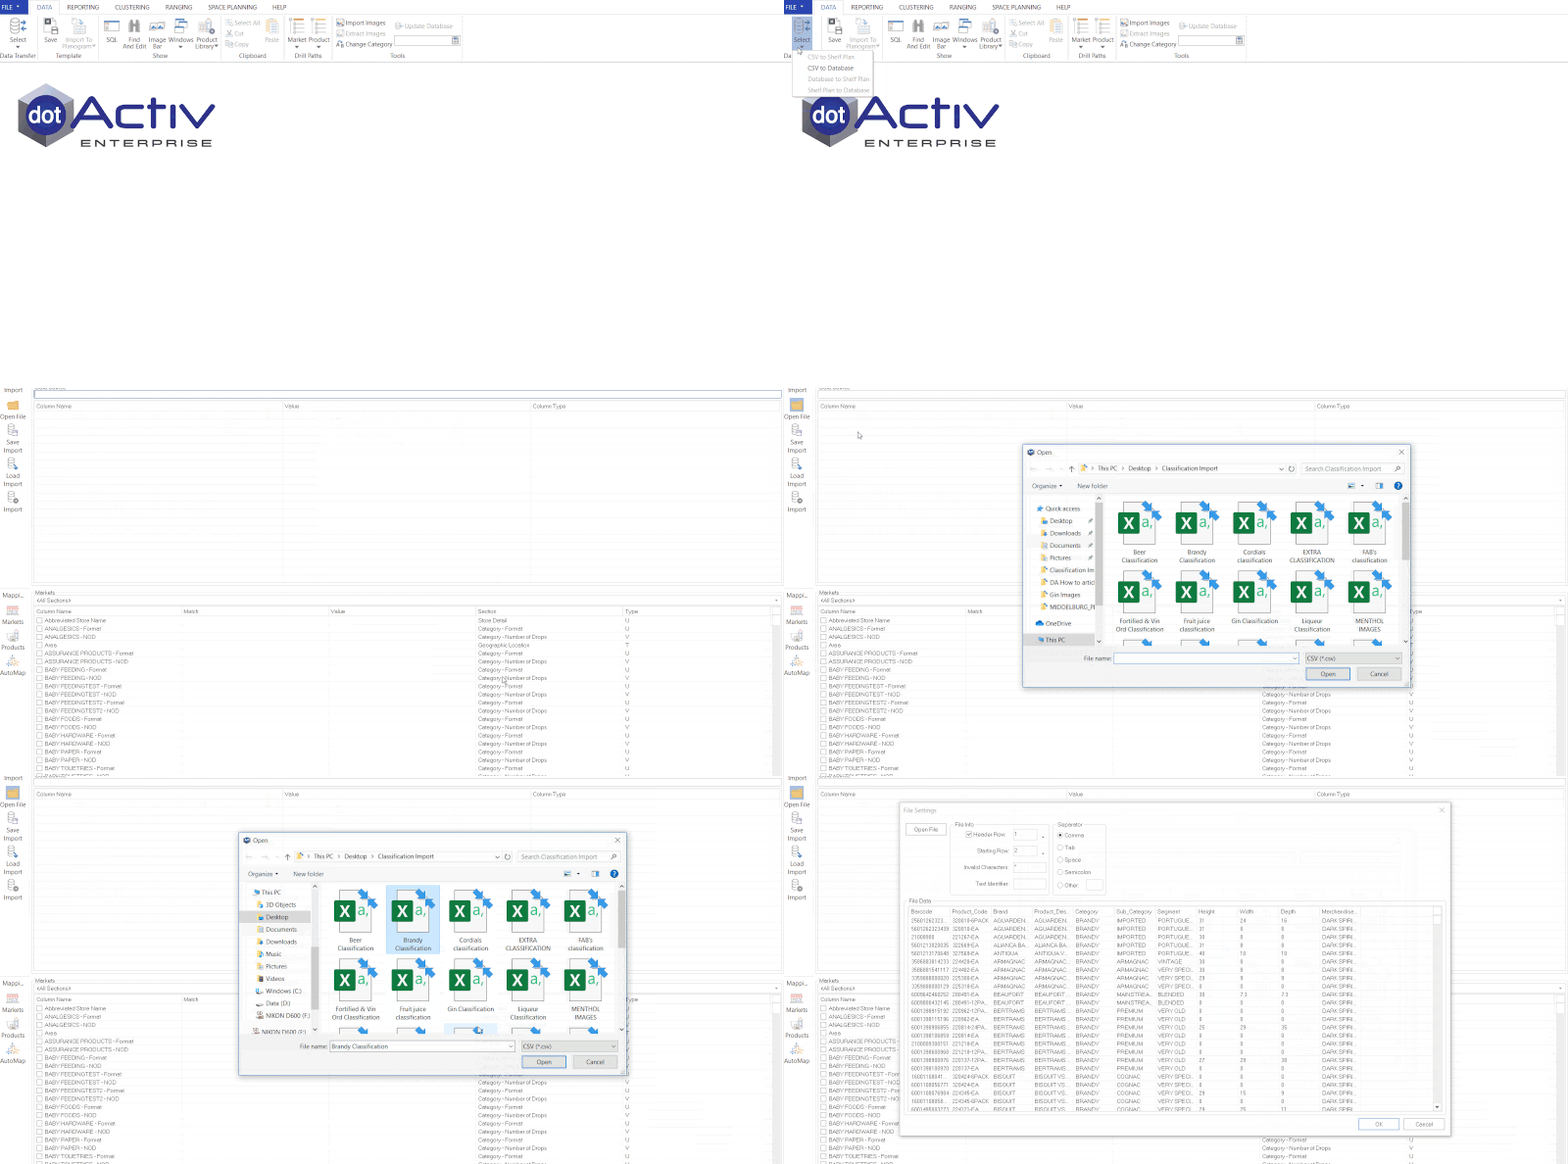
This opens a ‘File Settings’ window. This is an overview of what is in your CSV. Confirm whether this is the correct file and then click ‘OK’.

In the top section of the ‘Import to Database’ window, you can see the available fields in the CSV.

You’ll need to map these fields to the DotActiv fields at the bottom.

You can do that by using the ‘AutoMap’ function.
Please note that the naming convention used in the CSV must match the Column name in the DotActiv software for the AutoMap function to be accurate.
To do that, click on each field and then click on the ‘AutoMap’ function as seen in the GIF below.

Please check that the correct fields have been mapped. If a field has been mapped twice, click on the incorrect mapped field and double click the left button on your mouse to remove it.
You can also manually map your fields to the DotActiv fields, by dragging and dropping them onto the correct DotActiv fields as illustrated below.

After you have mapped all the relevant fields, you are now ready to import.
To do this, click on the ‘Import’ function.

This opens the ‘Import Summary’ window.

It is important to note that when you are updating the database you should always select ‘Update Only’.
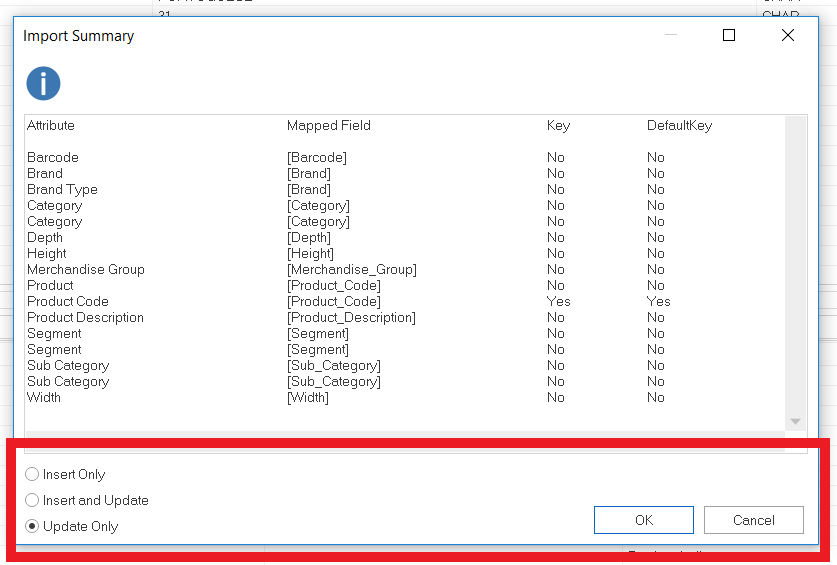
Then click ‘OK’.
Once the update has been completed a window will appear verifying that the import is complete.
