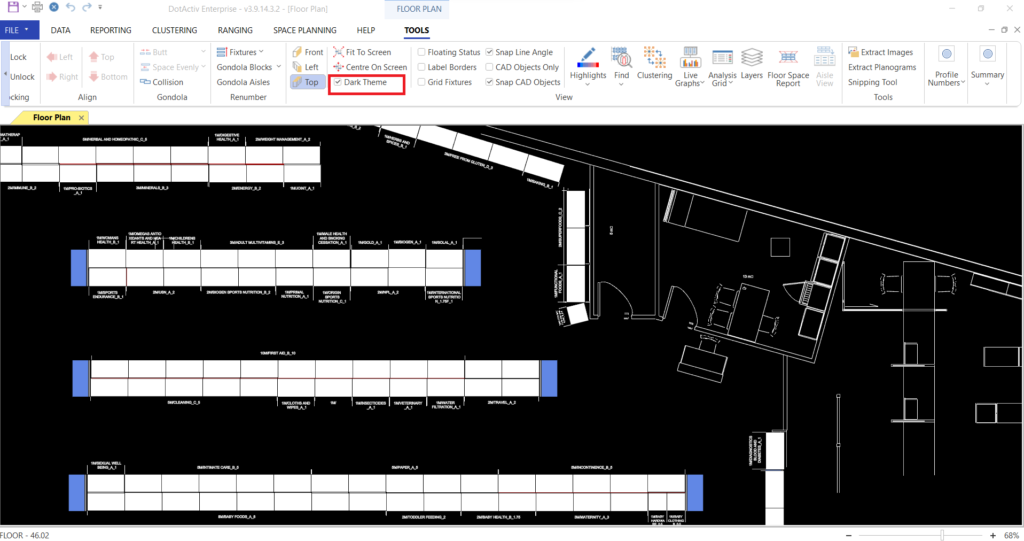
The purpose of this article is to unpack how to toggle between the white and dark themes when working within the floor planning function in the DotActiv software.
When working within floor planning in the DotActiv software, you have the option to set your environment to either a white theme or a dark theme.
If you would like to set your environment to the white or dark theme, you can do so by simply ticking or unticking the ‘Dark Theme’ box found in the ‘Tools’ tab under the ‘View’ section when working on a floor plan.

By having the box ticked, your environment will be set to the dark theme. If you would like to set it to the white theme, you can simply untick the ‘Dark Theme’ box as seen in the gif below.

Once you have set the theme of your preference, any new floor plans that you create will be saved with this theme. If you choose to open up an existing floor plan it will automatically open with the theme that you have set on your device, even if the existing floor plan was created in a different theme.
Please note that using a white or dark theme should not be confused with setting the background colour of a floor plan.
The colour of the CAD objects and text will complement the theme that you have set on your device. For example, if you are working on a black theme and you create a ‘CAD Object’, that object will also be dark. On the other hand, if you are working on the white theme and create a ‘CAD Object’, the object will be white.
It is important to note that if your environment is set to the white theme and you decide to change your floor plan background to black, the CAD objects will remain white as per your theme.
Should any of the steps above not work for you, please feel free to log a ticket to our IT Support team who is always willing to assist.
