Introduction
This article will guide the user to report on changes between two different floor plans. The Changes Report is used to compare the impact of the changes that were made when optimising a floor plan.
How To Set Up And Interpret The Changes Report
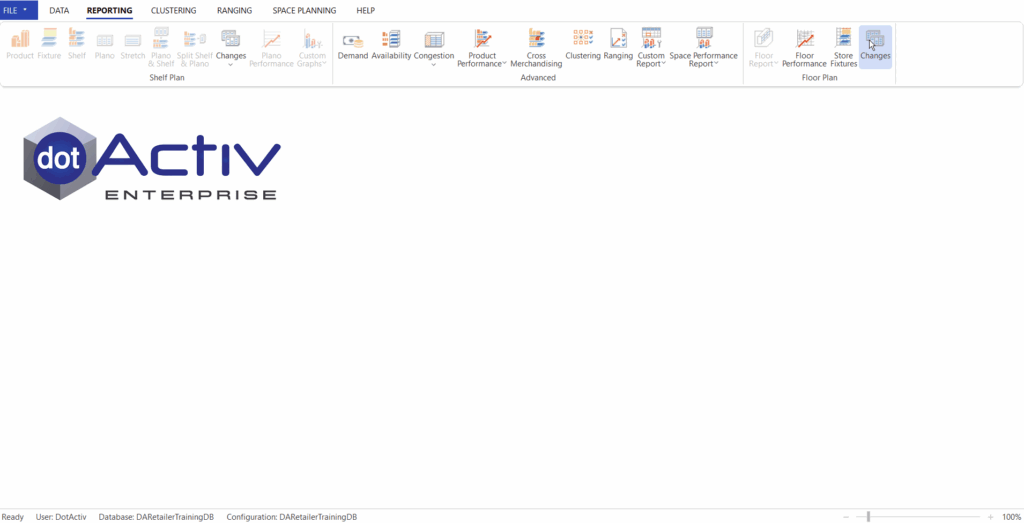
Step 1: The Changes Report is situated under the ‘Reporting’ tab under the ‘Floor Planning’ section.

Step 2: Next, you will need to map your floor plans to the report in order to analyse the changes. Select the directory path to the ‘Proposed’ and ‘Current’ floor plan folders. Keep in mind that the .flp naming conventions of both floor plans need to be exactly the same. For instance, D10L_FLOOR PLAN.

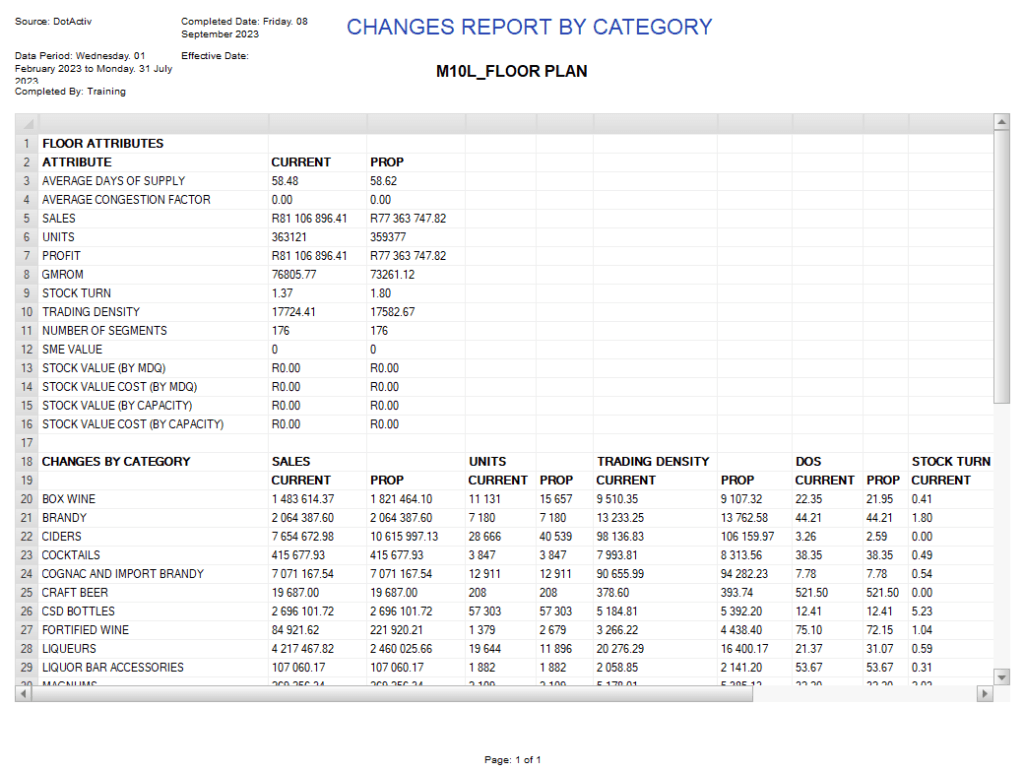
Step 3: Once the report has run, the grid will appear that showcases the changes made between the ‘Current’ and ‘Proposed’ Floor Plans.

The first section, Floor Attributes’ indicates the implicated changes on a ‘floor’ level. For instance, the changes proposed in the floor plan have an impact on the DOS, Sales, Units, Profit, GMROM, Stock Turn and Trading Density.

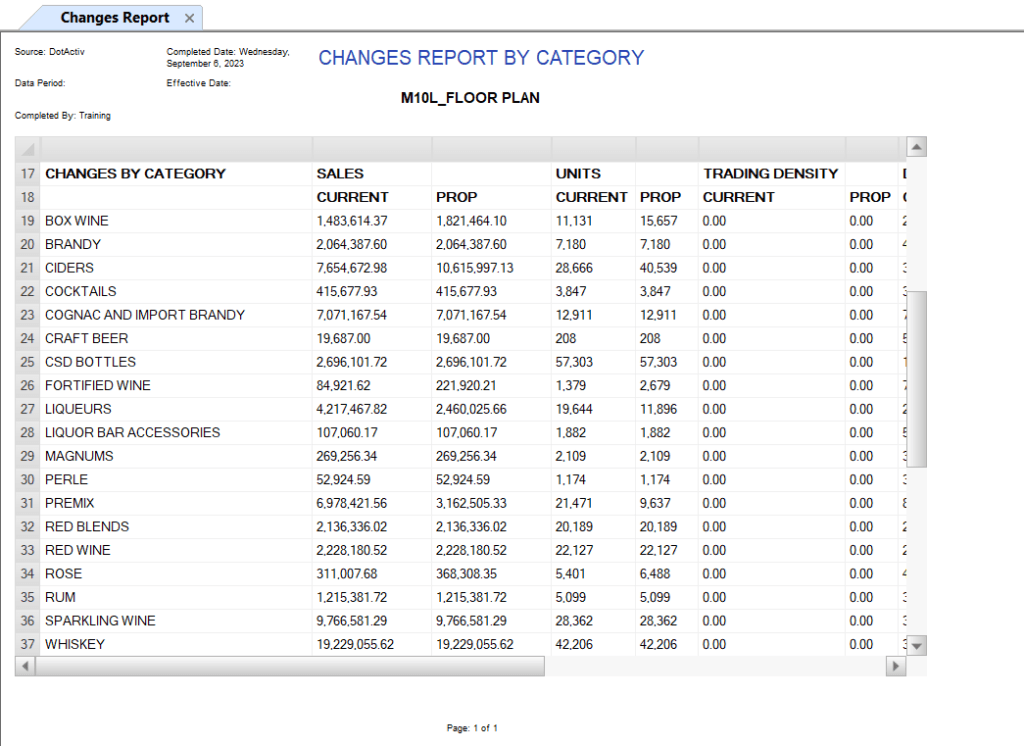
Thereafter, the impact of the changes on a category level is indicated. Fortified Wines (in row 26) has a major proposed Sales and Units increase. Scrolling to the right in the report will allow the user to view more impacted data per category like the DOS, Number of Drops and the Format of the category.

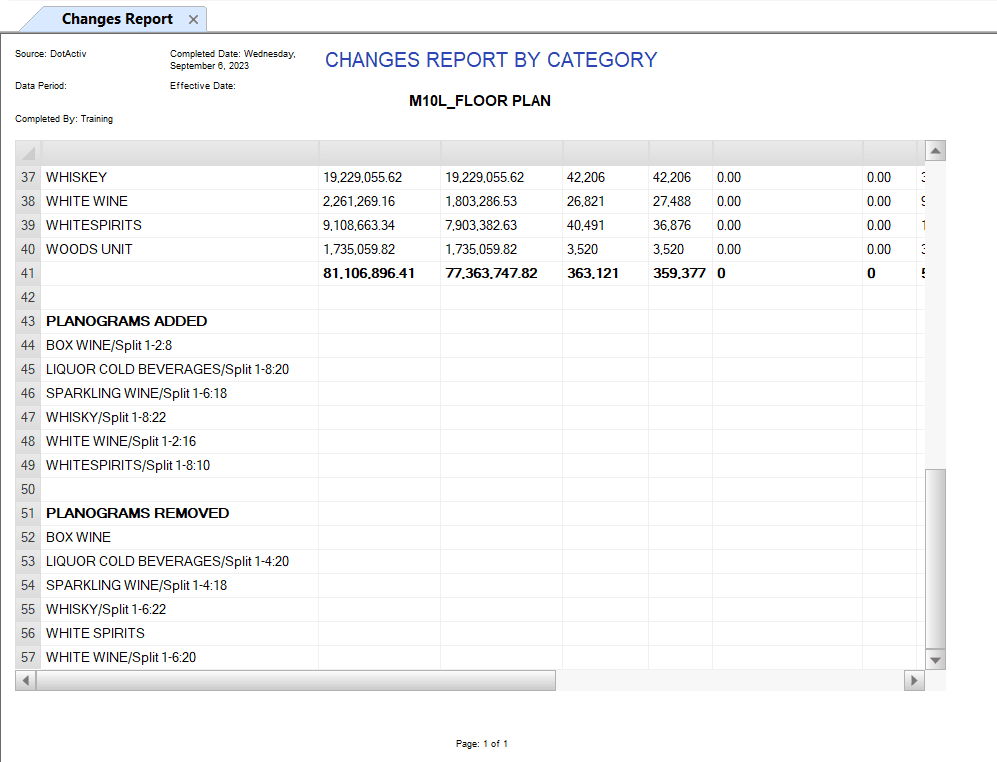
The final section is comprised of the Planograms that are added and removed in the proposed floor plan.
Should this functionality not work as intended, kindly log a task for our Support Team.
