The purpose of this article is to provide you with a step-by-step process on how to set up your administration application settings for DotActiv.
To find the application settings, click on ‘File’, scroll down to ‘Setup’ and from there select ‘Applications’ under the ‘Settings’ section.
1. FLP Format
This setup refers to the planogram format set up i.e. these are the fields that will be shown in and stored within the planogram file.
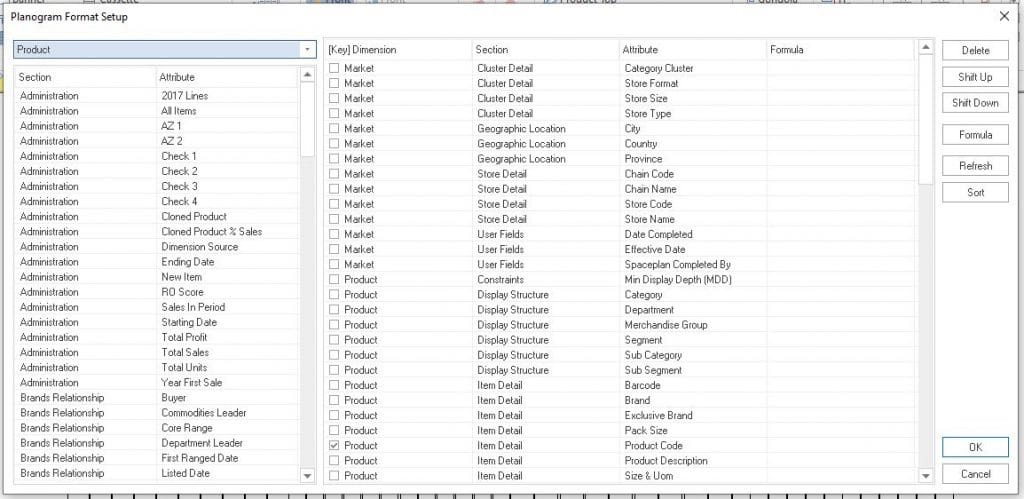
In the product and market dimensions, you will note that the ticked box indicates the key product.

Please note that it is advised that these are not amended but are standard.
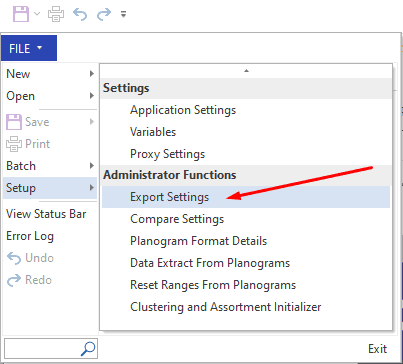
How To Export Your Database FLP Format Settings
If you would like to export your Database FLP format settings, simply go to ‘File’, ‘Setup’ and then click on ‘Export Settings’, as seen below.
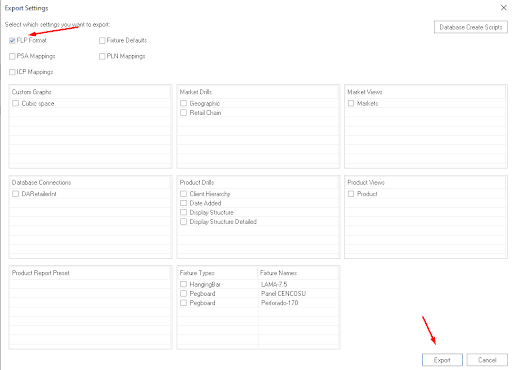
Next, tick the ‘Export FLP’ box found within the ‘Export Settings’ Window, as seen in the image below. Once you have ticked the box, click on ‘Export’.
If you would like to import the FLP format settings to your database, you can simply drag and drop the file into the DotActiv software.
2. Congestion Setup
You will use these conditions and absolutes to define how planogram congestion is calculated.
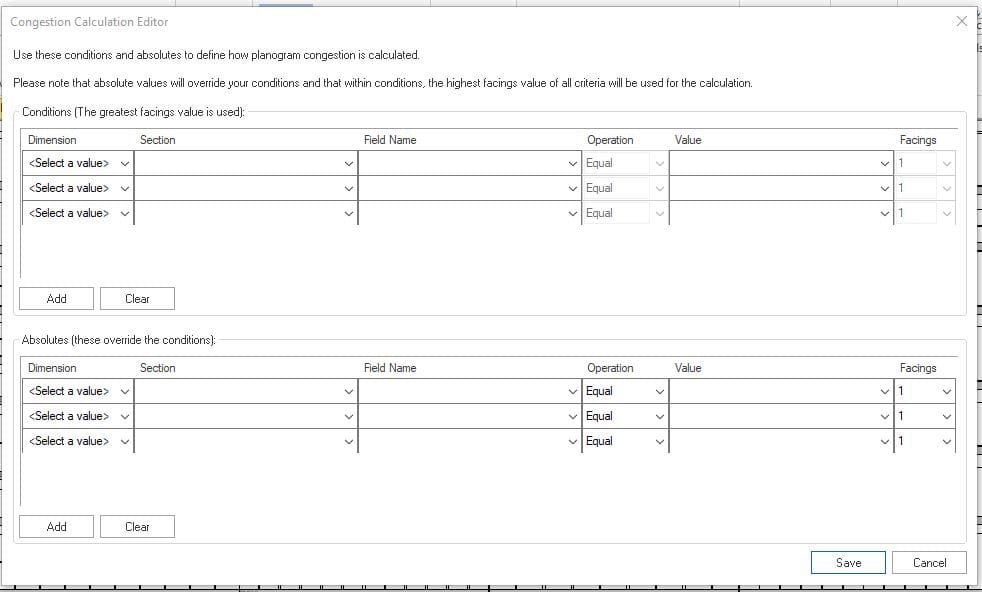
The first selection refers to the conditions i.e. the greatest facings value is used based on these settings.
The section setting refers to the absolutes or values that override the conditions.
3. Autosave Setup
By clicking on the Autosave Setup button, you are able to change the frequency (in minutes) which DotActiv autosaves your work, as well as the maximum amount of autosaves the application is allowed to save per planogram that is open.

Further, you are also able to specify in which folder you want your autosave files to be stored and also tick or untick to have autosave enabled or not.
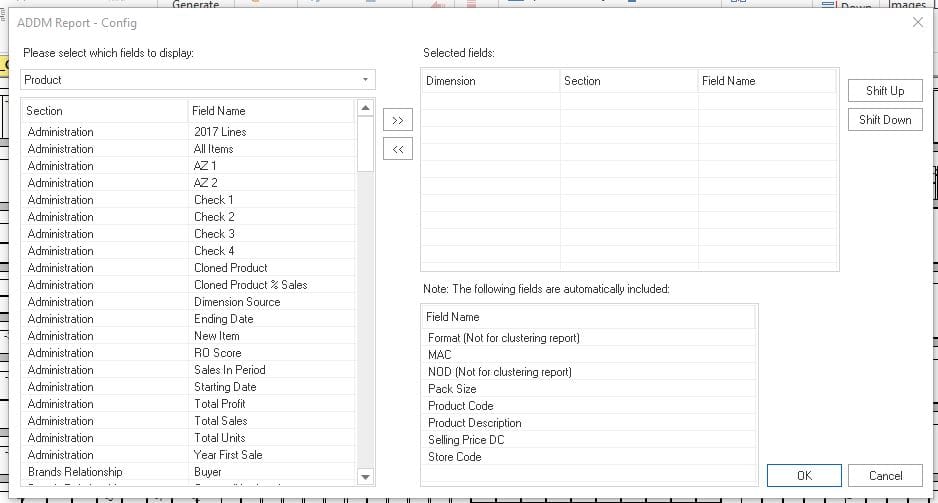
4. ADDM Setup
The ADDM Setup can be used to change the fields that are displayed when creating a Demand Report (ADDM Report).
To change these fields, click on the ‘ADDM Setup’ button to open the ‘ADDM Report – Config’ window. You are now able to select fields on the left side of the window that you wish to be included in the ADDM report (these will then be displayed on the right).
Please note that some fields (as shown in the window) are automatically included in the report and cannot be removed.
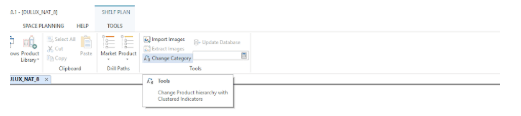
5. Change Category Setup
Products can easily be changed from one category to another with the use of the Change Category function in DotActiv. To do this, click on ‘Change Category’ under the ‘Data’ tab in the ‘Tools’ ribbon.
The Change Category window will now open. Here, you are able to drill down into sub-categories and select specific SKU’s you wish to change from one category to the next. Notice that there are various fields displayed in the window for each SKU.
In this example, the fields displayed are Key Product, Barcode, Description and Size & UOM. This can, however, be changed by using the ‘Change Category Setup’ button under ‘Administration Settings’.

To change these fields, click on the ‘Change Category Setup’ button, which will open the ‘Change Category Setup’ window.
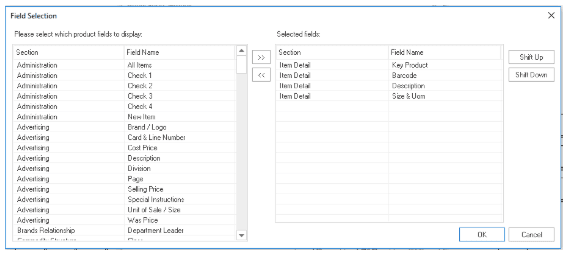
You are now able to select fields from the list on the left and drag them to the right which will be displayed as fields when using the Change Category function.
6. Range Optimizer Setup
When selecting the Range Optimizer Setup, a window pops up with three field display options.
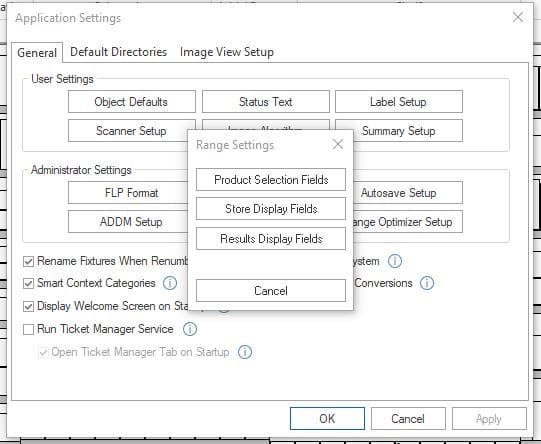
Here you can select to set up the:
- Product Selection fields;
- Store Display fields; and
- Results Display fields.
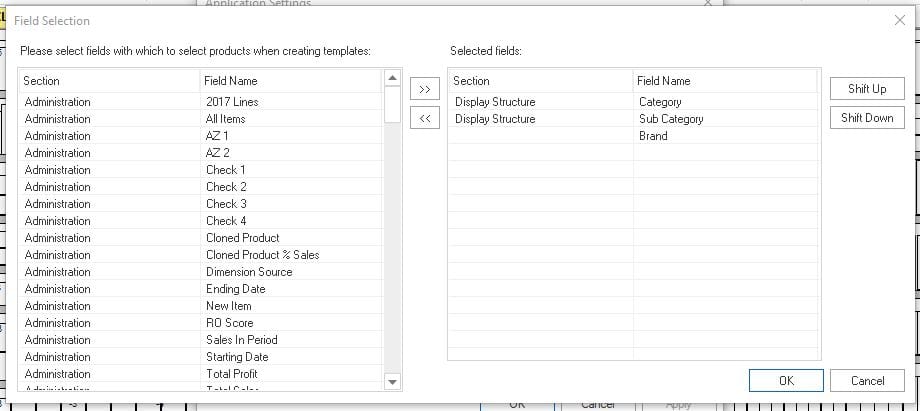
If you select the product selection fields, you can set up the fields with which to select products when creating range optimizer templates.
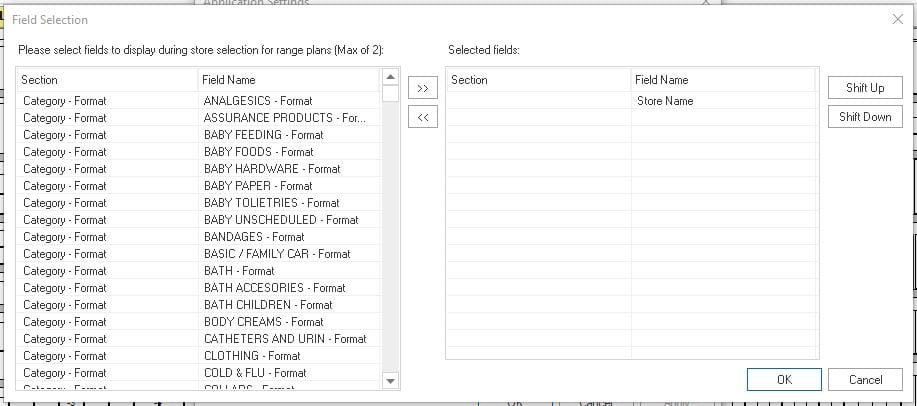
The store display fields allow you to select the fields to display during store selection for range optimizer plans.
Then the results display fields allow you to set up the fields to display in the range optimizer results page.

Should you require further assistance with the above settings, please create a ticket for support.