The purpose of this article is to unpack the various options available to you through the Floor Space Allocation Report found in the DotActiv software.
Finding The Floor Space Allocation Report
Before using the Floor Space Report, you must have a floor plan open. Navigate to the ‘Space Planning’ tab and then from the ‘Floor Planning’ section, select either ‘Open’ or ‘New’.
With your chosen floor plan open, scroll across the ribbon to the ‘View’ section where you can find ‘Floor Space Report’.
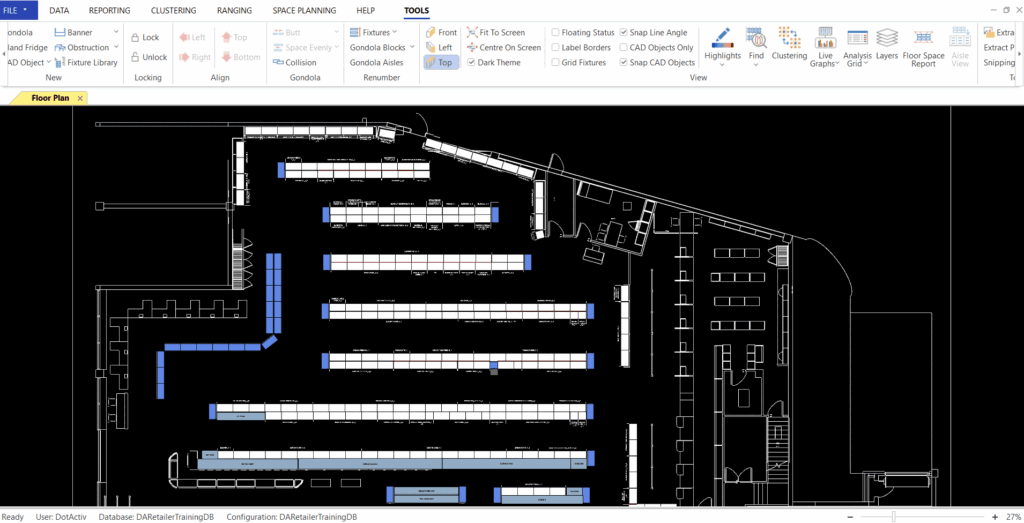
After selecting the report, you will see the following:
Understanding The Floor Space Allocation Report
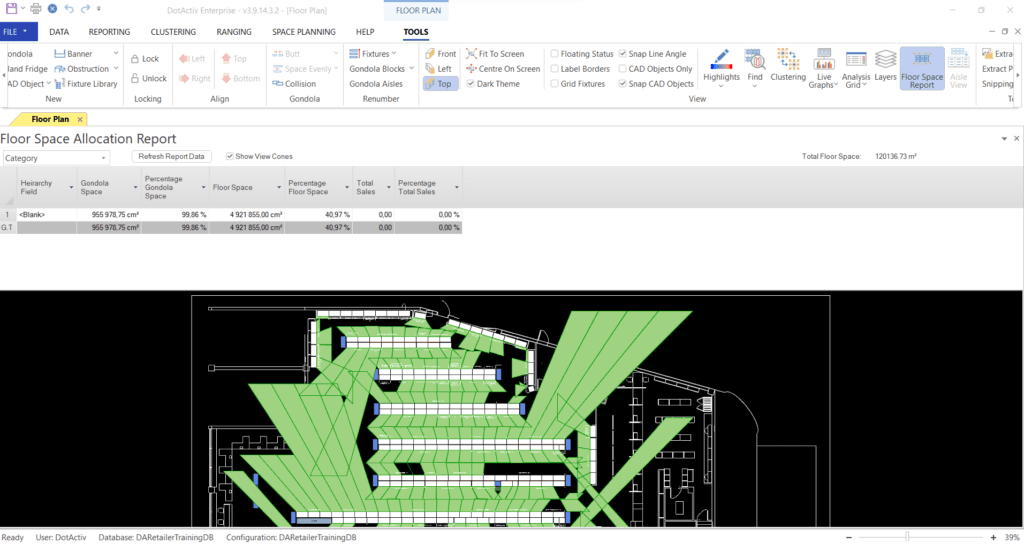
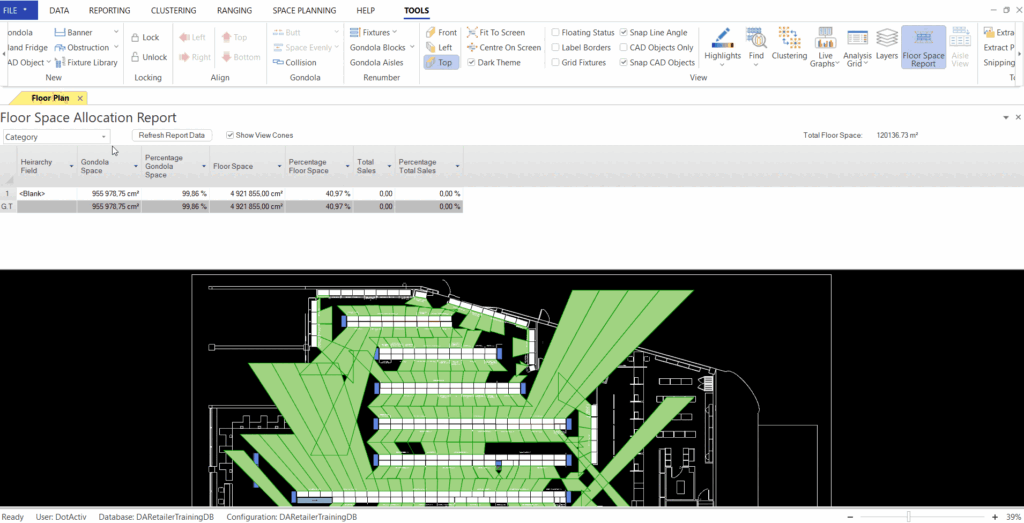
The Floor Space Allocation Report is made up of a few key sections.
Information Grid

The Information Grid at the top of the report offers you all the information generated by the report. At this stage, these fields are not configurable and will always have the same seven fields as described below.
| Field Name | Description |
| Hierarchy Field | This is the field that all the information is calculated on. It is also the field that you have selected from the drop-down list above the grid. In this case, we selected Sub-Category. |
| Gondola Space | This field represents the area occupied by each gondola segment that applies to your chosen Hierarchy Field. |
| Percentage Gondola Space | This field represents the Gondola Space as a percentage of the Total Gondola Space. The total row for this column should always be shown as 100%. |
| Floor Space | This field represents the area of the trading floor area allocated to your chosen Hierarchy Field. It is represented by a green area* shown on your floor plan while the report is open. |
| Percentage Floor Space | This field represents the floor space as a percentage of the total trading area* of your floor plan. |
| Total Sales | This field represents the total sales for your chosen Hierarchy Field. It is calculated by the sales information for each product under the Hierachy Field that is on the shelf of your gondolas. |
| Percentage Total Sales | This field represents the Total Sales as a percentage of the total sales for all product information on all gondolas. |
*The Trading Space or Trading Area refers to the floor space of the store not occupied by any physical object – walls, doors, windows, gondolas, tellers and so on.
In addition to the options specified in the next section, you can select a row in the grid to only show the allocated space for the item selected.
Report Options
Above the Information Grid, you’ll find a few options by which you can filter your report.
From left to right, these options are:
- This is the selectable field used as the Hierarchy Field for all report calculations. The values here differ depending on the FLP format used by your environment. The common values shown in this field include:
- Department;
- Category;
- Sub-Category;
- Merchandise Group; and
- Segment.
- This button regenerates the floor space allocations and then recalculates all values displayed in the information grid.
- This checkbox will toggle whether or not to show the allocated floor space areas on your floor plan.
- This is to indicate the total tradable space of the floor plan. The application will attempt to calculate the trade space of the floor plan using the linked walls as a reference. If the application is unable to determine this, it will calculate the full space of your floor plan.
Floor Plan
On the floor plan, below the information grid and report options, you will see a green area projected outwards from your gondolas. These shapes represent the allocated area of your trade space.
This space is also known as ‘Net Space’ or the ‘Gondola View Cone’.
Net Space / Gondola View Cone Properties
These spaces project outwards from the front of each gondola segment at a 45-degree angle. As seen below, they also wrap around other physical objects on your floor plan.
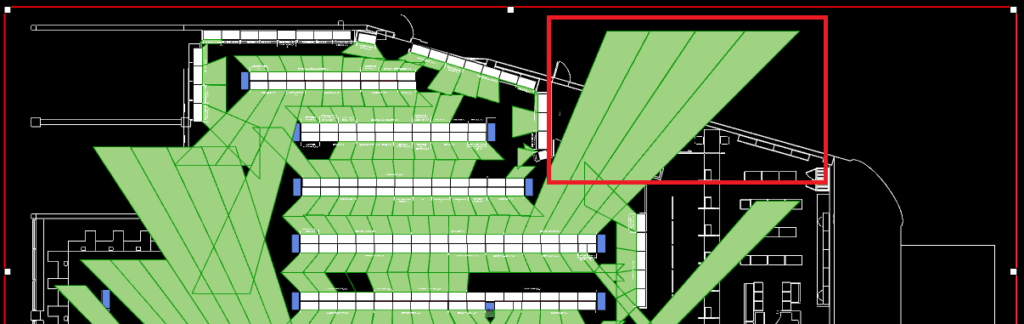
Finally, when they meet another gondola, the shape only projects halfway, thereby meeting the shape of the area from the opposite gondola.

Should the above steps not work for you, please create a support ticket and DotActiv support will assist you in uncovering the issue.