The purpose of this article is to explain how to configure your region settings on your Windows PC in order to set up your laptop to work on the DotActiv software.
Your region settings influence how your date/time, numeric, and currency data types appear when you apply formatting options
Configuring Your Region Settings
First, navigate to ‘Control Panel’. In the window that pops up, find and click on ‘Region’.

In the ‘Region’ window, navigate to the bottom and click on ‘Additional Settings’.

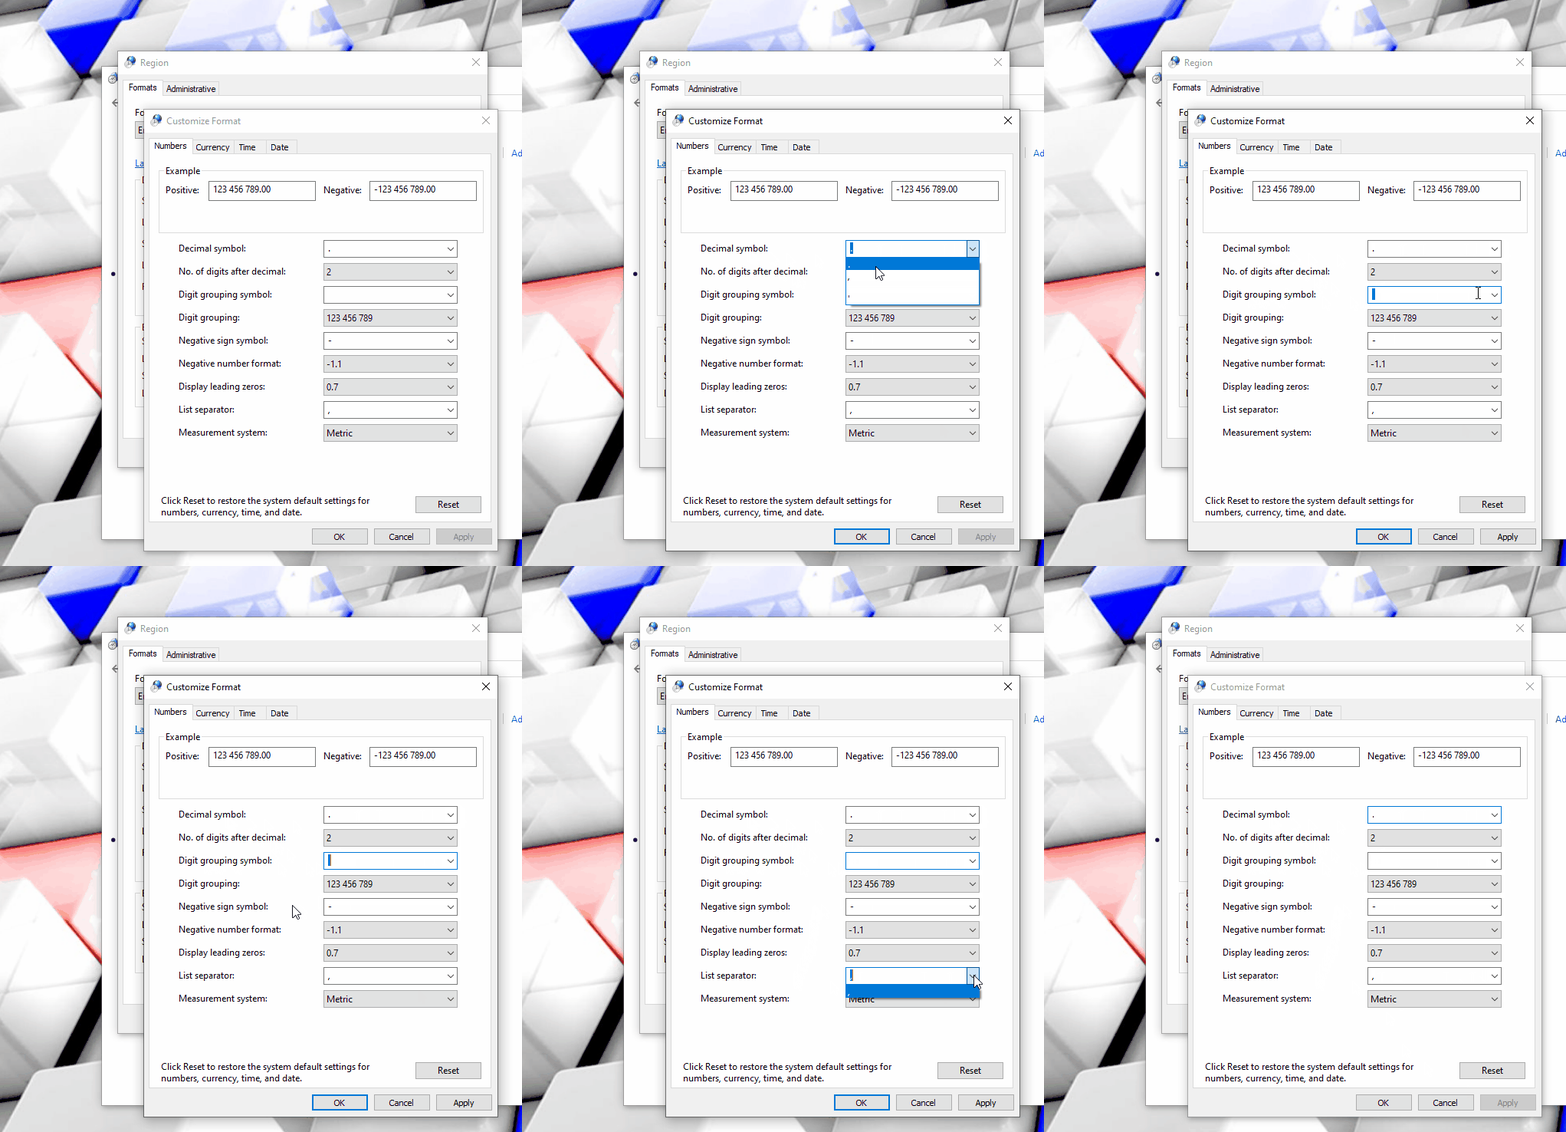
Under the ‘Numbers’ tab in the ‘Customize Format’ window, there are two main areas that you need to make sure are correct.
The first is the ‘Decimal Symbol’. It should be a full stop (.)
The next is the ‘Digit Grouping Symbol’ which should be a space, and then the ‘List Separator’, which needs to be a comma. Click ‘Apply’.

Next up, navigate to the ‘Currency’ tab. Here, the ‘Decimal Symbol’ should also be a full stop (.) and the ‘Digit Grouping Symbol’ must be a space.
You can also change the currency in this window. After selecting the ‘Currency’ tab, ensure that the currency symbol is in line with the region you in or in the currency you would like to work with. In the below GIF, the currency symbol is ‘R’ (South African rand).
Please note that the currency symbol can also be influenced by the location of your client. If we are using DotActiv software with data provided by a European country, we’d change the currency symbol to ‘€’ (Euro).
Next, make sure that the ‘Positive Currency Format’ is set that the currency precedes the actual number with no spaces in between. In addition, the ‘Negative Currency Format’ should be exactly the same as the ‘Positive Currency Format’ with the only difference being that it’s preceded by a minus mark. No spaces or brackets should be used in the two above-mentioned formats.
Once done, click ‘Apply’.

Lastly, you need to go to the ‘Date’ tab.
Look for the section that says ‘Date Formats.’ Here, you will find the Short date and Long date.
In the ‘Short Date Format’ box, choose ‘yyyy/MM/dd’. In the ‘Long Date Format’ box, choose should be ‘dddd, dd MMMM yyyy’.

Once you have completed the configuration above, click ‘Apply’ and ‘OK’.
Should the above steps not work for you, you may contact our support team to assist you in resolving the issue.
