The purpose of this article is to provide you with a step-by-step process to set up your user application settings for DotActiv.
To find the ‘Application Settings’, click on ‘File’, scroll down to ‘Setup’ and from there select ‘Applications’ under the ‘Settings’ section.
Object Defaults
Under ‘User Settings’, the first group of settings is the Object Defaults settings. When clicking on these settings the ‘Object Defaults’ window opens.
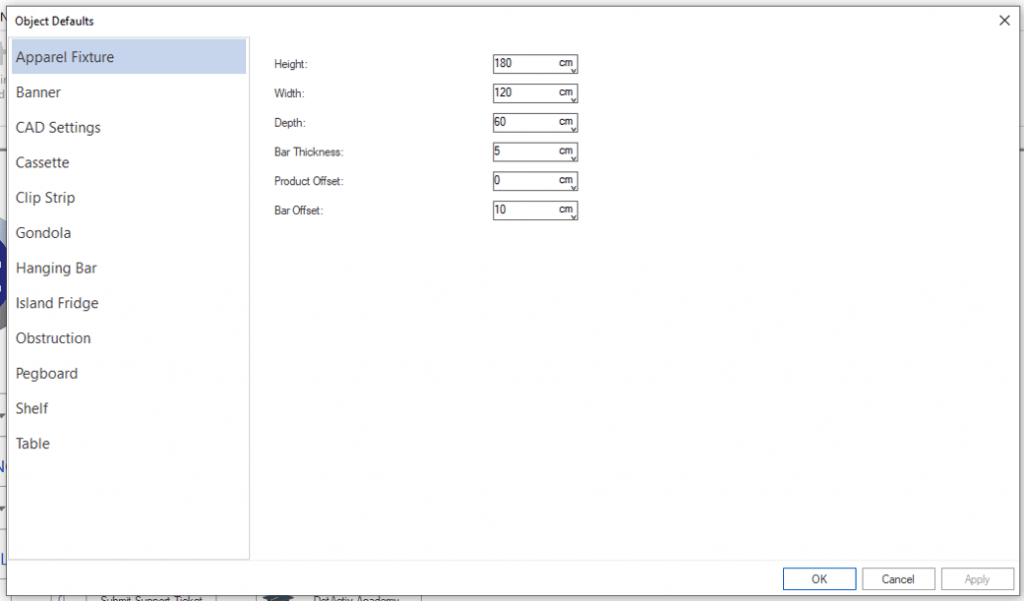
Here, you can change these settings for a variety of objects.
For example, you can set the default Height, Width, Depth, Base Height and NOD for Gondolas. For Apparel Fixtures, besides setting Height, Width and Depth, you can also set default Bar Thickness, Product Offset and Bar Offset. For Cassette fixtures, you can set the Slot Depth, Row and Column Spacing amongst other settings.
We have also updated the design of the Object Defaults window, going for a cleaner and refined look.
Once the settings have been changed, they will be the defaults for your chosen objects.
Aa seen below, if you changed the default NOD’s of a Gondola in the Object Defaults window to be 6, all new gondolas opened will have 6 segments.
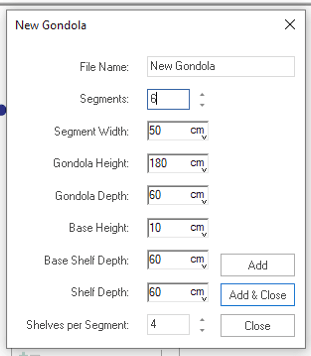
You can, of course, edit this field and others when you first create the Gondola or use any of the other objects in DotActiv software.
Status Text
This setting allows you to set what information displays on your Status Bar and Floating Text.
By clicking on the ‘Status Text’ button, a ‘Select Status’ window appears as seen below.
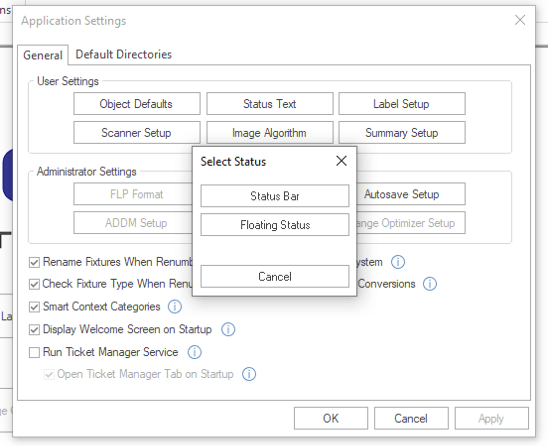
Here, you have the option to select your Status Bar or your Floating Status.
The Status Bar displays your chosen information in the blue ribbon at the bottom of your screen when you scroll over a given product. Meanwhile, the Floating Text displays in a small, white pop-up block when move your cursor over a product on your shelf plan.
When clicking on Status Bar, the ‘Status Bar Setup’ window opens. Here you can select fields on the left side of the window that you want displayed on your Status Bar.
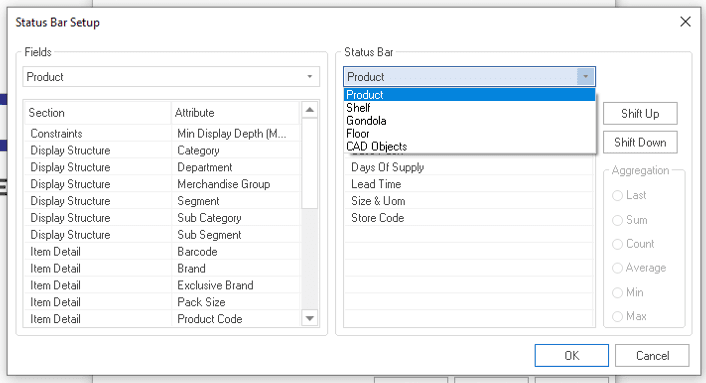
Select a field by double-clicking. Once selected, it will appear in the window on the right.
Under ‘Status Bar’, you can choose what fields you see for each object. If you select ‘Gondola’, you can ensure that when you hover over your gondola, specific fields will display.
For example, if we scroll over a Peanut Butter product on our gondola, you can see below that we have set it so we show the Product Code, Product Description, Days of Supply and Weekly Movement.

If you click on Floating Status, a similar window opens and you are able to add your fields, exactly as you would for your Status Bar.
To apply and save the settings for either your Status Bar or Floating Status, click ‘OK’.
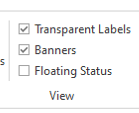
Please note that to view your floating status, you must first check the ‘Floating Status’ box found under the ‘Tools’ tab and in the ‘View’ section.
Once you have checked the box, when you hover your mouse cursor over a product, all the key information will pop up.
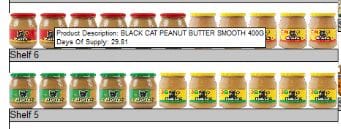
Using the Peanut Butter example again, you can see above the information we have set to show. If you don’t want to see this, untick the box next to Floating Status.
Label Setup
Changing the Label Setup enables you to change what information is displayed on gondolas, products, and floor plans when you turn labels on.
To set your information, click on the ‘Label Setup’ button to open the ‘Label Setup’ window.
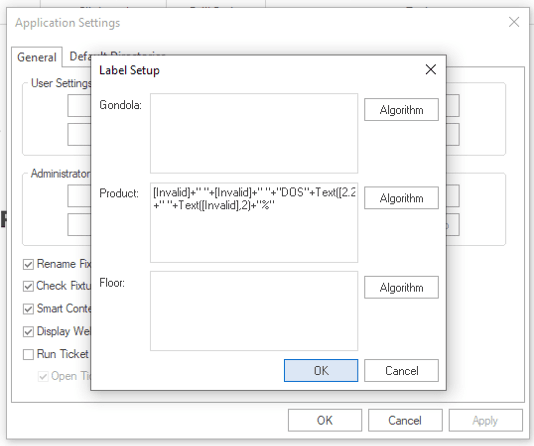
To change the Label, click on the Algorithm box. Now, drill down into either Market, Product, Fact or Period and choose the attribute you want displayed on your product label.
Once selected, click ‘OK’.
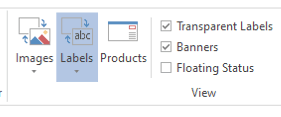
When you open your planogram and turn images off, and labels on, you can see the product information.
You can have your images turned on when viewing your product labels. Just note that you must have the checkbox next to ‘Transparent Labels’ unticked to see the product labels clearly.
With your product labels on, the information you selected in the Label Setup window will appear across your products.
Scanner Setup
The Scanner Setup function allows you to the setup your handheld scanners.
After clicking the Scanner Setup button, the ‘Scanner Settings’ window appears, as seen below.
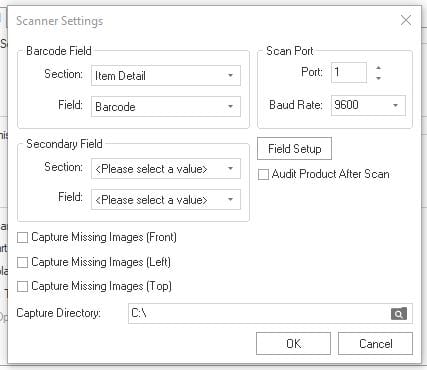
The Barcode Field setting refers to the section and field that the handheld scanner is scanning to. Ideally, you could set this to Item Detail and the field Barcode. This may differ where the key product is not Barcode. The secondary field refers to the section and field to be populated as an alternative to the barcode field.
The Scan Port is automatically updated when inserting the handheld scanner.
You can also select to capture missing images with a webcam if desired and indicate the directory to which they must be saved.
Image Algorithm
The Image Algorithm setting is where you can change the algorithm or path that DotActiv will use to locate your product image files on your computer or network.
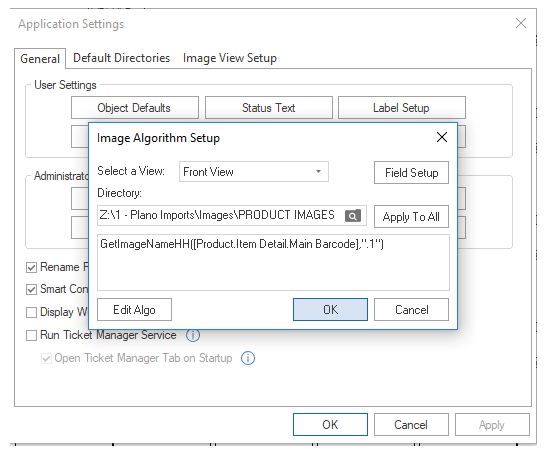
To amend, click on the ‘Image Algorithm’ button to open the ‘Image Algorithm Setup’ window.
Firstly, select which of the three product views you want to edit: Front, Side or Top.
Under ‘Directory’, click on the folder icon to select the directory on your computer where the product images are saved. You now have the option to apply this algorithm to all i.e. DotActiv will use the same algorithm for Front, Side, and Top images.
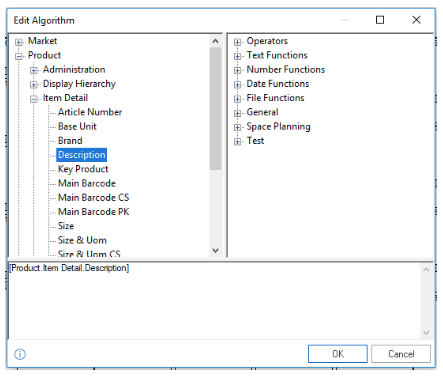
You are able to also edit the algorithm and select the correct value to map to. Click on Edit Algo. The following window opens:
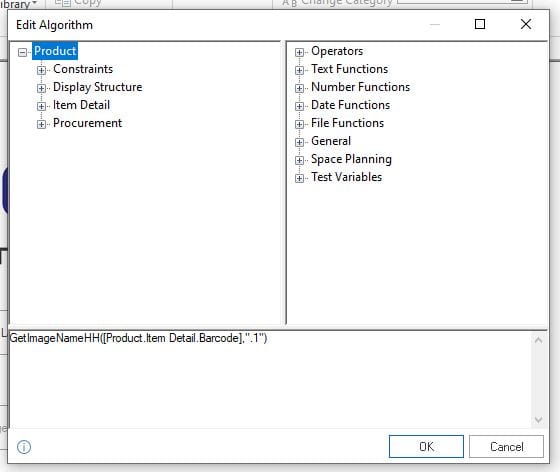
You can select product algorithm details from the window on the left and other functions on the right. Select by double-clicking. Here you can see the basic algorithm to use.

Once complete, click ‘OK’ and ‘OK’ again.
Summary Setup
The fields set up on the dialog are used when you use the pack to the target function.
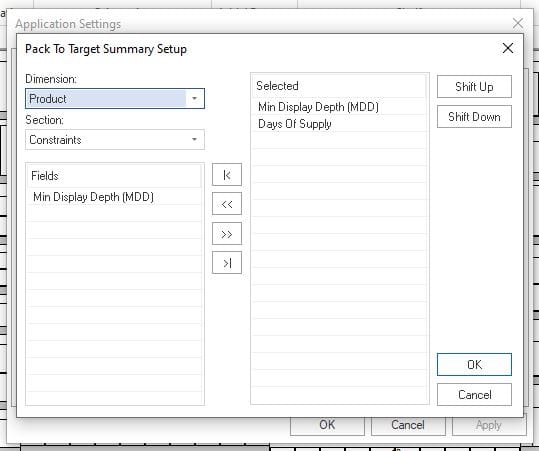
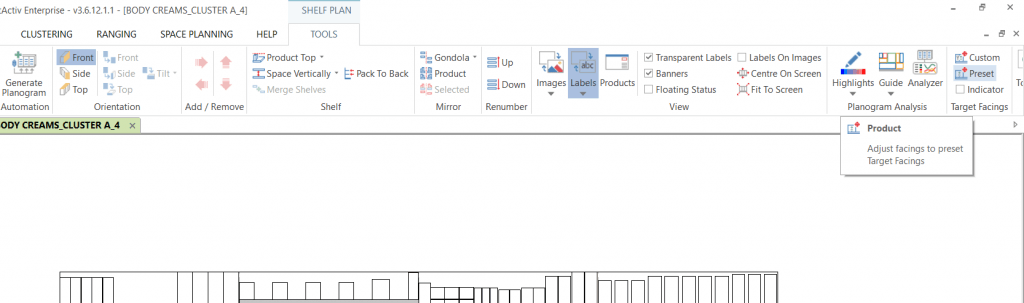
These summary fields selected will show once you have set the target value of specific fields and the facings for each product on the specified planogram in the target facings section found on the shelf plan tools tab seen below.
Should you require further assistance with the above settings, please create a ticket for support.