The purpose of this article is to provide you with a step-by-step process for viewing and editing category clusters on a floor plan in DotActiv software.
Viewing Category Clusters
With your floor plan open, ensure you are in the ‘Tools’ tab. Next, find the ‘Clustering’ icon in the ‘View’ section and click on it.
Please note that the floor plan requires a store code for it to link to any data in the database.
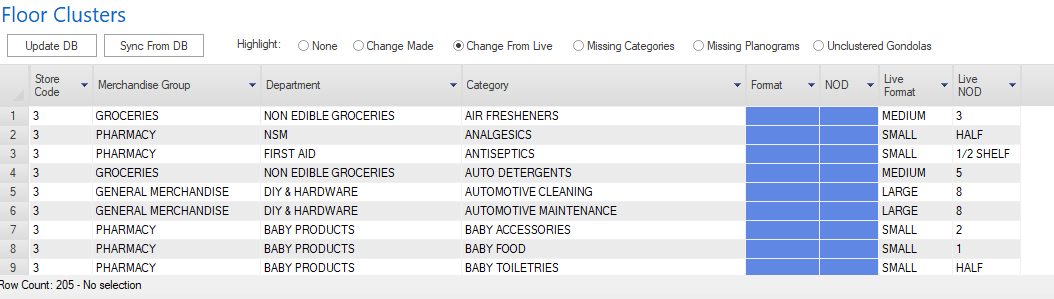
A dockable window appears above your floor plan, as seen above with various fields.
Editing Category Clusters
- Update DB: Clicking this button will make changes to your database. You will do this after making any changes.
- Sync From DB: Clicking this button will bring in all of your planograms linked to the store as per the database. You can use this button to refresh your clusters if you want to disregard any changes.
Highlights
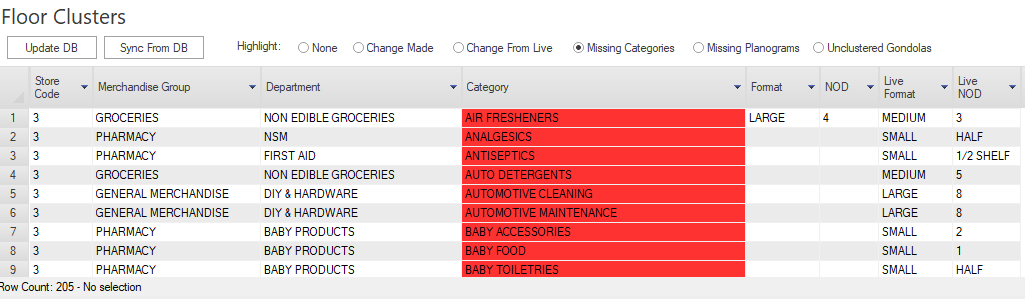
The following highlight options are available. The example below used ‘Missing Categories’.
- None: Select this to remove any highlights.
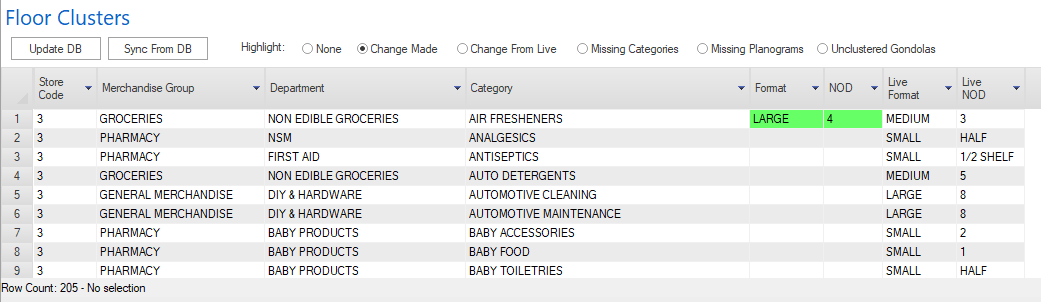
- Change Made: This shows you any changes you’ve made to your clusters. It reflects as green.
- Changes From Live: This shows you the difference compared to your database.
- Missing Categories: This highlights which categories have planograms missing.
- Missing Planograms: This highlights what clusters have no planograms attached.
- Unclustered Gondolas: This highlight will display all unclustered gondolas.