The purpose of this article is to provide you with a clear step-by-step process on how to update one or more fields to specific values in one or more planograms for a filtered selection of products.
Batch Replacing Products
Step 1: With DotActiv open, click on ‘File’ and scroll down to ‘Batch’ then navigate to ‘Replace Products’ and click on it. This opens up the ‘Batch Replace Values’ window

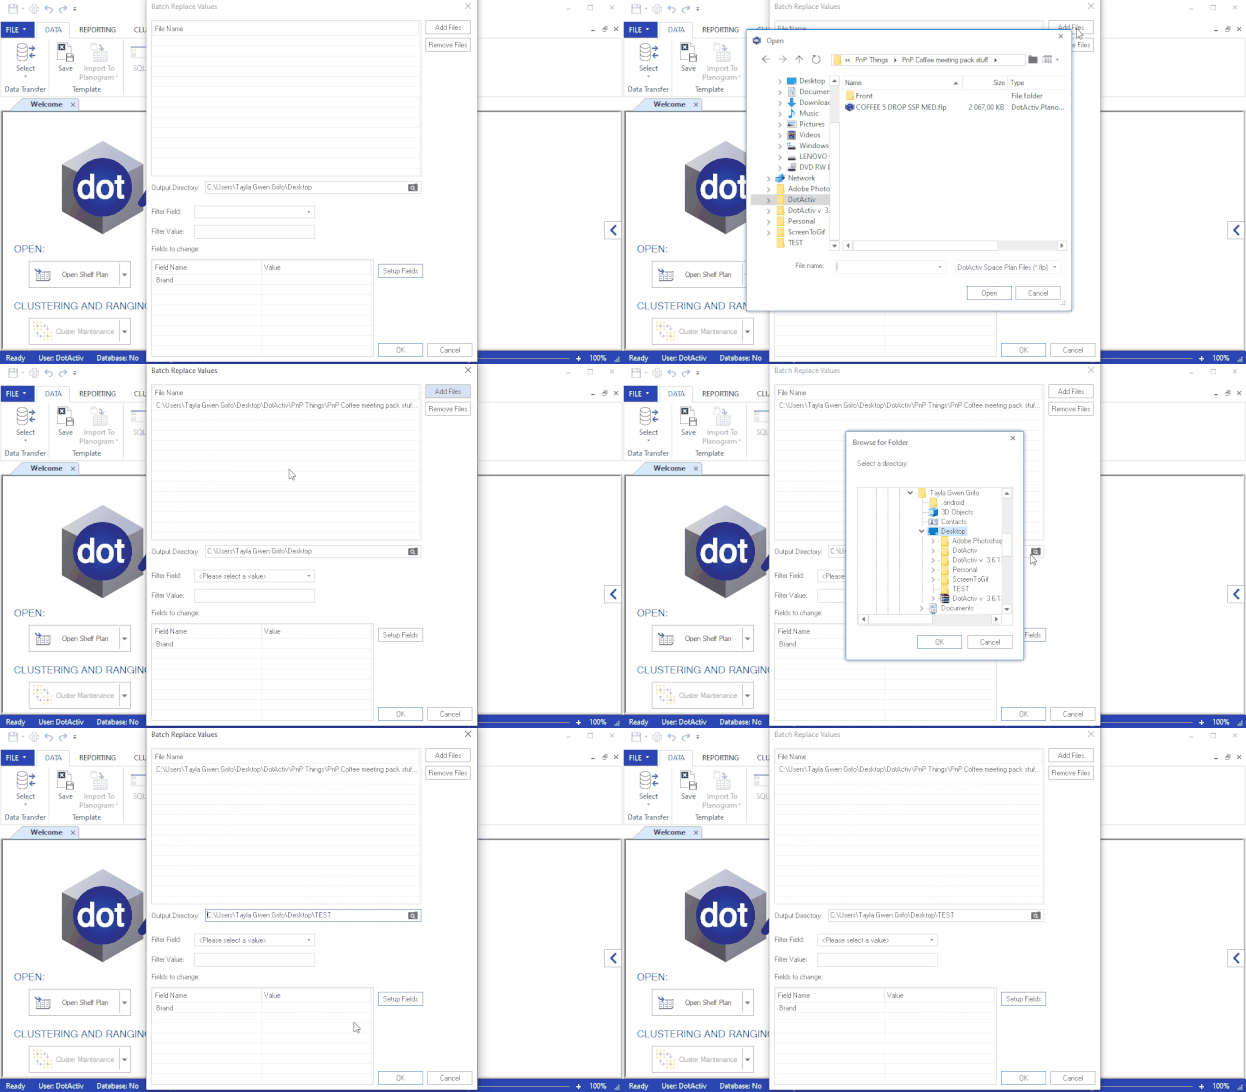
Step 2: Under ‘File Name’, click the button on the right named ‘Add Files’ and navigate to the planogram/s you would like to update. Then click ‘Open’.
Step 3: Next, select ‘Output Directory’ and navigate to where you would like to save the updated planograms.

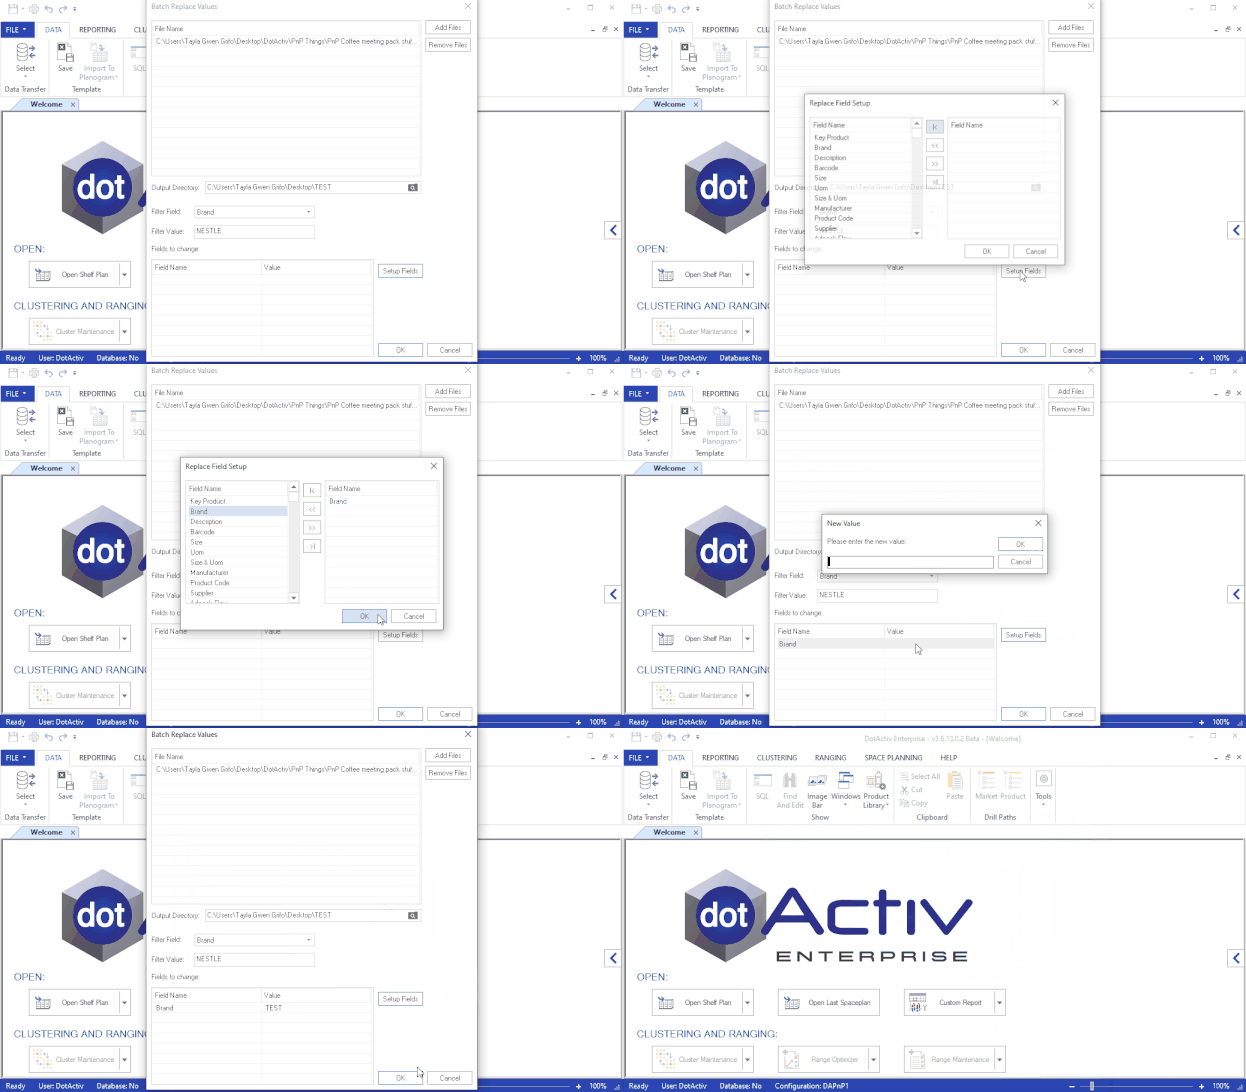
Step 4: In the next field called ‘Filter Field’, click on the drop down arrow and select the field you would like to change. For example, ‘Brand’. Thereafter, in the text box called ‘Filter Value’, input the value used to identify the products you want to upload. For example, ‘Brand Name’.
Step 5: In the last field, ‘Fields To Change’, click on the ‘Setup Fields’ button on the right to bring up the window fields. Select the fields relating to what you want changed and click ‘OK’.

Step 6: You will now see what you have selected in the main window under ‘Field Name’. Next to the selection under ‘Value’, double-click to input what you would like to change the value to. Once completed, click on ‘OK’ and then ‘Yes’ to complete the replacement.

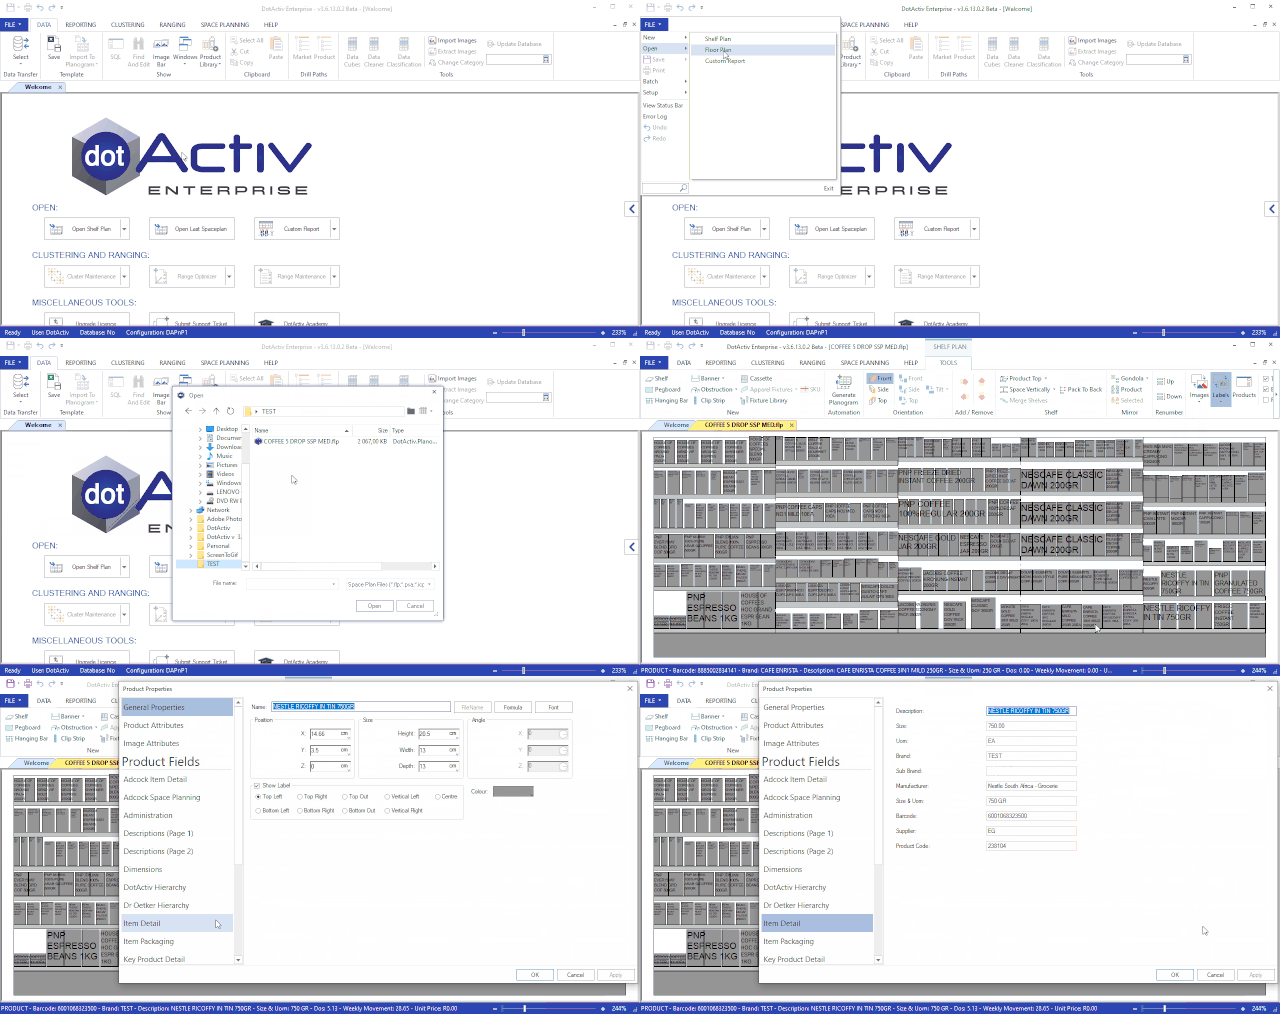
Step 7: Once the replacement is complete, navigate to the output directory selected in Step 3 and open up the planogram/s and you will see that all the products containing the filter value chosen in Step 4 have had the chosen fields updated to the specified values..

Batch replacing products in DotActiv is simple and convenient. Should the above steps not work for you, please create a support ticket and DotActiv support will assist you in uncovering the issue.
