The purpose of this article is to explain how you can create and add a cassette fixture to a gondola in DotActiv software. We also explain how you can add products to a cassette.
Adding Cassettes
A cassette is a type of fixture that you can add to a gondola or planogram. It is usually used for beauty products such as makeup items.
Before adding a cassette, you must first have a gondola or planogram open.
Read this in-depth article to learn how to create a new gondola.
Once you have created your new gondola, ensure you are in the ‘Tools’ tab. Next, find the ‘Cassettes’ icon in the ‘New’ section and click on it. You can add a cassette by left-clicking on your shelf.
To view, add and edit the attributes of the cassette, double-click it.
Doing so brings up the ‘Cassette Properties’ window as seen in the GIF below. You can also right-click the cassette and select ‘Properties’ from the context menu that pops up.
Adding Different Levels To A Cassette
In the ‘Cassette Properties’ window, click on ‘Cassette Attributes’ on the left-hand side to open the ‘Cassette Level’ window.
You can add different levels, edit them or remove them. You can also sort any created levels by moving them up and down.
To add a new level, click on ‘Add’ on the right-hand side. To edit an existing level, double-click on it to open the ‘Cassette Level’ window. Please note that they do not need to be the same.


Here, you can set the dimensions (Height, Width and Depth) of the cassette, ‘Slot Depth’ and ‘Orientation’ of the cassette.
Slot Depth
Slot Depth is the distance from the highest point of the cassette. It determines how deep the SKU will sit within the Cassette. For example, if you want to add makeup to the cassette, then we’d recommend 1 cm as this ensures the SKU sit deep enough and will not fall out/over. If, on the other hand you are merchandising chocolates on a flat surface, the slot depth could be 0 cm (it will show as a stand rather than a slot).
Please note if the slot depth is shallow enough, you can move the Cassette around without selecting the SKU itself.


In the ‘Orientation’ field, you have two options:
- Front Facing; or
- Top Facing
The front-facing can be described as seeing the product inserted from the front, such as adding foundation to a parts feeder or alcohol to a gravity feeder. Top-facing, on the other hand, can be seen as adding products from the top, such as with lipstick organisers, or watches to a watch box.

Top Facing (looking top down)
Height: how high the Cassette is and how many slots you need vertically. You need to use the Depth of the SKUs × the number of SKUS that will be placed from top to bottom

Width: How wide the cassette is and how many slots you need horizontally

Depth: How deep the SKU will go into the slot

Front Facing (looking at the cassette at eye-level)
Height: The distance between the base/previous level and the next level.

Width: The total width of the cassette with all slots included

Below that, you will have the option to set the row spacings of the cassette and the column spacings. These are called slots, which are dividers into which you will place your products.
The Row Spacing should be taken literally, the distance (front to back) of a slot. This can also be taken as the depth of the product. If your cassette depth is 10 cm and your row spacing is 5 cm, that means that you can fit two products behind one another.

Column Spacing is the distance between each row (left to right) of a slot. This can also be taken as the width of the product. If your cassette width is 30 cm and your column spacing is 10 cm, then you will have 3 columns with three products next to each other.

By clicking on the spacing, you can navigate to the little block at the bottom to edit it and click ‘Set’. You can also add different spacing by inserting your dimensions and then clicking ‘Add’.
Adding Products From Front View
You can add products onto a cassette by dragging and dropping a product from a shelf onto a cassette.
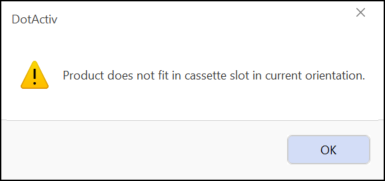
If the below warning appears, please ensure that the dimensions of the product are the same size as that of your cassette so that it adds correctly.
Adding Products From Top View
To add products onto a cassette from a top view, first, click on the cassette and then in the ‘Orientation’ section, select ‘Top’.
As seen above, you can now add your products from a top view.
Next, switch back to front view to see the products displayed on your cassette.
Should the above steps not work for you, please create a support ticket and DotActiv support will assist you in uncovering the issue.