This article will provide you with a step-by-step process on how to format and import product images for the DotActiv software.
Formatting Product Images
Please note that if you would like to update your current images with new images, you can follow the same steps unpacked in the process below.
Before you can import your images into the DotActiv software, they first need to be in the correct format.
Firstly they should be in their raw cropped format.
As per the example below, the naming convention should consist of the Barcode only.

Next, you need to create three separate folders for your images on your desktop.
- Front Images,
- Side Images, and
- Top Images.
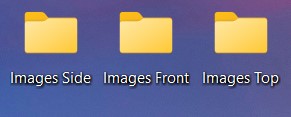
Please note that separate folders should be created for tray images if/where applicable.
You need to save your images in their corresponding folders i.e. front images in the images front folder, side images in the images side folder, and top images in the images top folder.
Importing Product Images
Open the DotActiv software and navigate to the ‘Data’ tab. Once there, scroll to Import Images and click on it. This allows you to import images into the DotActiv Image Directory.
Clicking on it opens the ‘Import Images’ window as seen below:
Firstly, select your ‘Source Directory’.
Here, you will go ahead and locate the folder containing your images.
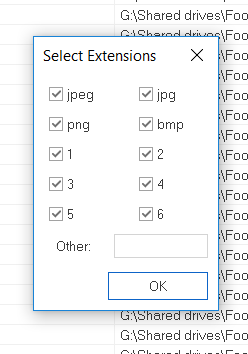
Next, click on ‘Extensions’.
Here, you can select the existing file extension of the image files. If you select all, it will detect all options. If you select only .jpeg, the DotActiv software will only search for the jpeg file extensions within the folder.
Now, from the ‘Select Image Type’ drop-down menu, select the image type that you are importing.
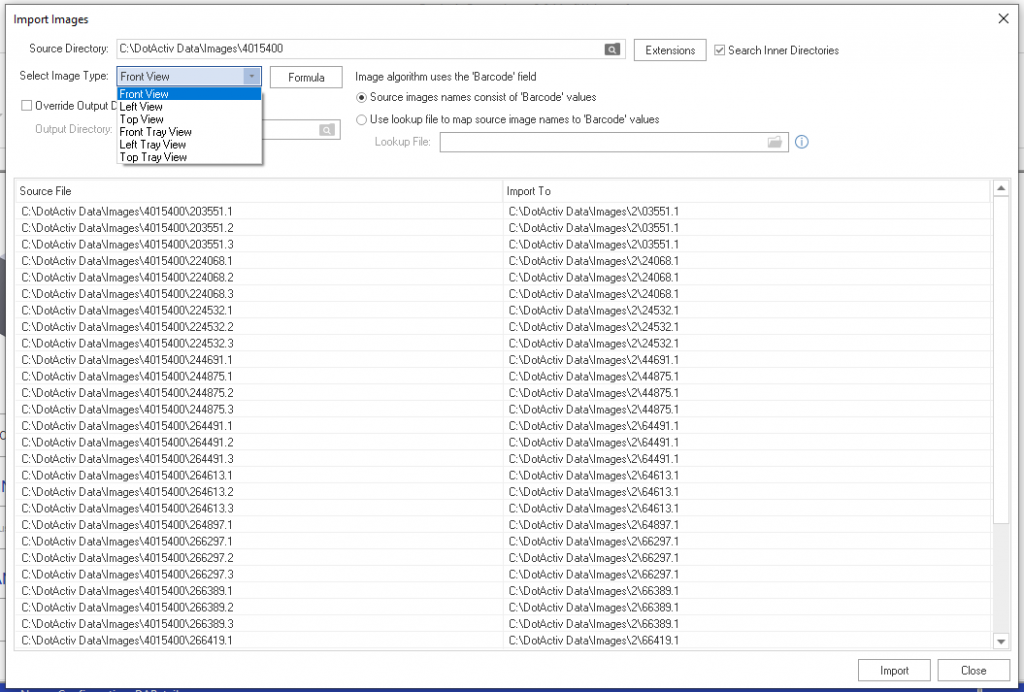
Below is a list of descriptors of how the DotActiv software reads each of the different image types.
- .1 = Front View
- .2 = Side/Left View
- .3 = Top View
- .4 = Tray Front View
- .5 = Tray Side/Left View
- .6 = Tray Top View
Please note that you do not have to format the images to include ‘.1’ as this will not import. The correct format will be ‘barcode.png’ as earlier in this article.
The software will automatically format it to include the list of descriptors above. That means that when you import an image named ‘barcode.png’, and you have selected the image type as front image, the software will automatically format it to ‘barcode.1’. Another example would be if you import an image named ‘barcode.png’, and you have selected the image type as side/ left image, the software will automatically format it to ‘barcode.2’.
Setting Up The Image Algorithm
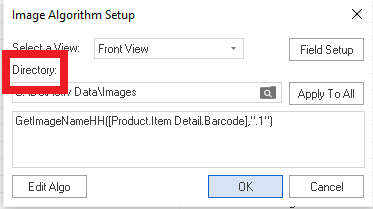
Click on the ‘Formula’ button. This opens the ‘Image Algorithm Setup’ window.
Firstly, select a view. This will ensure that you mapped your selected image orientation to the correct algorithm.

If you selected Front View above, ensure that you select Front View again here. The directory shows where the images will be saved once you have imported them.

You can also search for the location and click on ‘Apply to All’ and apply the location to all image orientations.

In the window below, you can see and confirm the image algorithm.
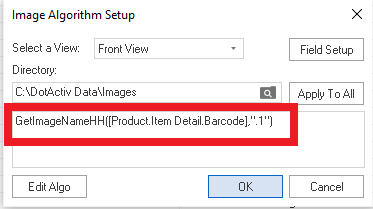
You also have the option of editing the algorithm by clicking on ‘Edit Algo’. Doing so opens the ‘Edit Algorithm’ window where you can select the correct value to which you want to map.
Click ‘OK’ to confirm.
Please note that for images that are not in subsequent folders, or have the full Barcode/ Product ID as the image name, the following should be used:
[Product.Item Detail.Barcode]+”.1″
.1 can be replaced with .jpeg .png .jpg etc.
Confirm The Lookup
Next, we have to confirm the lookup.
Firstly, confirm how the DotActiv software can identify the image. If the image consists of a barcode select the top box as indicated below.

You can also search for files containing barcodes by selecting the second box.
The ‘Import Images’ window allows you to review the current source file name; where your images are currently stored (in Red below) and where they will end up after you import them (in Green below).

Once you are happy with all your selections, you can go ahead and click on ‘Import.

A window will open confirming the number of images that you imported.
Please remember to go back and repeat the same steps for your Side and Top Images as well as the Tray images if applicable.
There are two additional ways in which you can upload images to your planogram:
- Drag and drop images from a file onto the product in the DotActiv software, or
- Bulk import images.
These methods are great if you only wish to add a few missing images to your planogram or if you have multiple images that you wish to import at once. Learn how to import images using these methods in this article linked here.
Why Are My Images Not Importing?
When working with your images, it’s necessary to have your ‘Images’ function switched on. You can find it in the ‘View’ section when in the ‘Tools’ tab.

If your images are not importing, there are a few things that you can check.
- Check the ‘Image Algorithm’, as seen above;
- Check the image format, as shown above (all extensions should be selected as the DotActiv software will only search for those selected);
- Make sure your images are in the folder you selected.
If you are sure that all of the above is correct and your images are still not showing, your barcodes may be corrupted. Please note, this is only if you are working on a database.
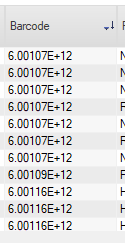
Corrupted barcodes might look like the above. Alternatively, they can also be a series of zeroes – for example 6001000000. In this case, the images you import won’t link to the correct barcode.
If you’re working on a database, the barcodes must be fixed in the original dataset you imported into the DotActiv software.
Alternatively, if there is only one or two images not showing, you can follow the steps listed in this article here.
Should the above steps not work for you, please create a support ticket for the DotActiv support team who will assist you in uncovering the issue.
