Strategic planning in the DotActiv software refers to category roles, strategies, tactics, and KPIs. This information can be added to custom reports via the table object.
Category roles, strategies, and tactics are integral components of category management, each serving specific purposes in optimizing the performance and profitability of product categories within a retail environment.
Key Performance Indicators (KPIs) are metrics used to measure the performance and success of various aspects related to product categories within a retail environment.
Adding Category Roles, Strategies, And Tactics
Please note, before adding strategic information to a table, it is important to know how to add a table in a custom report.
To add category roles, strategies, and tactics to a table you first need to add placeholders to your table cells.
Right click on the relevant cell and click ‘Edit’. The ‘Edit Cell’ window will appear. Click on the ‘Data Placeholder’ drop-down to select a placeholder from the following options:
- Category Description
- Category Role
- Strategy
- Strategy Description
- Strategy Tactic
Click ‘OK’. Your selection should appear in the relevant cell between square brackets.
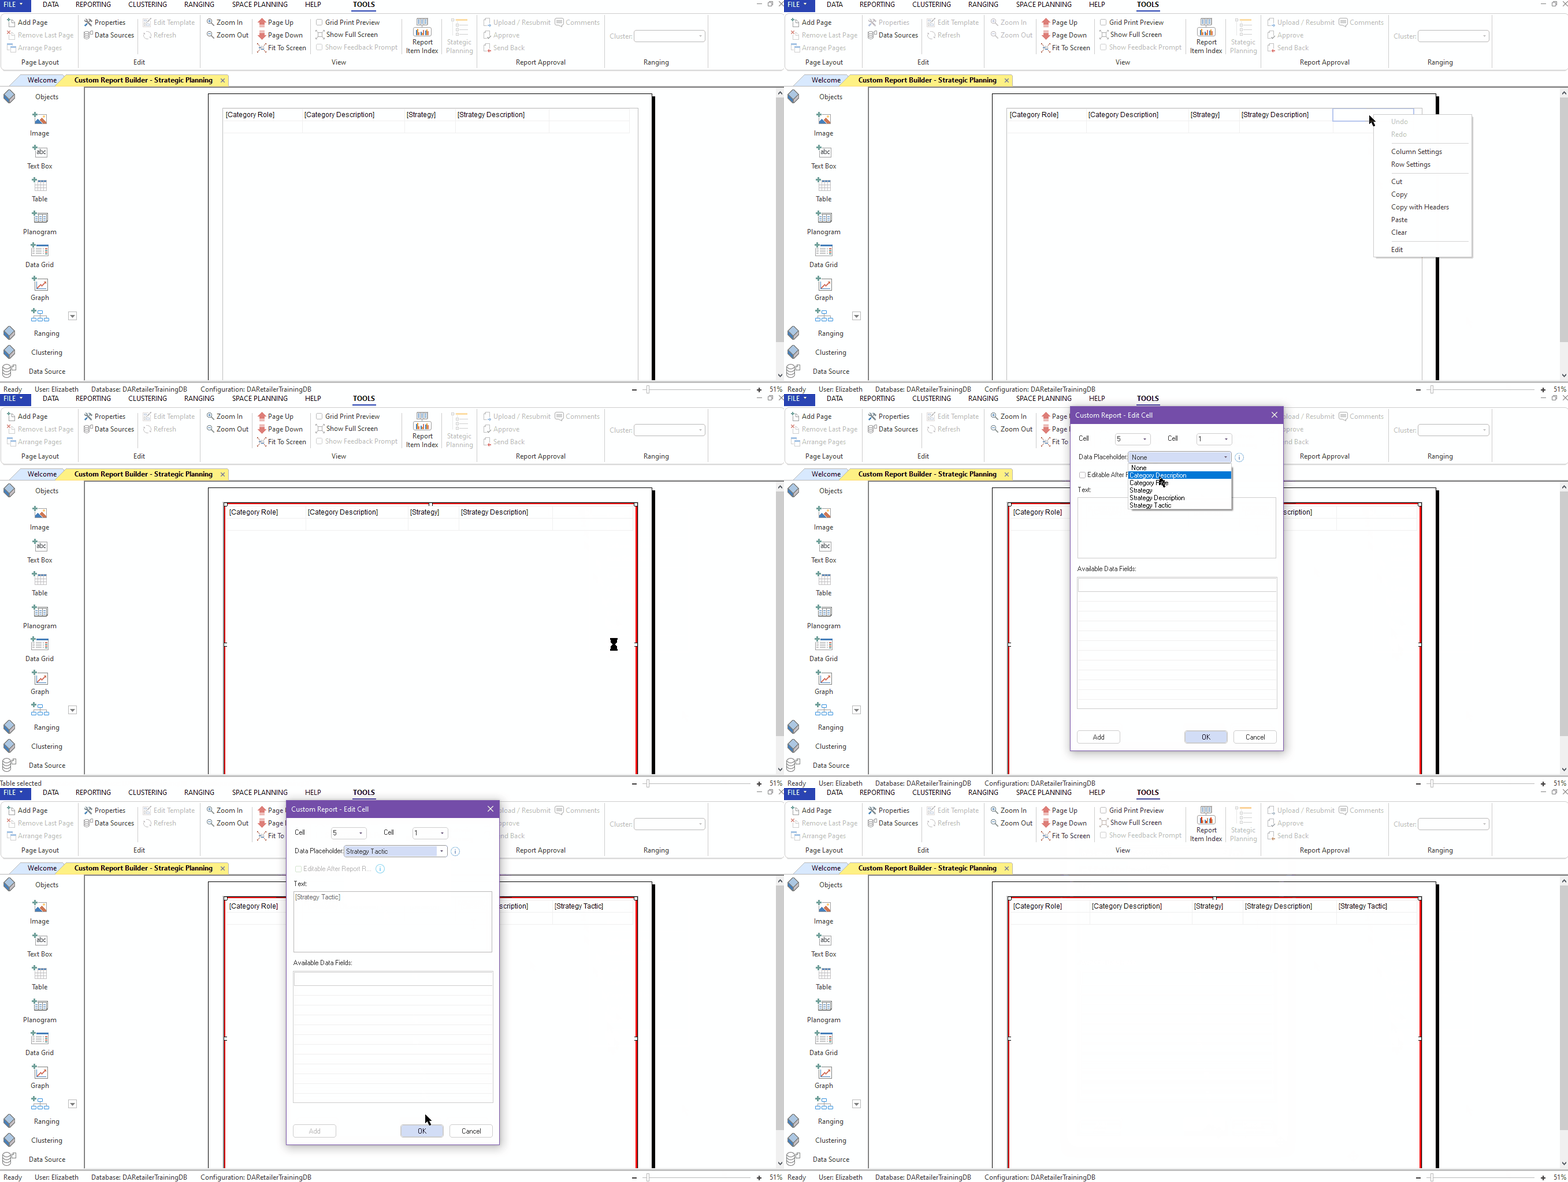
Repeat this until you have selected the placeholders of your choice.
Then, save and run your report otherwise you won’t be able to continue.
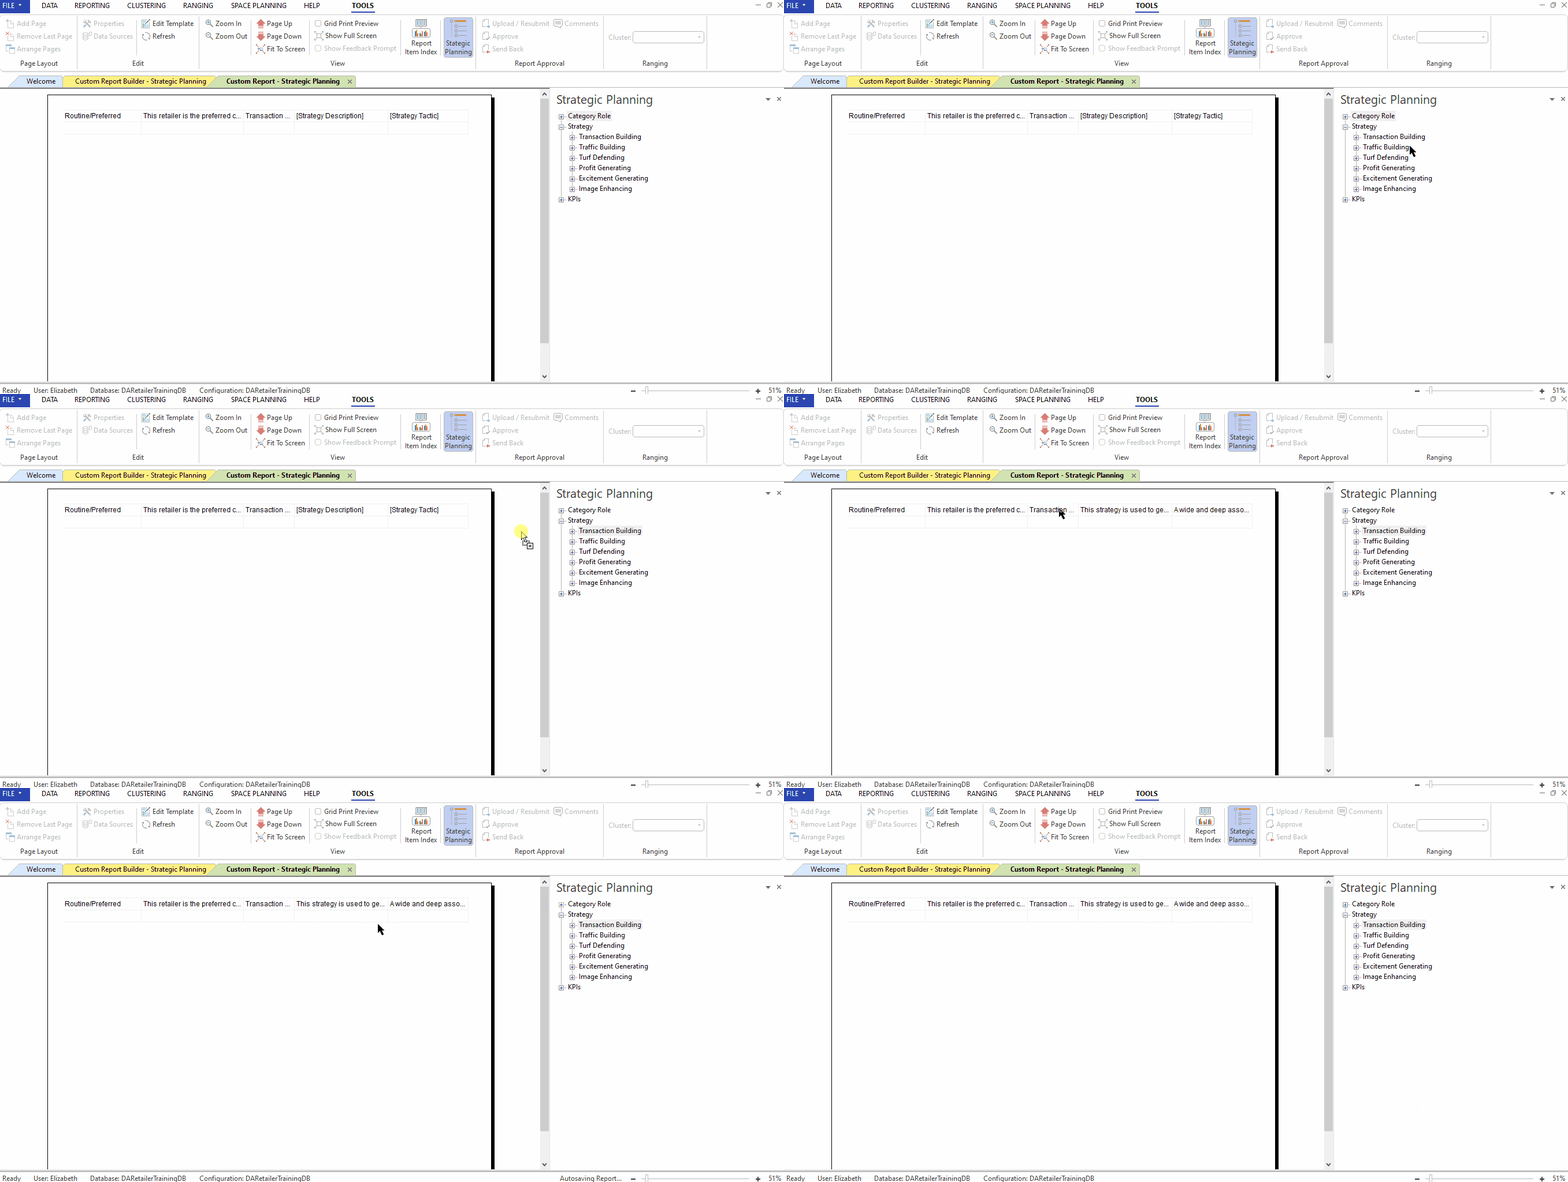
After you’ve run your report, click on ‘Strategic Planning’. A window will appear with options to drill down into the category roles, strategies, and KPIs.
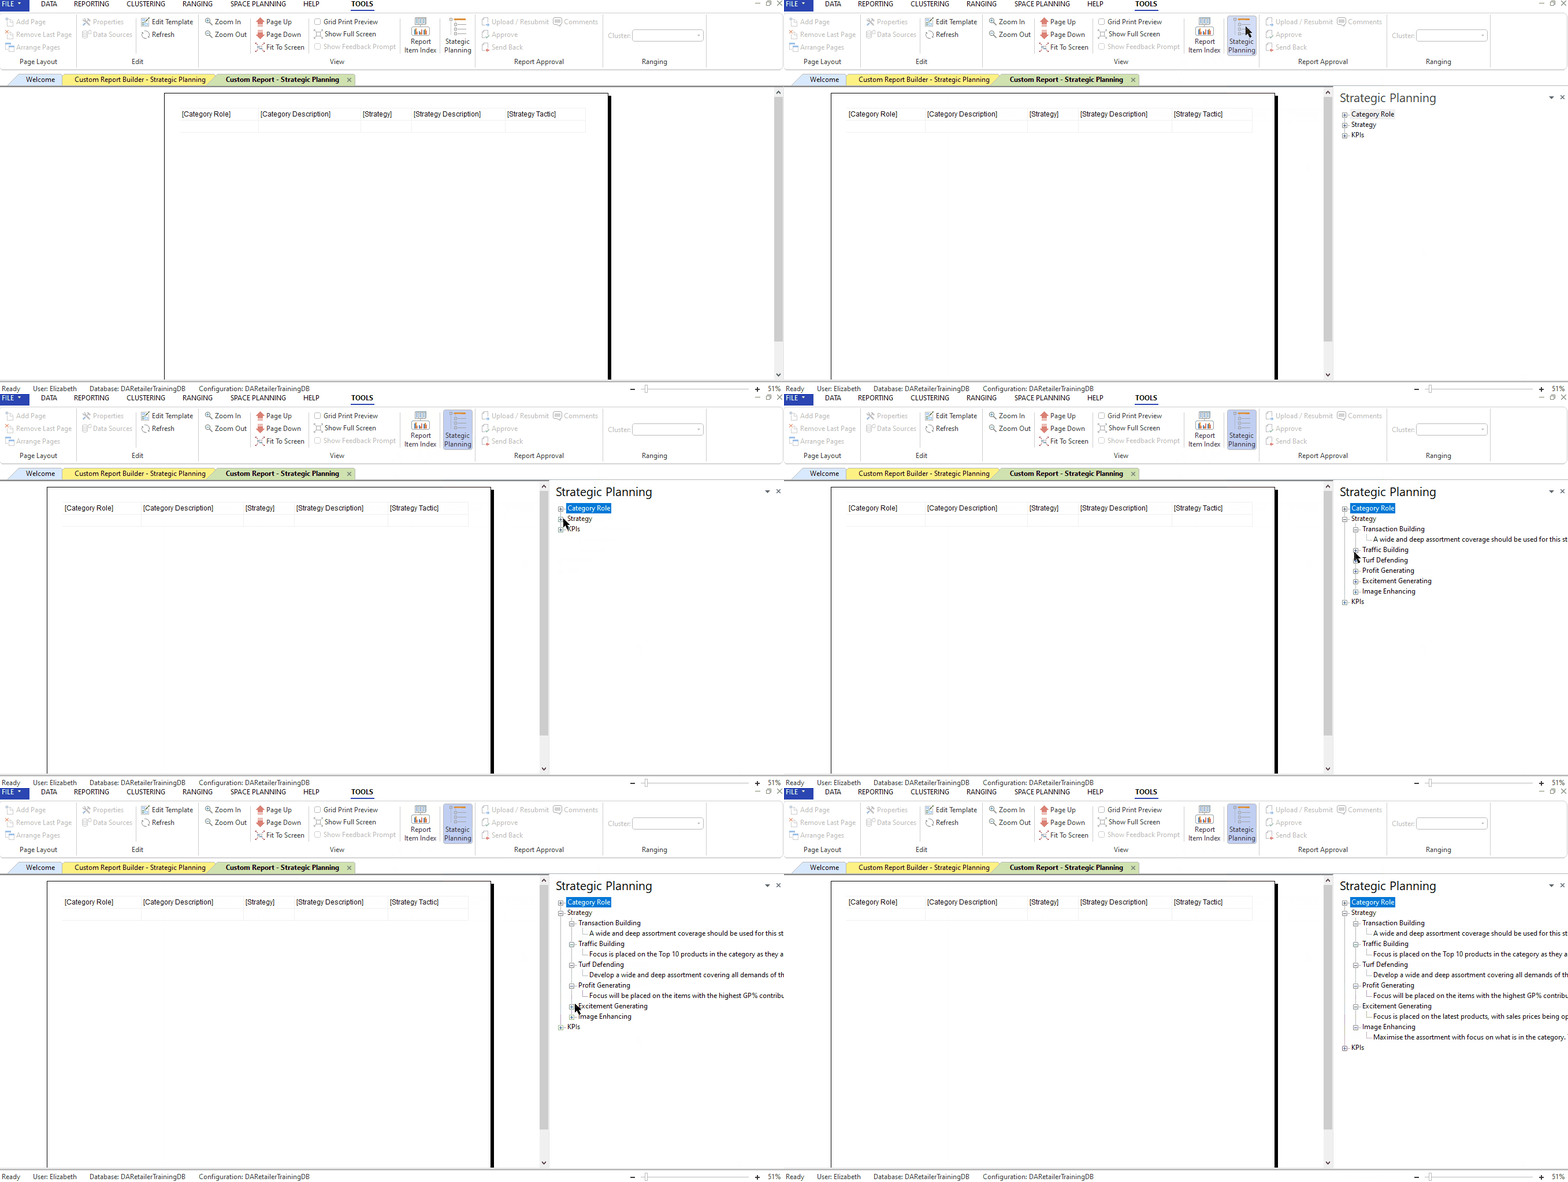
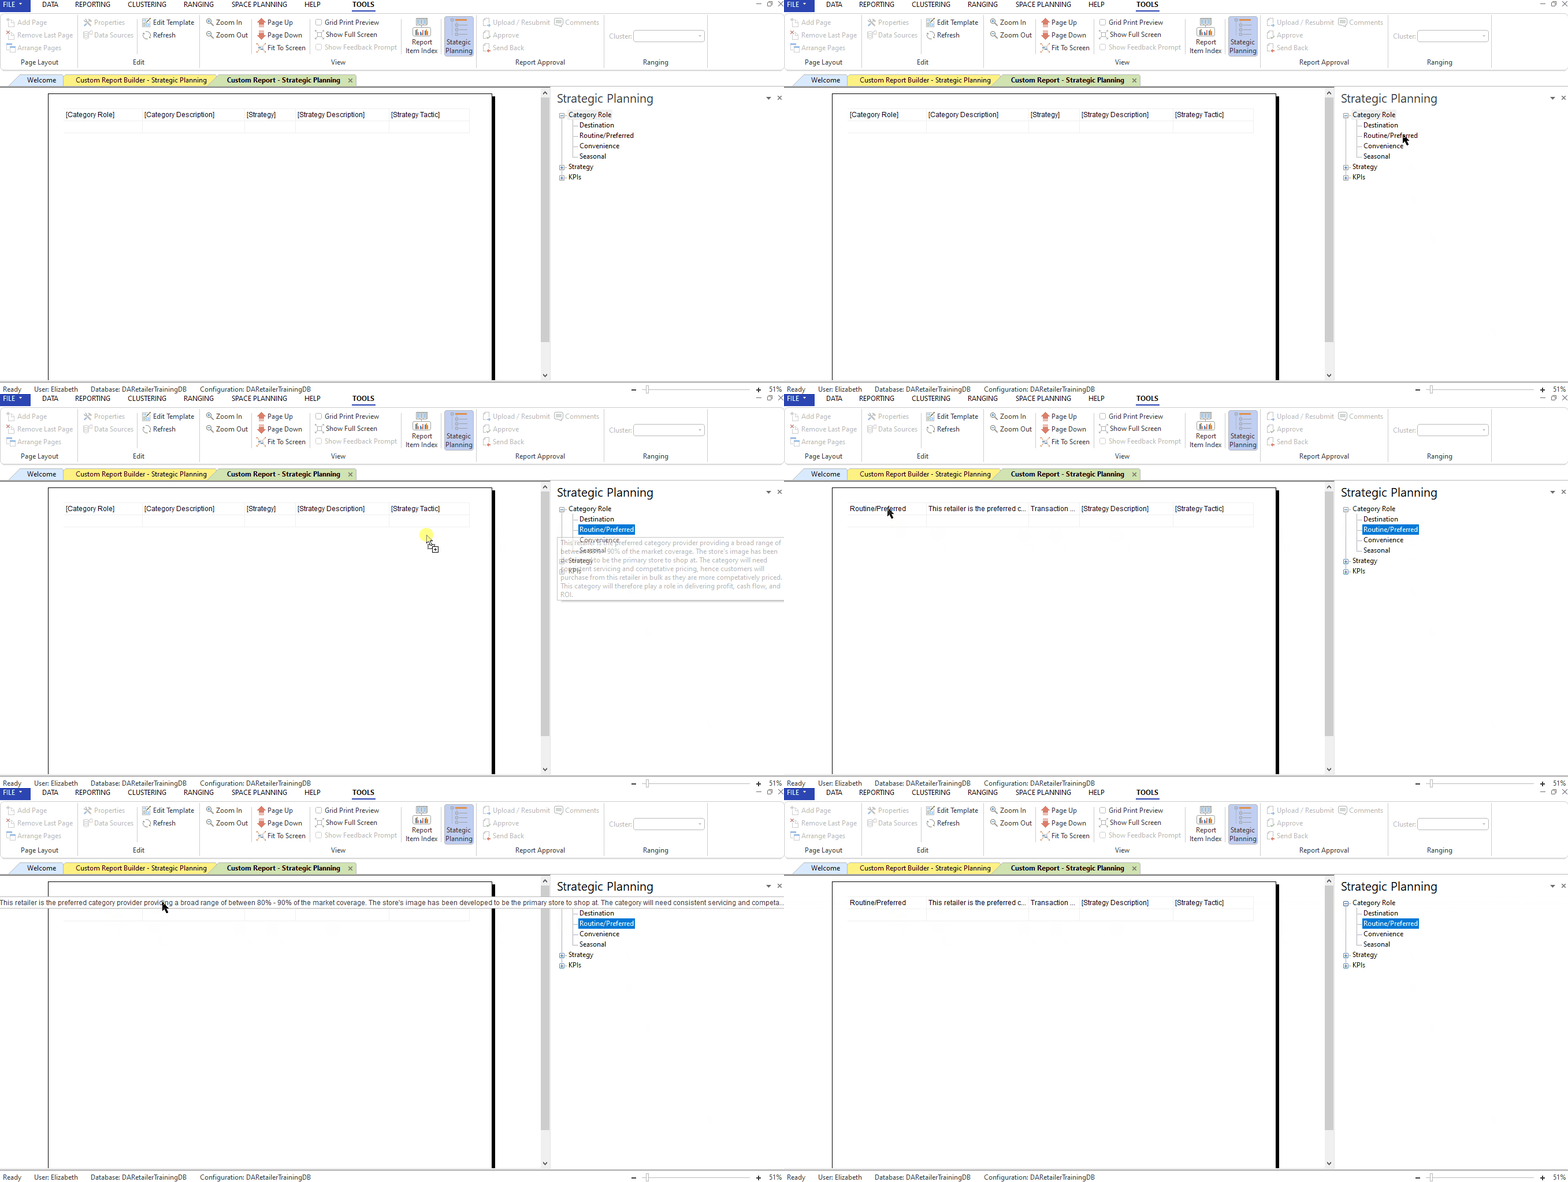
To add a category role, simply click and drag the chosen role onto the table.
Next, click and drag the chosen strategy. Please note that certain strategies are only applicable to certain category roles. Should a strategy not be applicable to the chosen category role you will receive this error message: Invalid Strategy Selection.
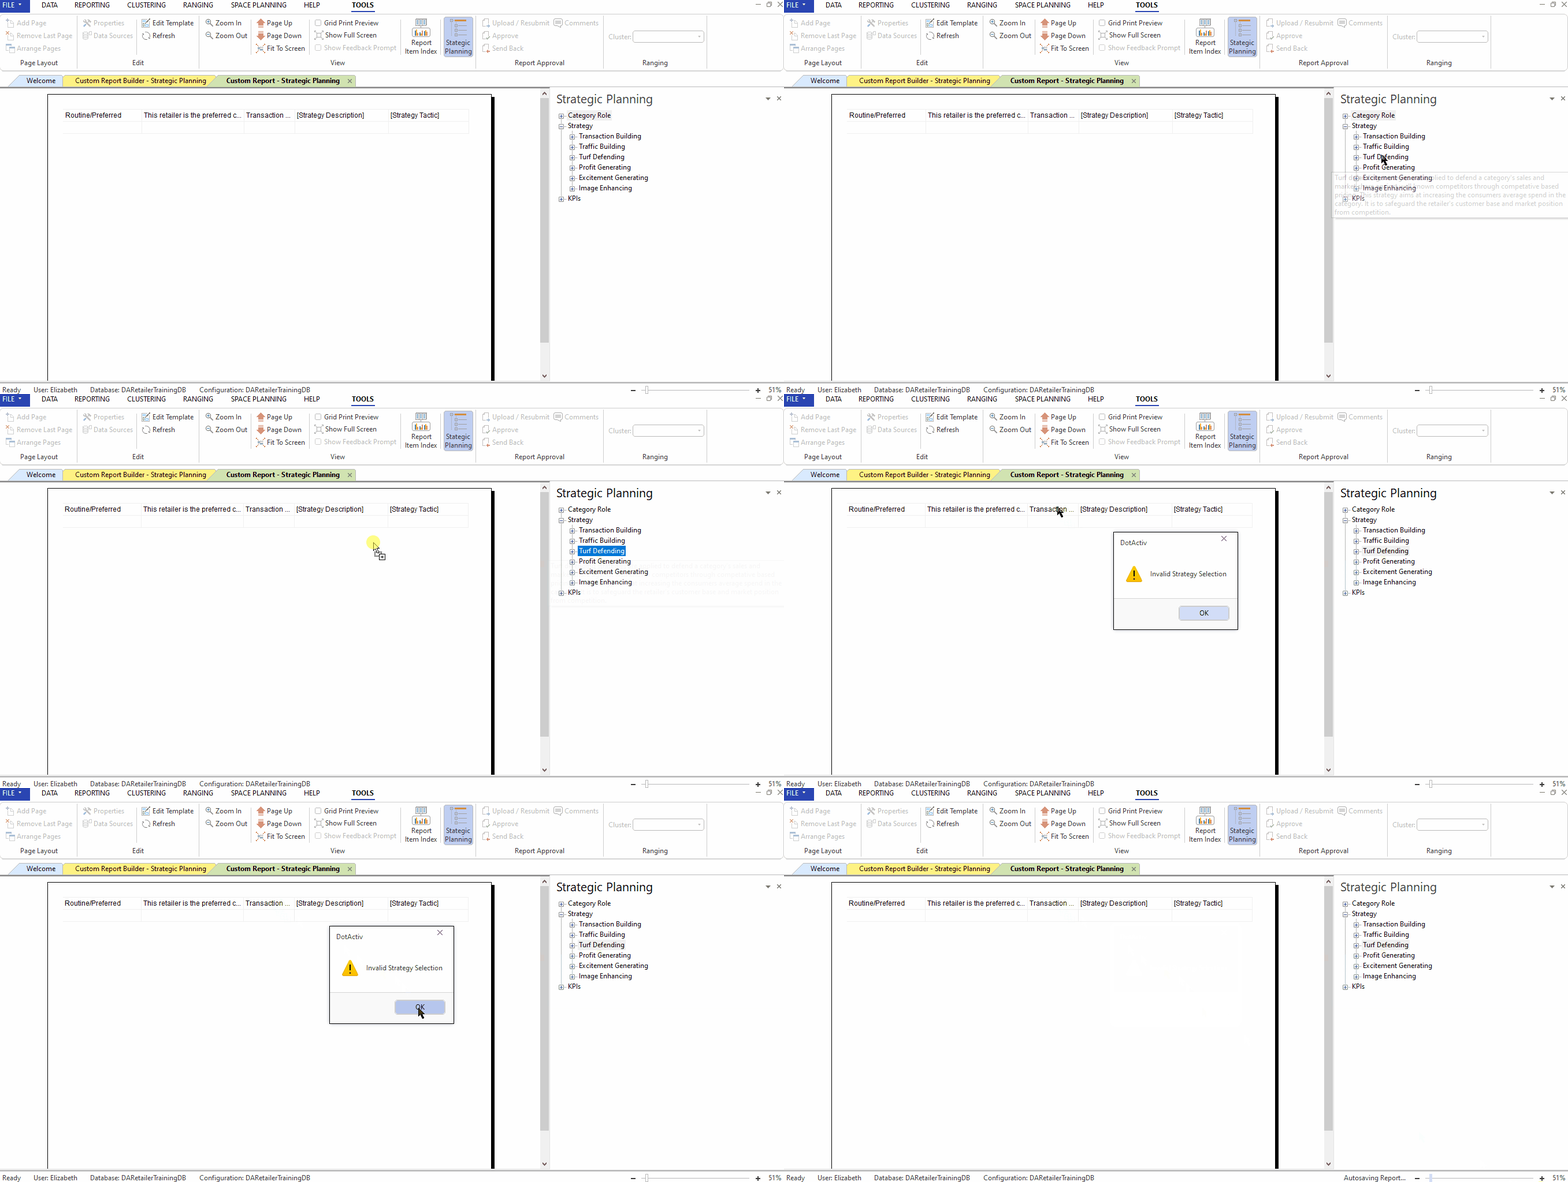
Once you have selected a strategy, if you have a tactics placeholder, this should auto-populate.
Adding KPIs
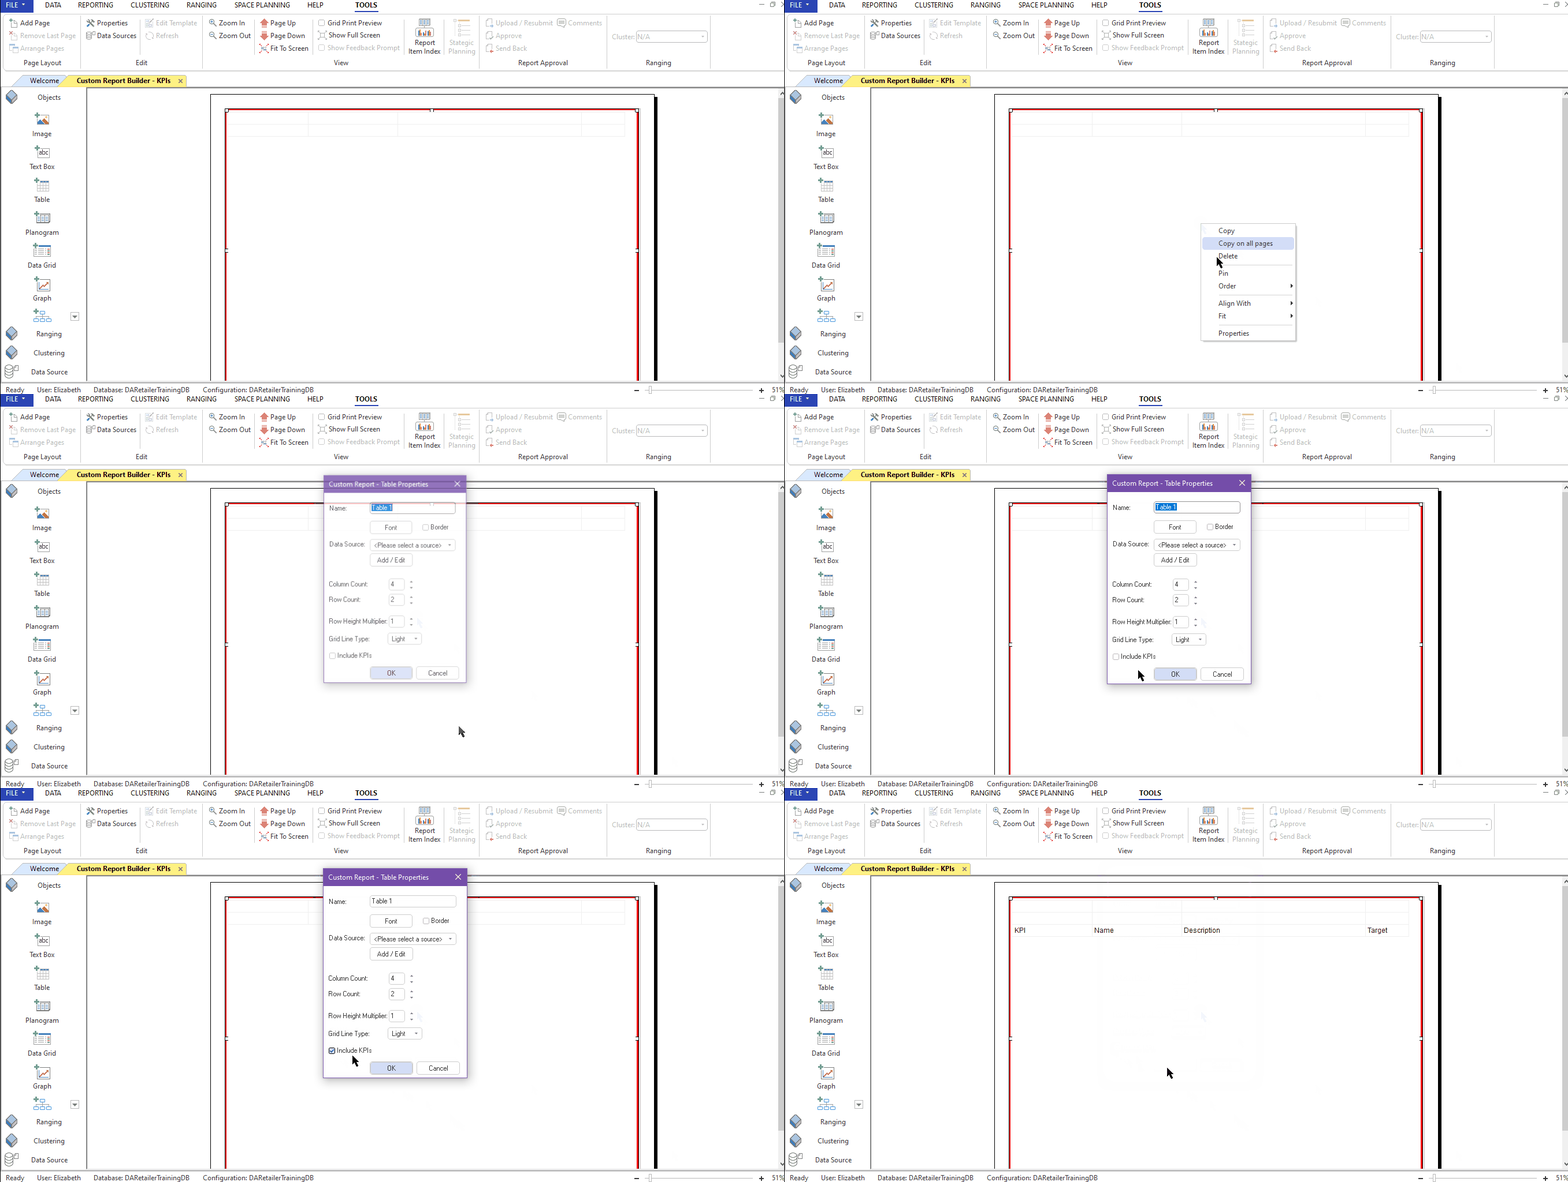
To add KPIs to your table, open the table properties by right clicking on the object and tick ‘Include KPIs’.
The following should appear in your table in report builder mode:
- KPI
- Name
- Description
- Target
Then, save and run your report otherwise you won’t be able to continue.
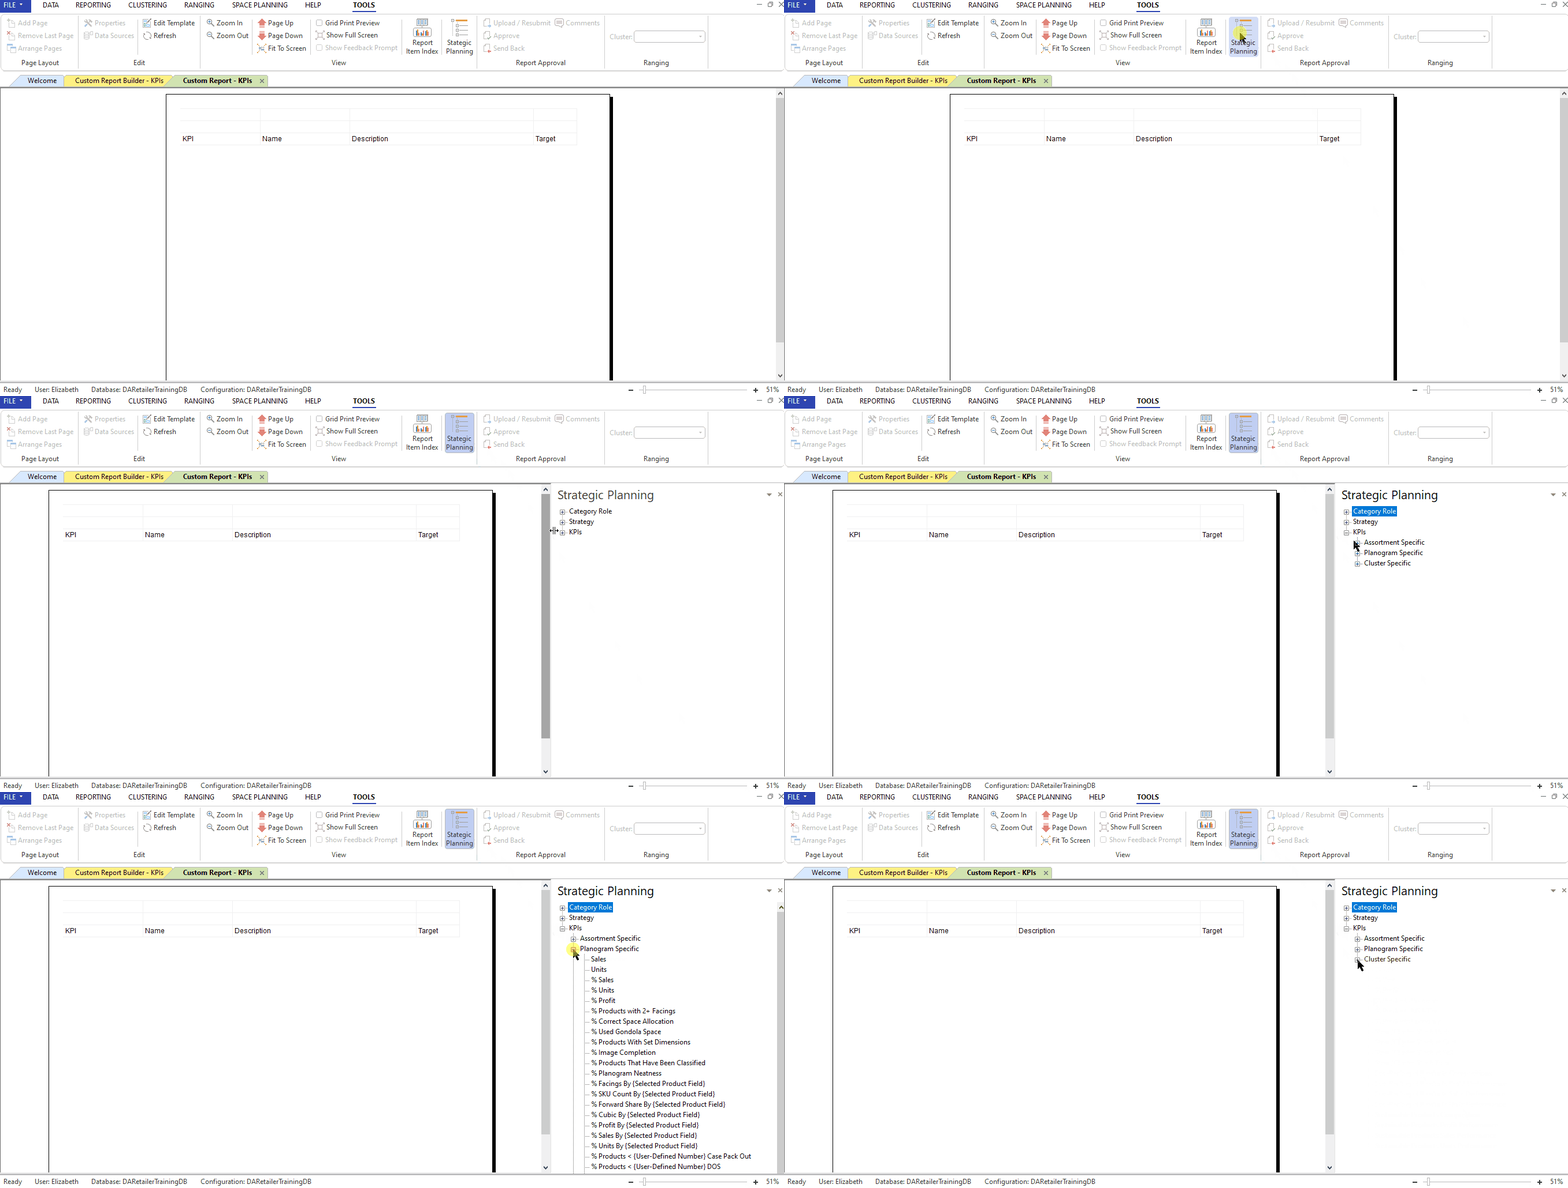
After you have saved and run your report, click on ‘Strategic Planning’. A window will open on the right.
Click on ‘KPIs’ and then click on the type of KPIs you would like to see, whether that is assortment, planogram, or cluster specific KPIs.
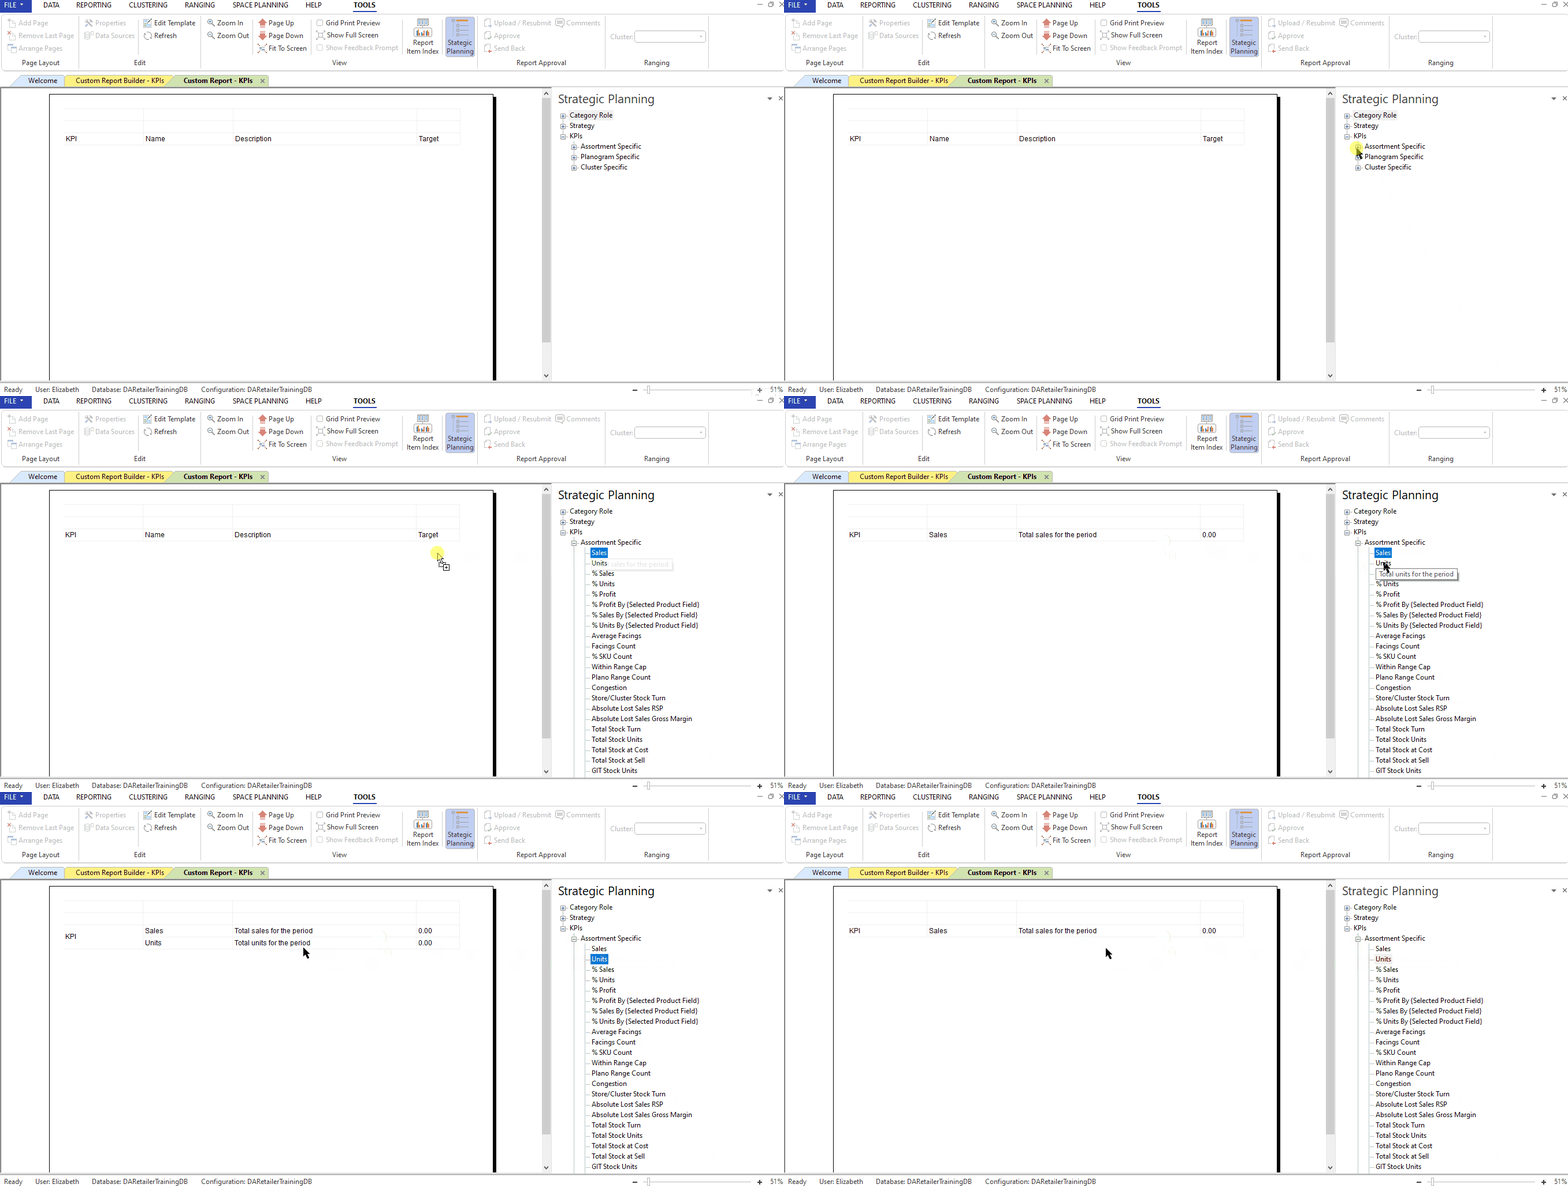
To add a KPI, simply click and drag the chosen KPI onto the table and the information will auto-populate.
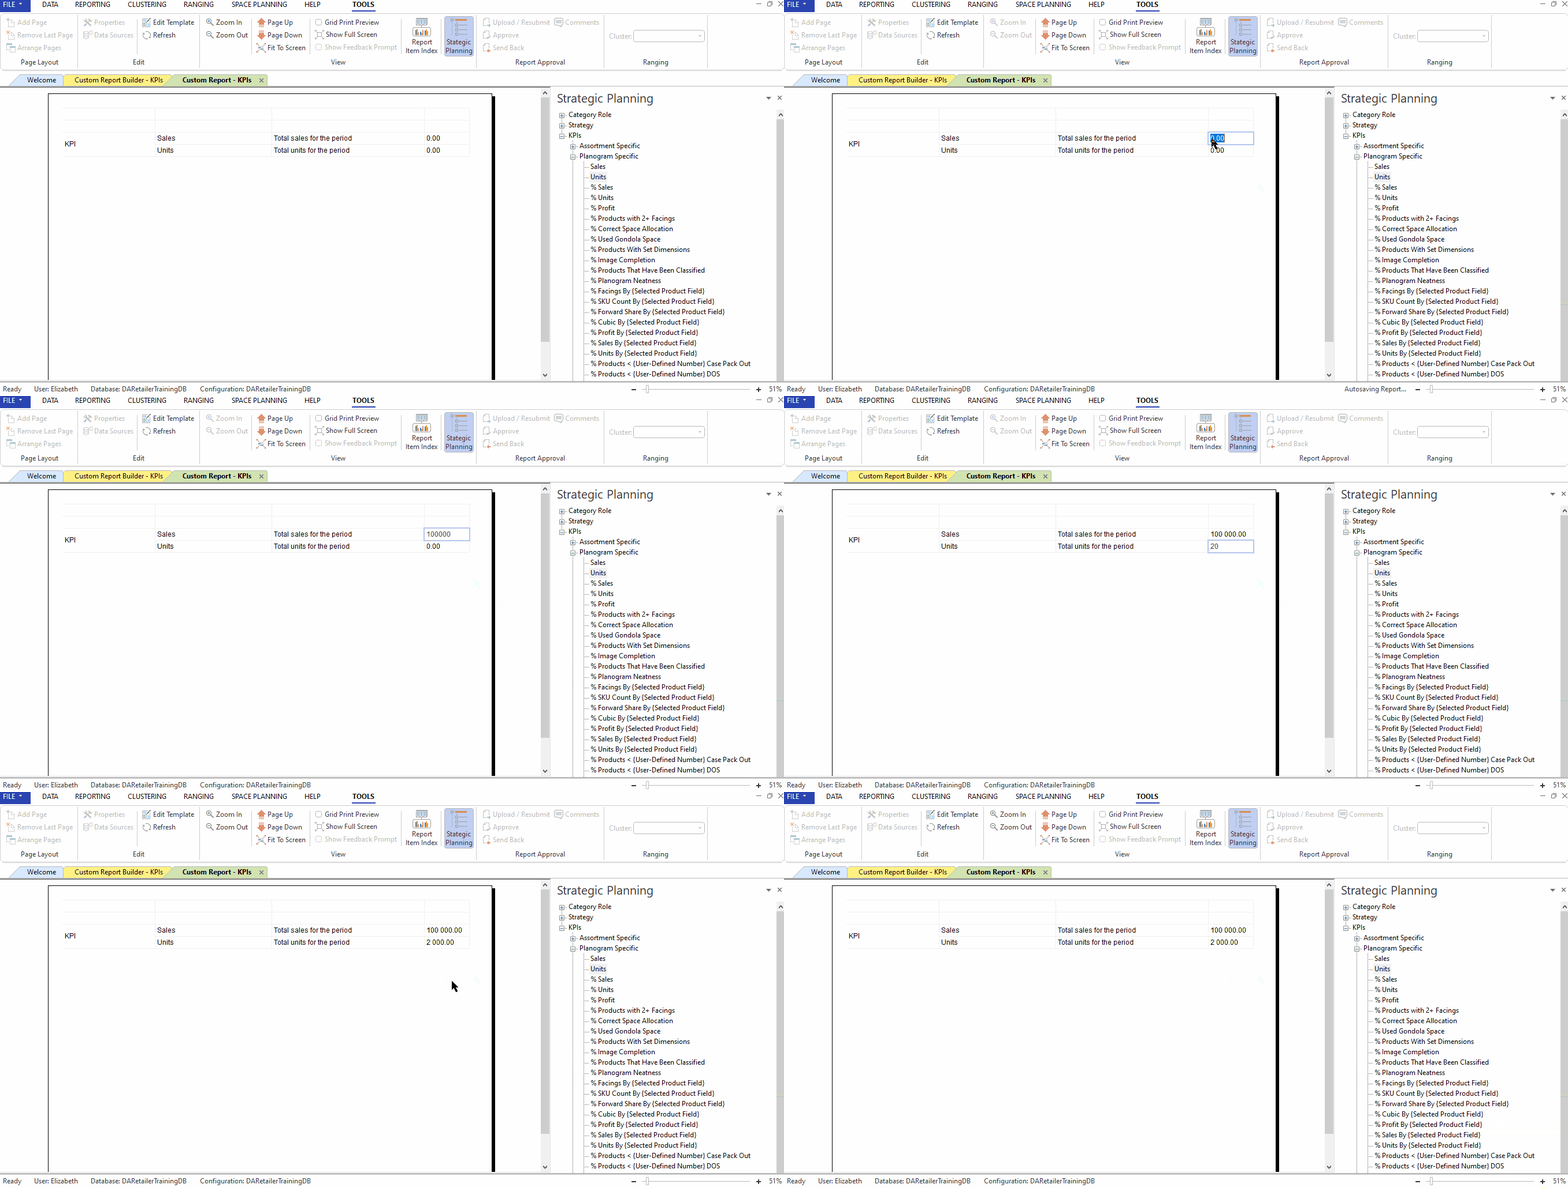
Setting KPI Targets
To set a KPI target, in your run report, click on the relevant KPIs cell in the ‘Target’ column. Then, manually input the target.
If the steps listed above do not work for you, please log a support ticket for our IT Support team who is always willing to assist.
