The purpose of this article is to explain how you can create and add Table fixtures in DotActiv software.
As with the Apparel Fixtures available in DotActiv software, Table fixtures are primarily used for clothing and softline retailers. You can also use Table fixtures to merchandise other products too.
Adding An Apparel Container
As you would build a new gondola to add fixtures when working with FMCG goods, the same applies to apparel. Instead of referring to it as a gondola, we refer to it as an apparel container.
With DotActiv open, ensure you are in the ‘Space Planning’ tab. Next, click on ‘Apparel Container’ in the ‘Shelf Planning’ section.
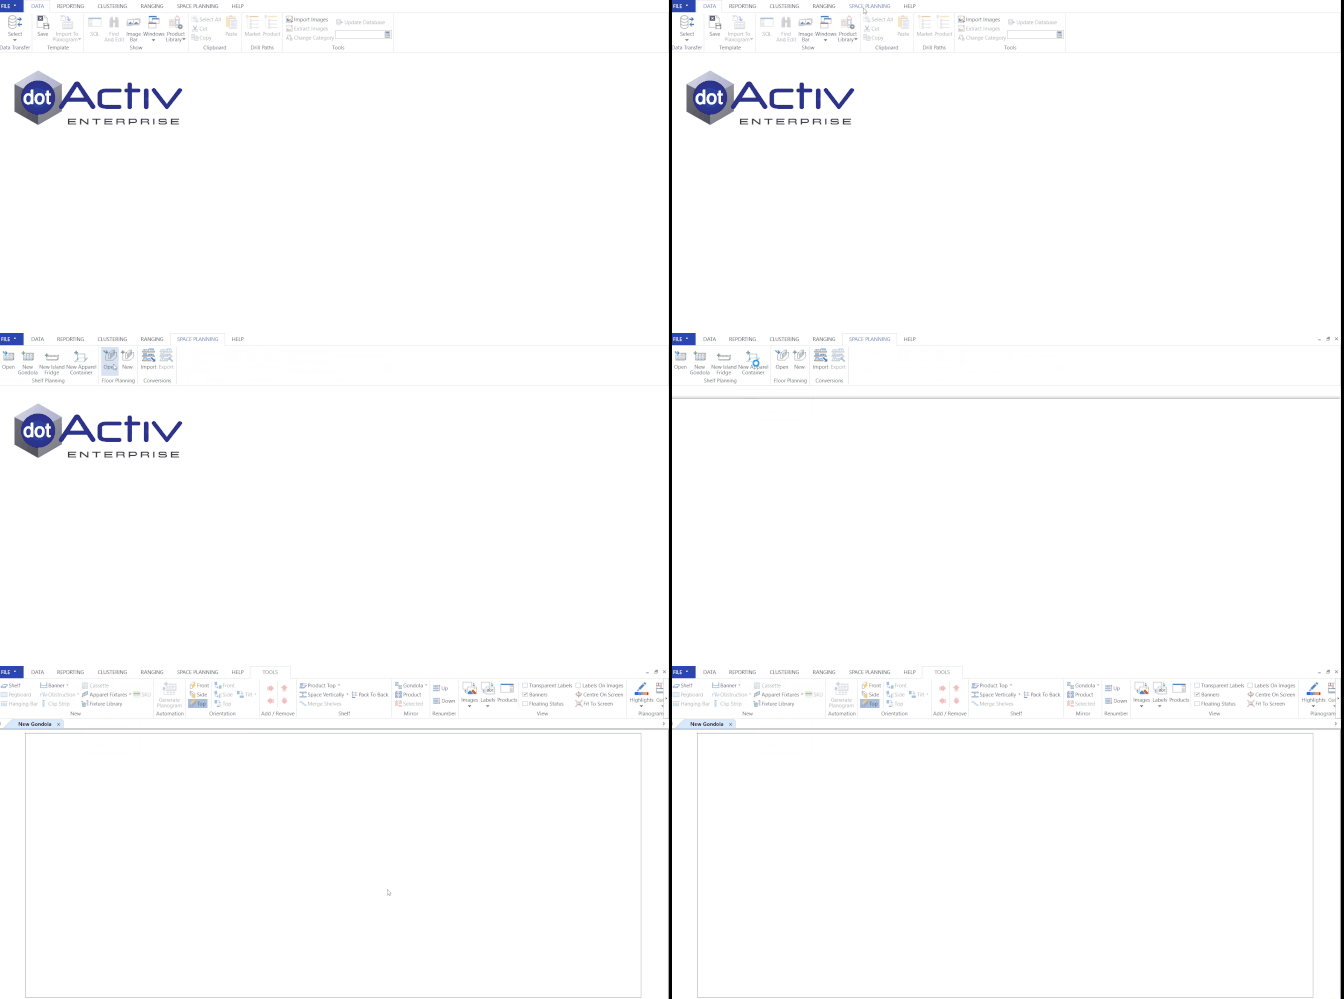
Once you add the apparel container, you can add your Table fixtures.
Please note you cannot add any fixtures until your first create an apparel container. The ‘Apparel Fixtures’ option is greyed out until you do.
Adding Table Fixtures
To add a Table fixture, click ‘the Apparel Fixtures’ in the ‘New’ section. From the drop-down menu, you can select ‘Table’ and then click on your apparel container to add it.
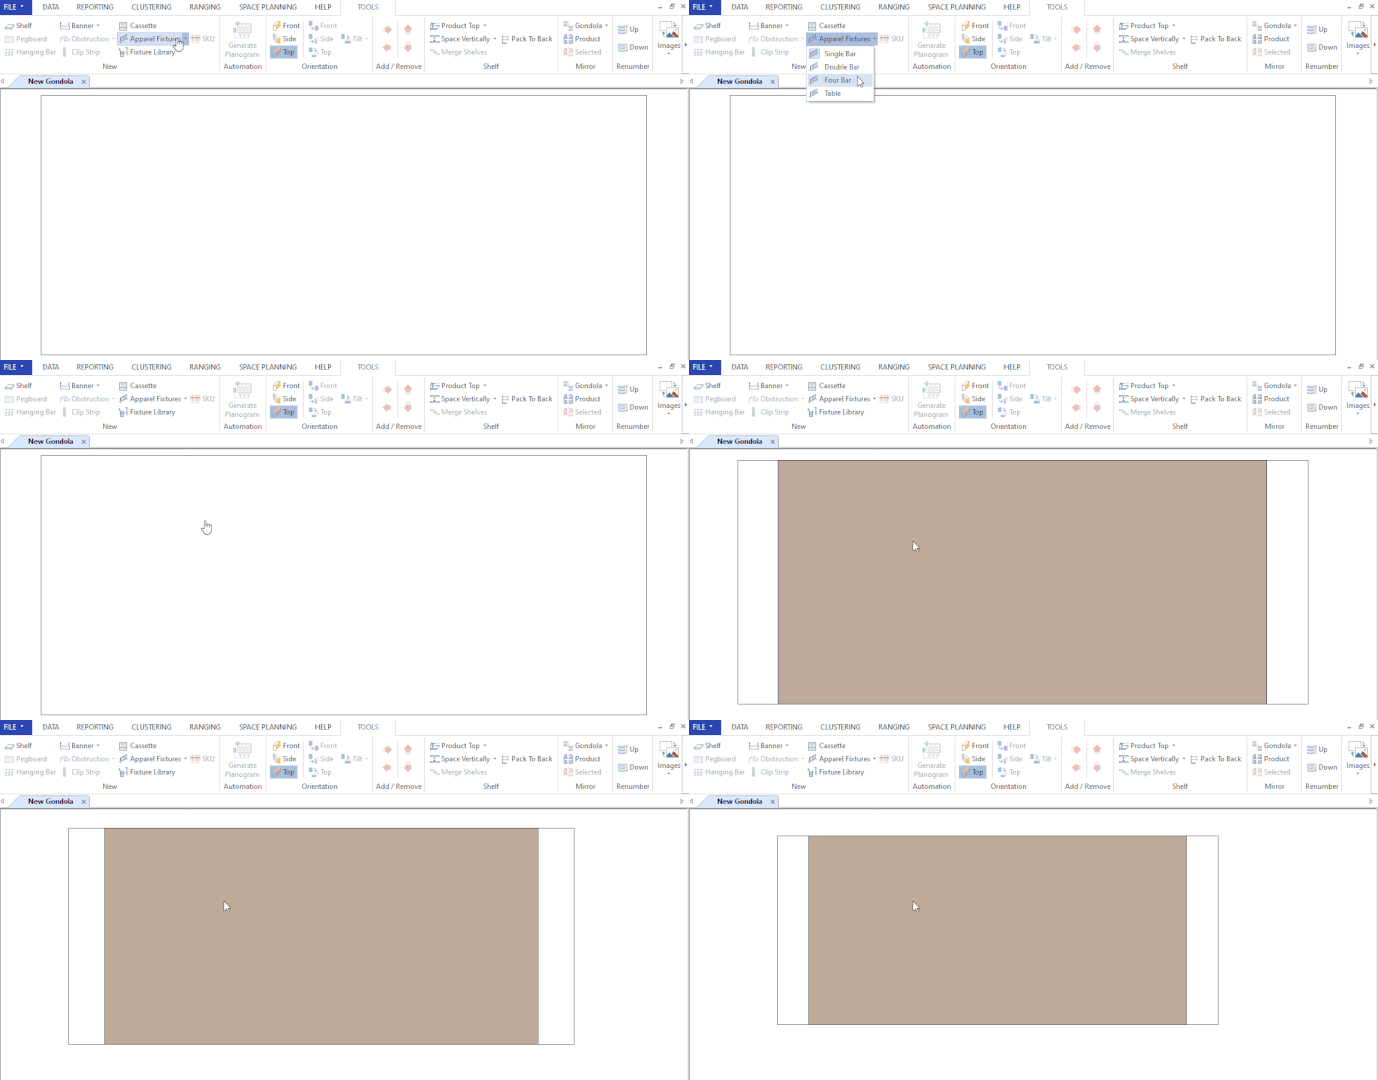
As you can see above, a brown rectangle appears in your apparel container. What you are seeing is the top of your table. When added a Table fixture, the default view is ‘Top’.
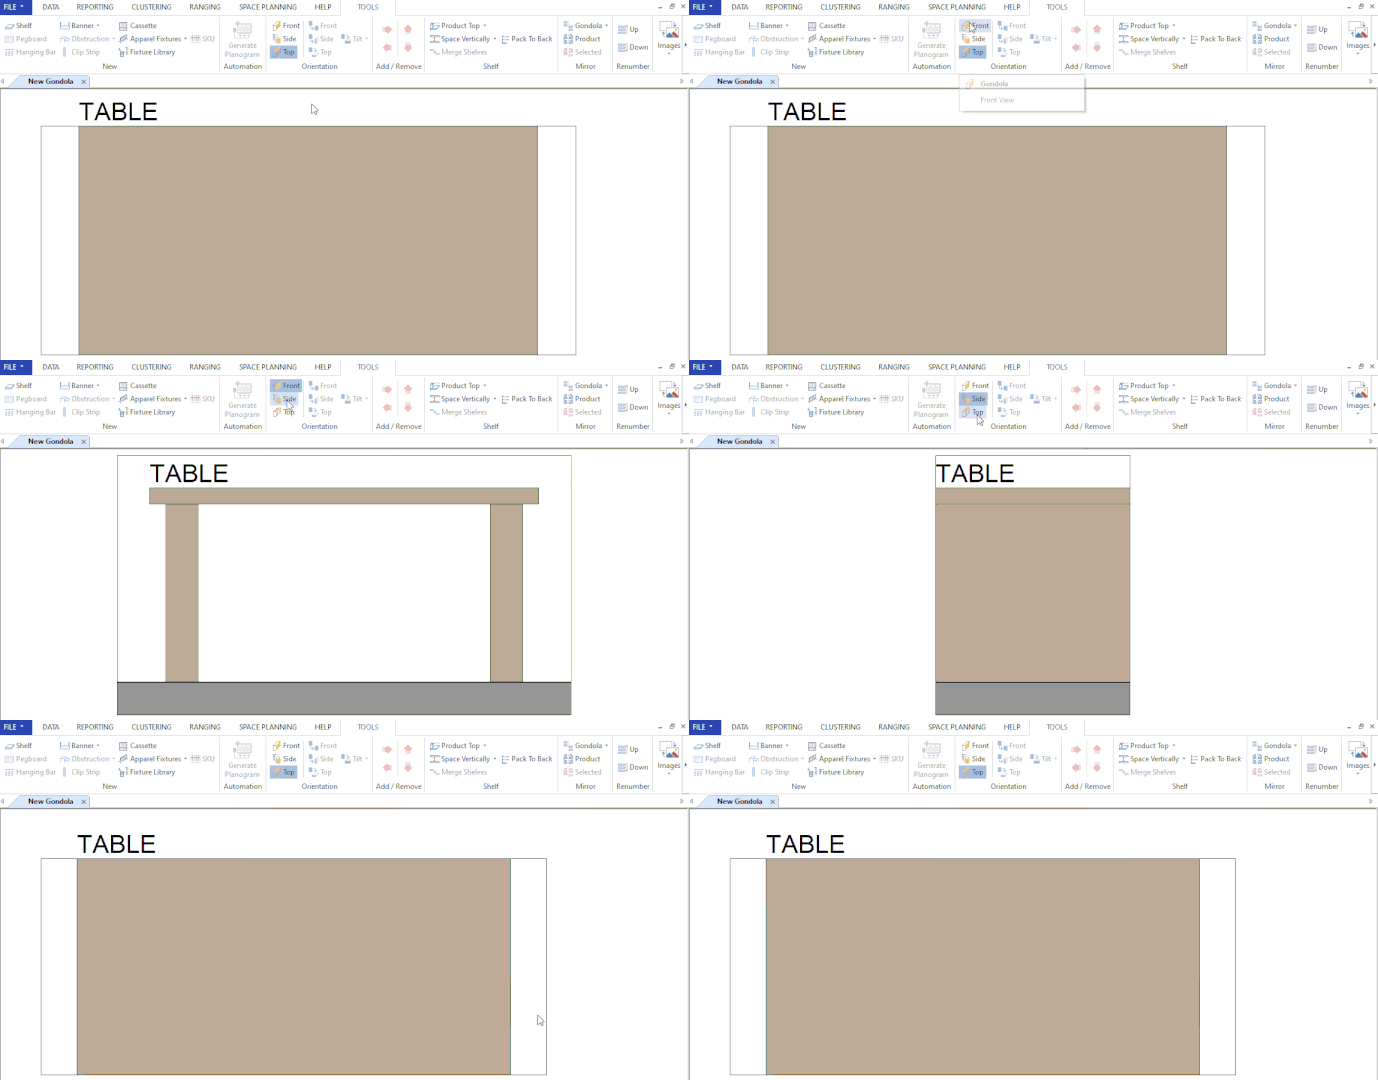
To change the view, select ‘Front’, ‘Side’ or ‘Top’ from the ‘Orientation’ section in the ‘Tools’ tab.
Editing Table Properties
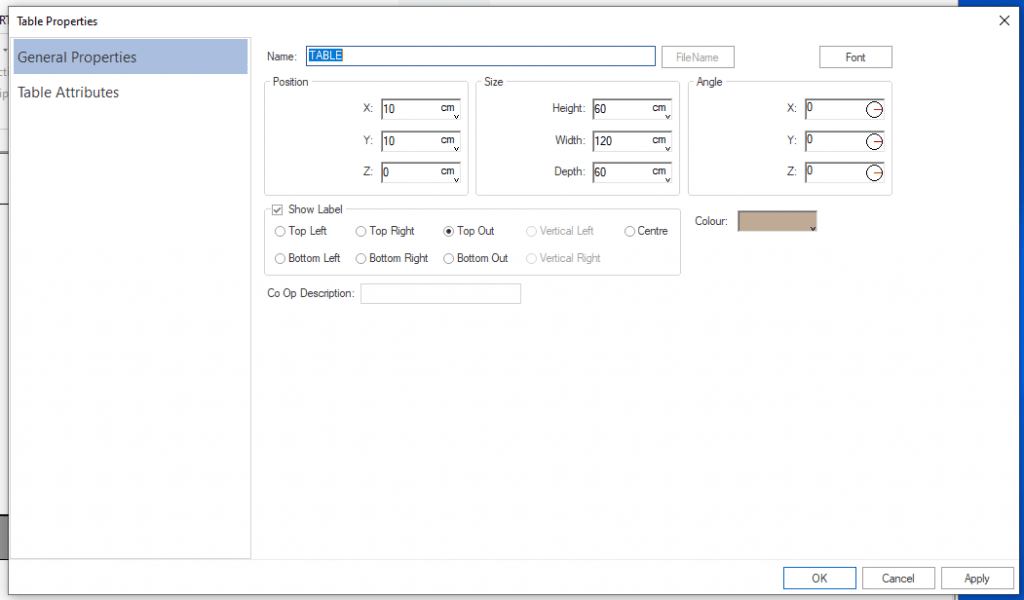
To edit the attributes of your Table fixture, right-click on the fixture and choose ‘Properties’ from the context menu that pops up. You can also double-click on the fixture to open the ‘Table Properties’ window.
Editing General Properties
In this window, under ‘General Properties’, you can give your fixture a name, change the font, as well as the position and size. You can also decide to show labels and choose a colour.
Editing Table Attributes
To edit the attributes of your table, first, select ‘Table Attributes’ to go to the ‘Table Properties’ window.
In this window, you can choose how you want to spread your products on your table as well as the attributes of your table – table thickness; leg thickness; and leg offset.
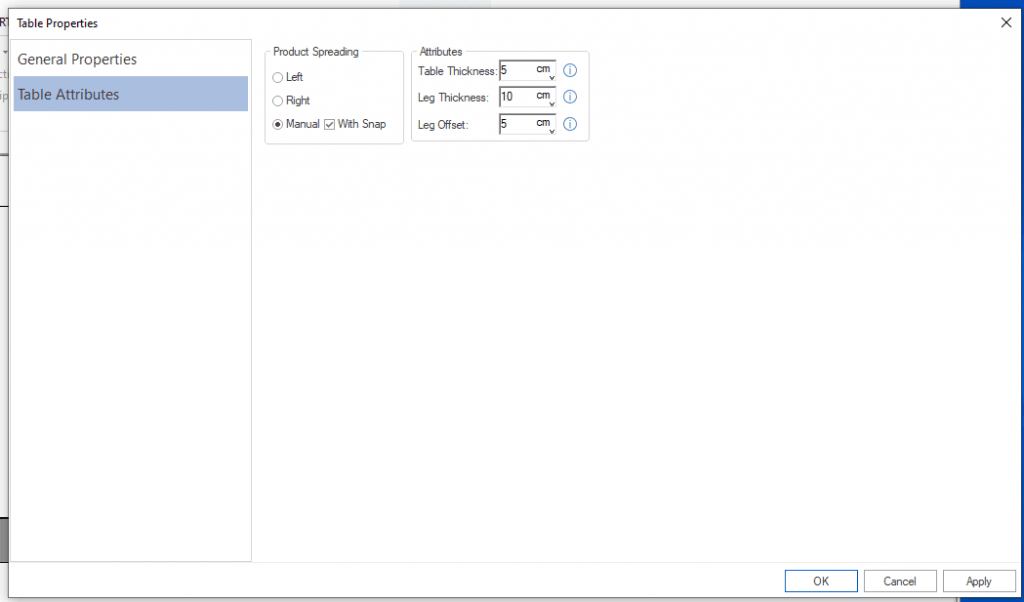
In the ‘Product Spreading’ section, you have the option to tick a ‘With Snap’ box. This applies to manual packing on your table.
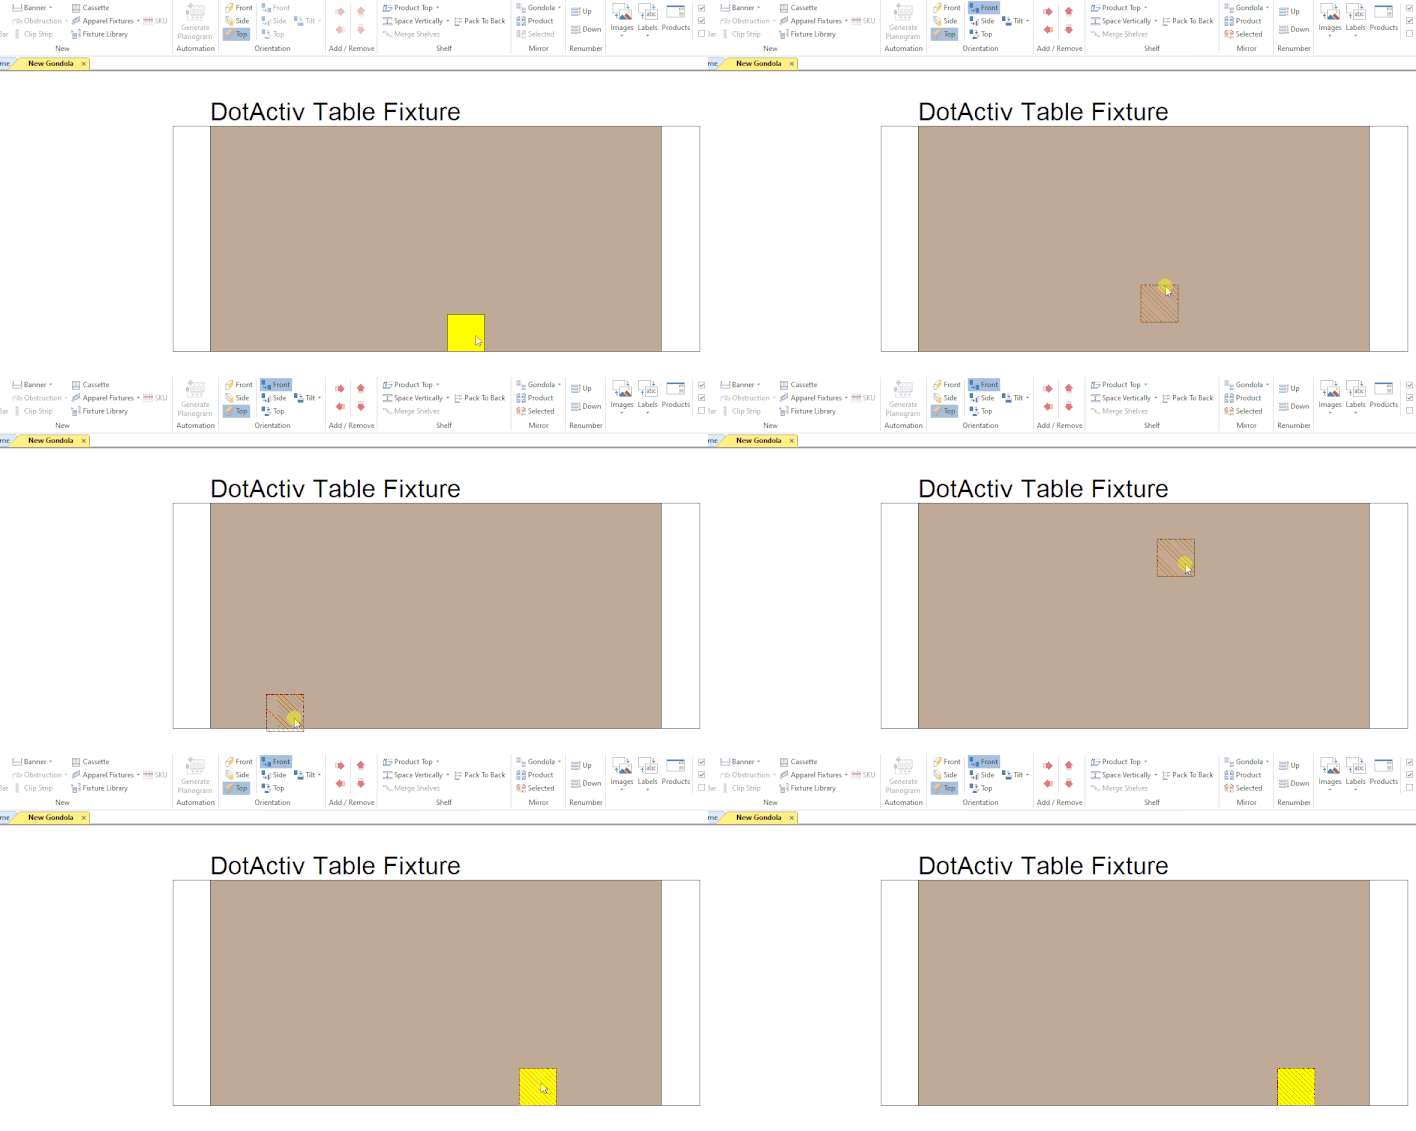
As seen above, if you use the ‘With Snap’ option, you can place your product anywhere on the table and it will snap to the bottom in that position.
Adding Shelves
You can add a shelf to your table in the same way that you’d add a shelf to a gondola.
After creating your initial table and ensuring it’s in ‘Front’ orientation, select ‘Shelf’ from the ‘New’ section and then click on your table to add it.

Table Fixtures And The Fixture Library
The Table fixture feature is also compatible with the Fixture Library.
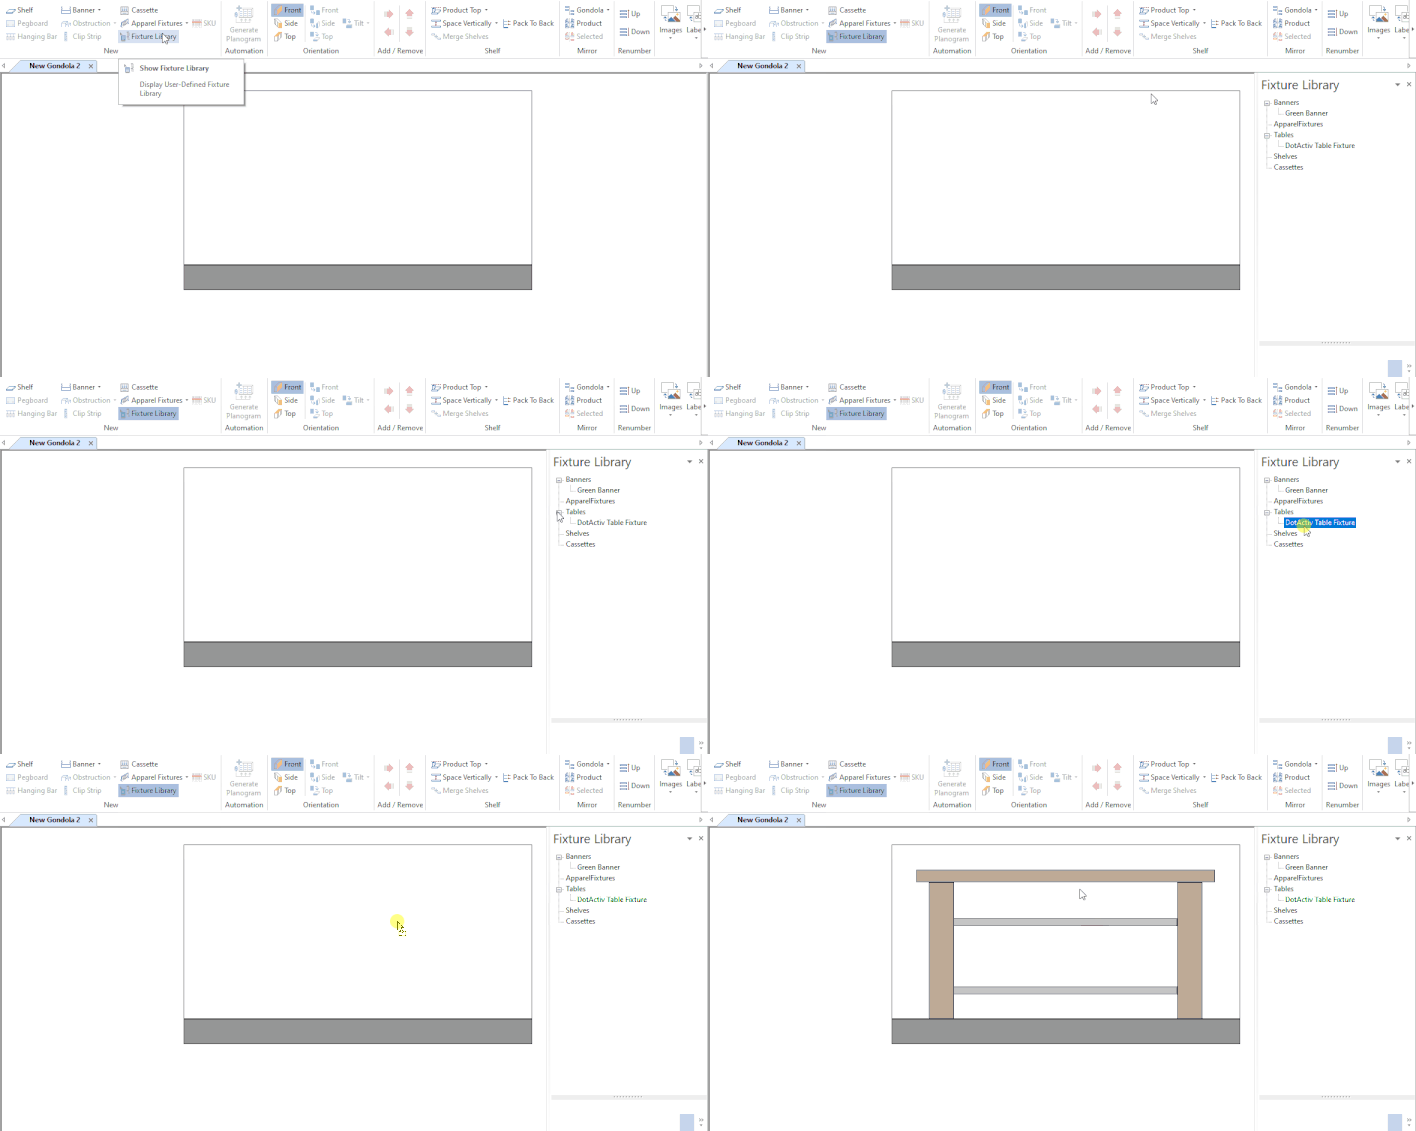
To save a Table fixture to the fixture library, first, right-click on the fixture. From the context menu, select ‘Save As Fixture’. Then, give it a name.
If you open the Fixture Library, it is now available under the sub-heading ‘Tables’. Drag and drop if from the Fixture Library to begin working with it.
Should the above steps not work for you, please create a support ticket and DotActiv support will assist you in uncovering the issue.
