The purpose of this article is to help guide you on how to convert planograms to and from different file formats while working in the DotActiv software.
Converting To FLP Format
If you have created a planogram in a space planning software other than the DotActiv application, you will need to convert it to .flp format. The DotActiv Software makes use of FLP files to make changes or create planograms.
The following formats can be converted to a .flp using the DotActiv software:
- PSA
- ICP
- PFA
- PLN
If you have created a planogram using the DotActiv software and need to convert it to another format for a client, this can also be done on the software.
We can use the software to change a .flp to the following formats:
- ICP
- PSA
Planograms Conversions via Space Planning
Mapping Your Planogram Fields
When converting a planogram to and from various file formats, you need to ensure that your mappings are set up correctly.
Once you have set up your mappings, they will remain the same for all your imports and exports.
Importing A File And Changing The Mappings
PSA, ICP & PLN
To configure the mappings, you will have to import the file into your DotActiv software.
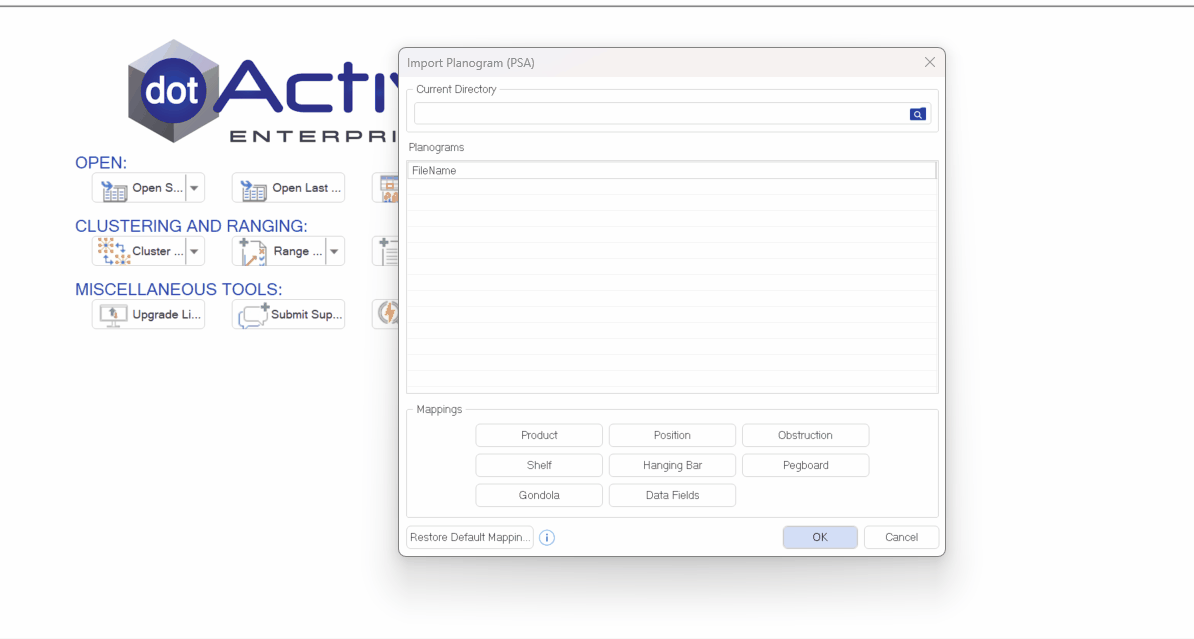
First, ensure you are in the ‘Space Planning’ tab. Once there, click on the ‘Import’ icon under the ‘Conversions’ section as seen in the GIF below.

Here you can select if you would like to import a PSA, ICP, PFA or PLN file, for this example, we will use PSA file type.

The ‘Import Planogram (PSA)’ window, as seen above, will appear and you can select the directory of the files you would like to import.
If you want to import an ICP file, the window that pops up will be the same except for the name: ‘Import Planogram (ICP)’.
Once you set the directory, remember to tick the box next to the item that you would like to make the changes on.
After you have selected the format that you would like to import, there will be a list of mappings from which you can choose, namely;
- Product,
- Position,
- Obstruction,
- Shelf,
- Hanging Bar,
- Pegboard,
- Gondola, and
- Data Fields.
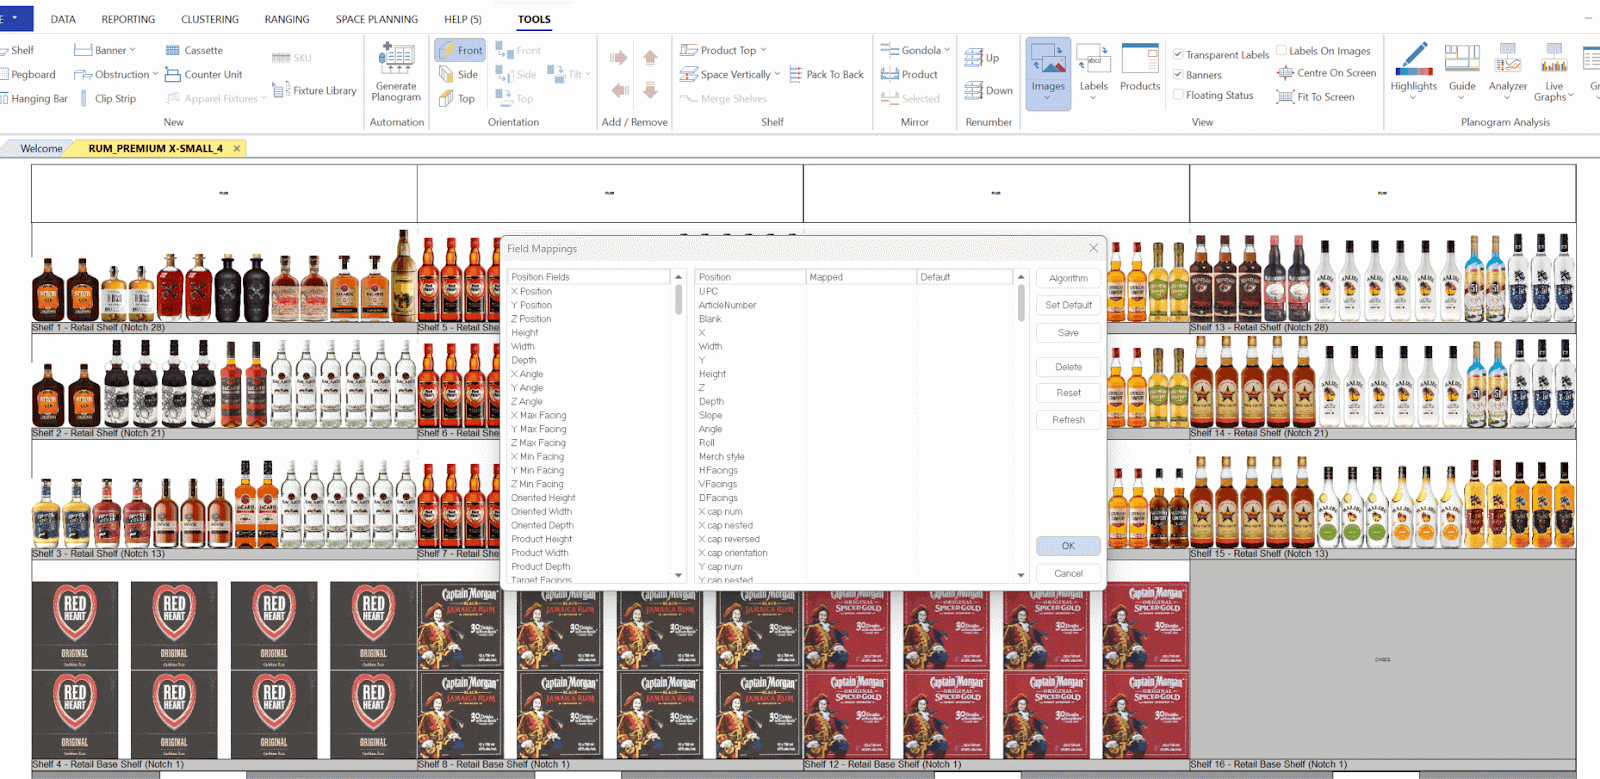
If we choose to click on ‘Product, a ‘Gondola Map’ window appears. This will display the DotActiv mapped fields under ‘Product’ and which field it is mapped to under ‘Mapped’.
On the left side, you will see the fields that are available to be mapped with the DotActiv values.
When importing a PSA file into the DotActiv application, Product ID will always be mapped to ArticleNumber.
To map the field, you can drag and drop it from the ‘Product Fields’ section to the respective field in the ‘Mapped’ section.
- The product refers to the actual product fields.
- The position indicates where various objects are located in the file.
- Obstruction pertains to any obstruction-based objects present in the file.
- The shelf, hanging bar, and pegboard are used to specify details about fixture types.
- Gondola relates to the attributes associated with gondolas.
- Finally, data fields encompass any fact or product-related information that must be linked or included.
When mapping, ensure that you review each of these fields and make necessary corrections accordingly.
Once the mapping has been checked, click ‘OK’ and your FLP File will now open up in the DotActiv software.
PFA
When wanting to convert a PFA file to FLP you will be presented with this window and you will need to select your PFA file.

After selecting the file, click ‘Open.’ With the mappings confirmed, click ‘OK’ to open the FLP file in DotActiv.
Please note that during the import process, it is essential that all planogram fields are correctly mapped to ensure proper data integrity and system interpretation. Mapping is done using the ‘Data Fields’ interface:
– Planogram Fields (on the left panel) represent the layout and structural metadata of the PSA file
– Data Fields (on the right panel) correspond to product, fact, market, and period data stored in the DotActiv database (FLP File).For example, when mapping barcodes, filter the Planogram Fields by ‘Product’ and the Data Fields by ‘Product Fields’. Then, drag and drop the corresponding source field (e.g., UPC in a PSA file) to the target DotActiv field (e.g., Barcode).
This process mirrors the same functionality as the “Convert/Don’t Convert” prompt that appears when opening .flp files. It’s critical that fields such as Market, Product, Fact, and Period are mapped accurately according to your database configuration.
Exporting your file and changing your mappings
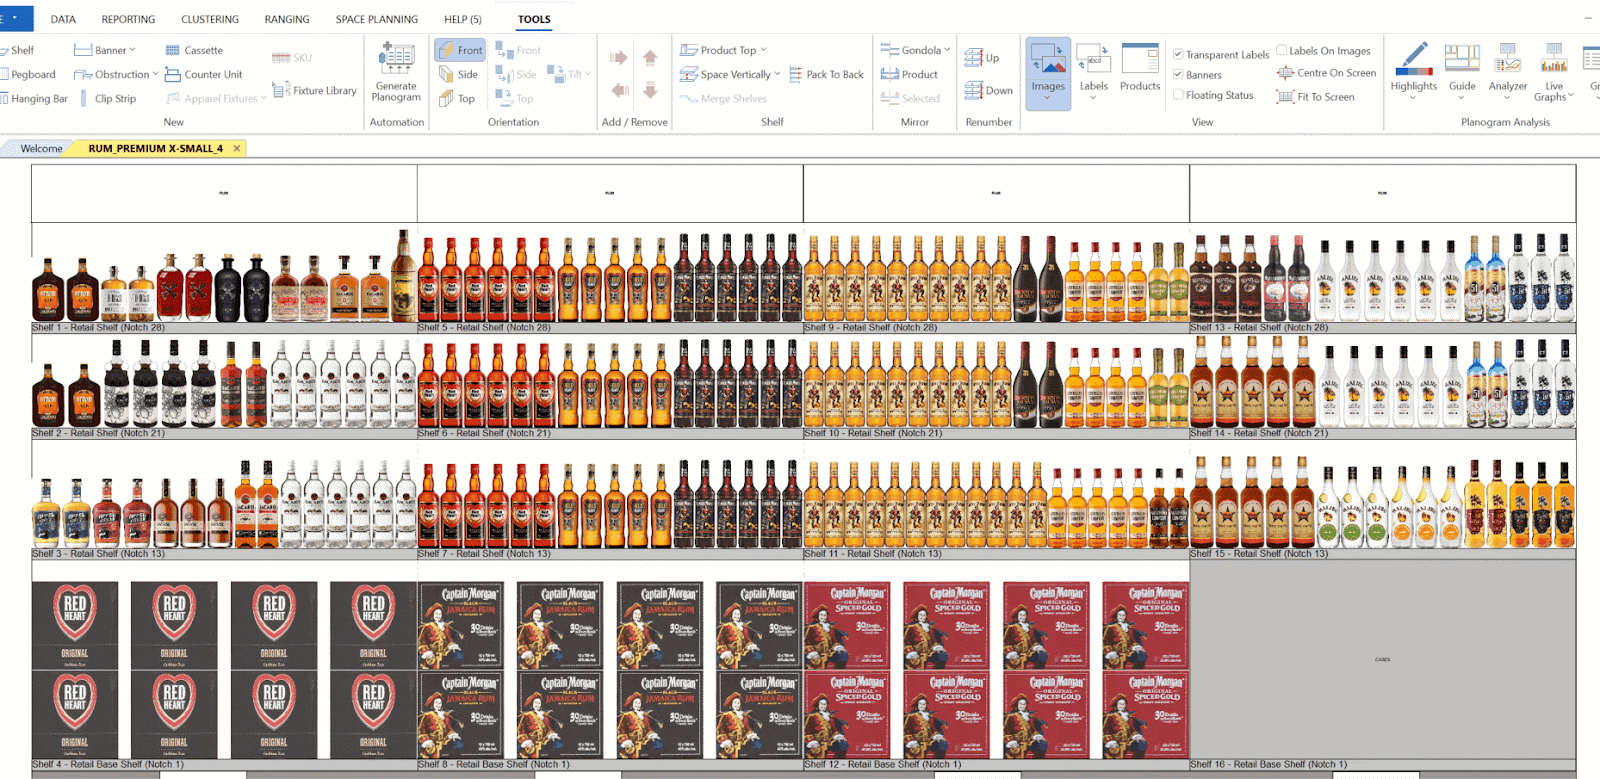
You can also export your planograms to a PSA or ICP file format.
With your planogram open, ensure that you are in the ‘Space Planning’ tab. Next, click on the ‘Export’ icon in the ‘Conversions’ section. Here, you can select if you would like to export to a PSA or ICP file, for this example, we will use a PSA file format.
Be sure to select your output directory in the ‘Export Planogram (PSA)’ window that pops up. If you don’t set it, it can cause the DotActiv application to crash. After selecting your output directory, you can also give your file a new name.
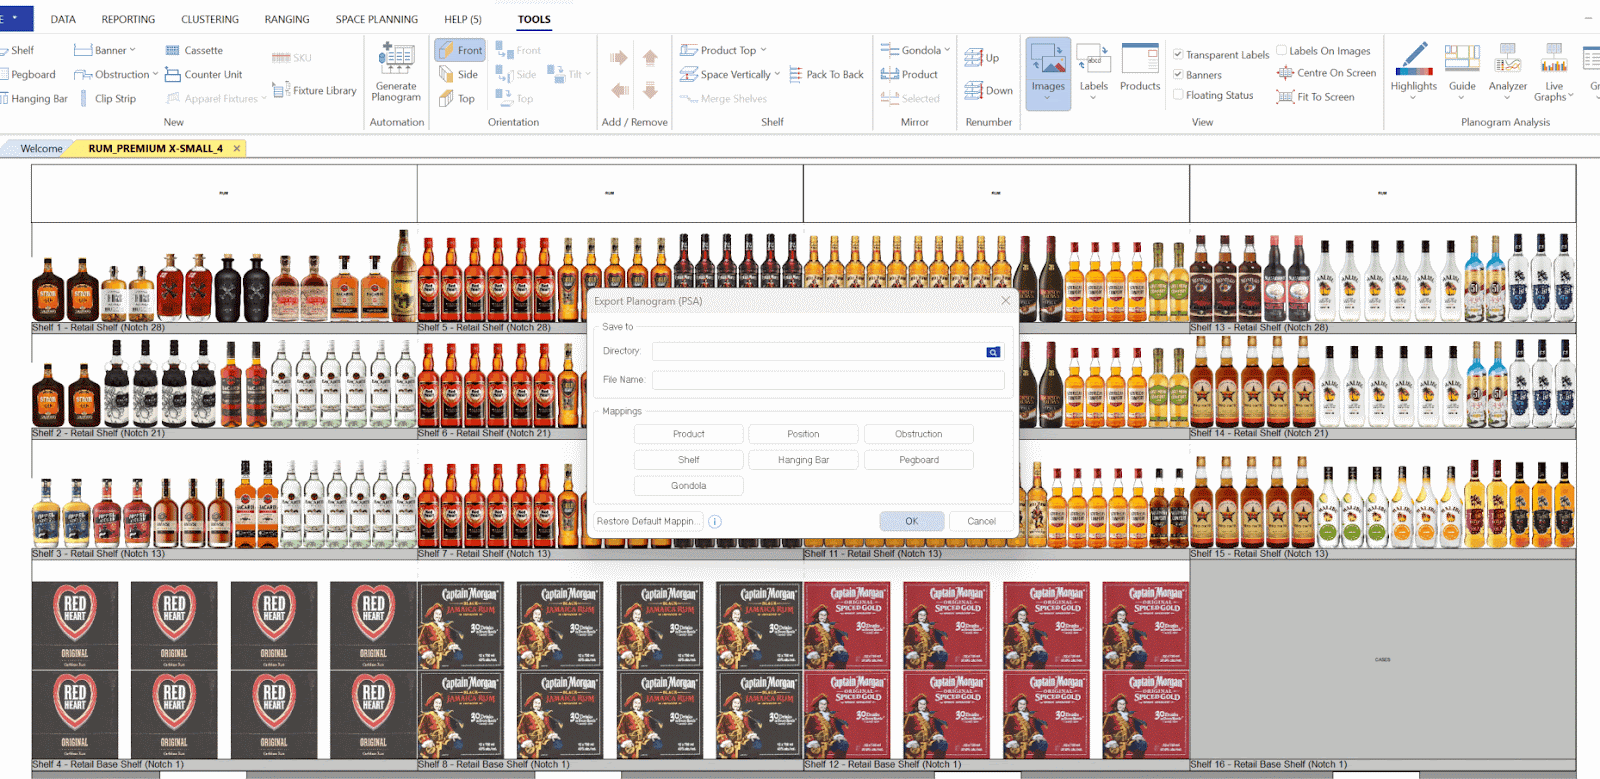
Once set, you can begin mapping. As with importing, you can choose from the same list of mappings for the exported file.
For this example, we will click on the ‘Position’ tab. In the ‘Gondola Map’ window that appears, drag and drop the field that you want to map from the ‘Product Fields’ section to the respective field in the ‘Mapped’ section.
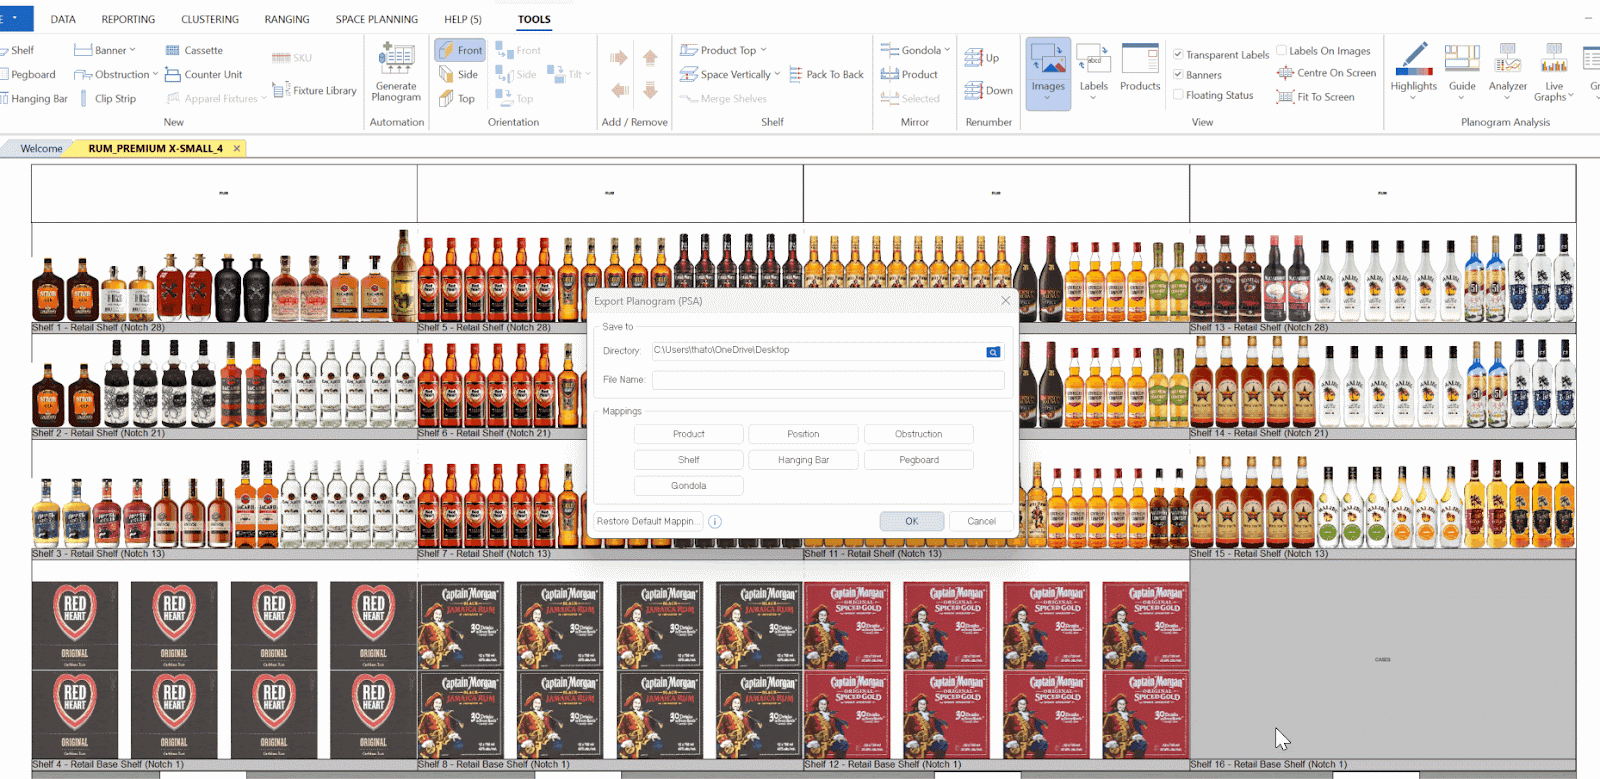
Once you’ve mapped all your fields, click ‘OK’ and then ‘OK’ again to export your file.
Planogram Conversion via Batch
At DotActiv, we are able to convert Planograms in 2 ways, namely through the Space Planning Tab and Batch. We recommend that our staff use the Space Planning Tab when doing conversions. The only time the Batch convert option should be considered is if:
- Your mappings are set and saved as a default to your environment.
- You do conversions on a weekly basis
- You are converting 15 or more planograms and require them urgently
It is also worth noting that under this option you will not be able to adjust your mappings so please ensure that your mappings are correct.
Converting To FLP
As mentioned previously under this Tab, you will not be able to adjust your mappings.
With the DotActiv software open, go to ‘File’ and scroll down to ‘Batch’ and select ‘ICP to FLP’ or ‘PSA to FLP’
Once you have selected ‘ICP to FLP’ or ‘PSA to FLP’, a ‘Batch Convert From ‘ICP to FLP’ or ‘PSA to FLP’ window appears as seen below.

In this window, you must select ‘Add Files’ and then find the folder in which you have your files saved. Select the file, then ‘Open’, then specify the Output Directory. Click ‘OK’. A pop-up window will inform you that the conversion has been completed.

Converting From FLP
With the DotActiv software open, go to ‘File’ and scroll down to ‘Batch’ and select ‘FLP To ICP’ or ‘FLP to PSA’. For this example we will be using an FLP to PSA.

Once you have selected FLP to PSA, a ‘Batch Convert From FLP To ICP’ window appears as seen below.

In this window, you must select ‘Add Files’ and then find the folder in which you have your FLP. Select the FLP file, then ‘Open’, and then ‘OK’.

A pop-up window will inform you that the conversion has been completed.

Restoring Default Settings
When importing a PSA file there is an option to reset all current mappings to the default option. To do so, go to the ‘Space Planning’ tab, click ‘Import’ and select ‘PSA’ from the pop-up window, as seen below.

Once you have selected your PSA File, you can click the ‘Restore Default Mappings’ button at the bottom left of the window and select ‘Yes’. Please see the image below.

It is worth noting that selecting Restore Default Mappings will restore it to a generic version that the developer created. This may not be applicable to your environment, so please check the mappings to ensure your internal ID and Article Number are mapped as well as the rest of the mappings apply to your account.
Should the above steps not work for you, please create a support ticket and the DotActiv support team will assist you in uncovering the issue.