The purpose of this article is to help guide you on how to create, save and use planogram preset highlights while working in DotActiv software.
By using highlights, you can visually see product grouping and performance by using colour. This shows you how you have grouped products according to sub-category, brand, size or segment and you can quickly correct where wrong.
The highlight function in the DotActiv software also helps you organise, group and analyse planogram data. You can highlight the top/bottom sellers or the slow/fast movers which can help determine what products to remove from a range or add more facings. It can also help gain insight on which products to place both on a macro-level (floorplan) and micro-level (on the shelf).
Please note that setting up highlights are the same for both Floor Plans and Planograms. For more information on Creating Planogram Highlight Spectrums For Floor Plans, read this article.
Creating Planogram Preset Highlights
With a planogram open, navigate to the ‘Tools’ tab.

Please ensure that your images are turned off, as seen below. You can turn your images off by clicking on the ‘Images’ button found under the ‘Tools’ tab.

Next, click on the drop-down arrow under the ‘Highlights’ icon in the ‘Planogram Analysis’ section.

The drop-down menu has four options – ‘Highlights’, ‘Transfer’, ‘Transfer To All Open Planos’, and ‘View Legend’.

Click on ‘Highlights’, which opens the ‘Highlights’ window as seen below. You can also click on the ‘Highlights’ icon to open this window.
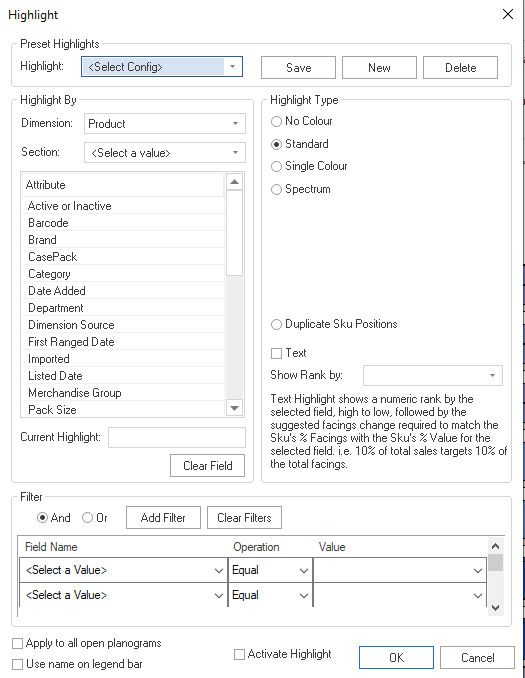
Next, decide how you want to highlight the products. For example, do you want to highlight by Brand, by Category, or by Sub-Category? This is done in the dimensions box.
For this example, we will choose ‘Products’ and under the ‘Section’ option, ‘Hierarchy’.
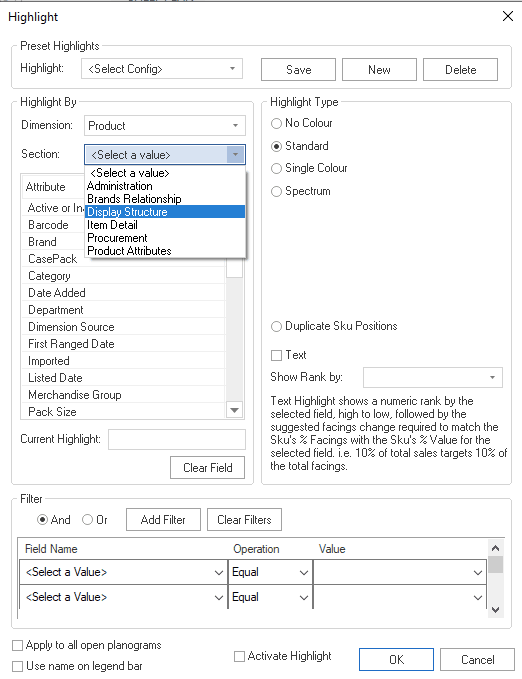
You can also choose to apply the highlight to all open planograms by ticking the ‘Apply to all open planograms’ box. In this case, it will apply the exact same generated colour set for all the open planograms.
The ‘Use name on legend bar’ will display the name of the highlight that you have set on the highlight legend.
If you would like to activate the highlight, tick the ‘Activate Highlight’ box.
Once done, choose Sub-category in the ‘Attributes’ window. Double-click on it.
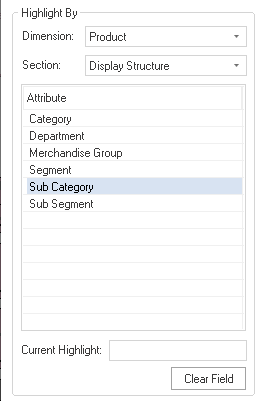
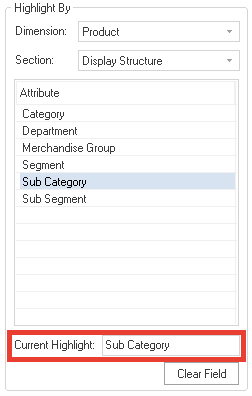
When you double-click on Sub-Category, you will see the current highlight will change to that.
Next, choose your type of highlight that you want to use.
There are four different highlight types – No Colour, Standard, Single Colour, and Spectrum.
For this example, we’ll choose ‘Standard’, which will highlight the products according to the Sub-Category.
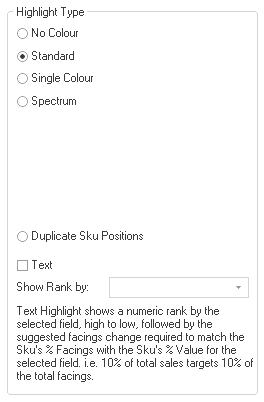
Click ‘Save’.
Your product will now be highlighted. To see what each colour indicates, click on the drop-down arrow under the ‘Highlights’ icon and click on ‘View Legend’.
Doing so opens a dockable window above your planogram where you can see what each colour indicates.
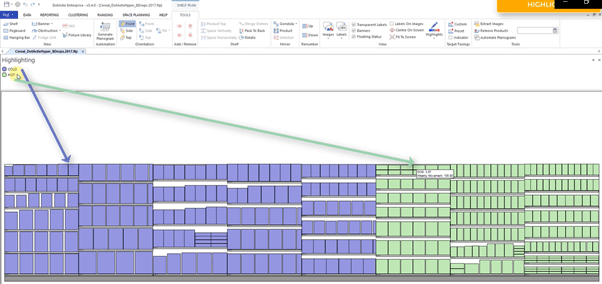
Use highlights when you begin a planogram to ensure the flow of your Sub-Category, Brand, Size, and Segment is correct. When you add new products to an existing planogram, this will also help you place the products in the correct area.
