The purpose of this article is to provide you with a step-by-step guide to setting up and changing the orientation of product caps as well as using the nesting function. We also highlight the reason for using product caps as well as the benefits.
What Are Product Caps?
A product cap allows a space planner to stack a product above or below a front-facing product. Product caps are used to optimise available shelf space by placing products on a top orientation.
When an item is laid on top of another item in a different orientation, it’s called a layover.
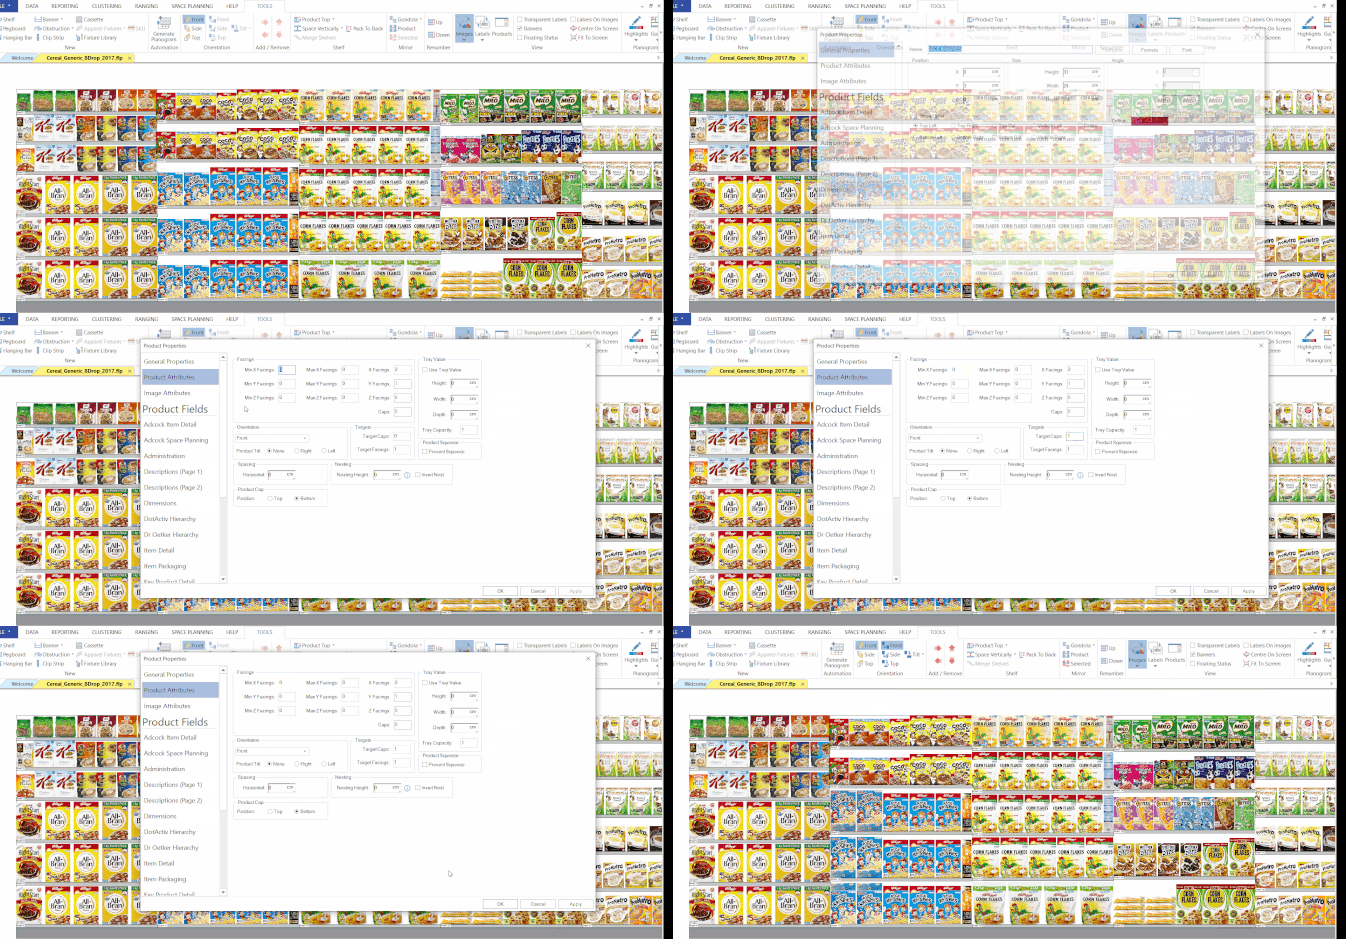
In the image below, we have placed product caps underneath (or at the bottom) of the first two Rice Krispies boxes.
Benefits of Product Caps
Product caps benefit retailers by increasing the days of supply – the amount of time it takes to sell a product on the shelf. This allows merchandisers to replenish shelves less often. It also provides a more pleasant shopping experience for your customers.
You can also use product caps to manage the expiry dates of your products. It is common industry practice to place products that expire first at the front of the shelf so shoppers purchase them first.
You can only use product caps for solid, regular-shaped products such as cereal boxes as you can stack them on top of each other.
You should not use caps to merchandise products such as chips and canned vegetables.
Setting Up Product Caps
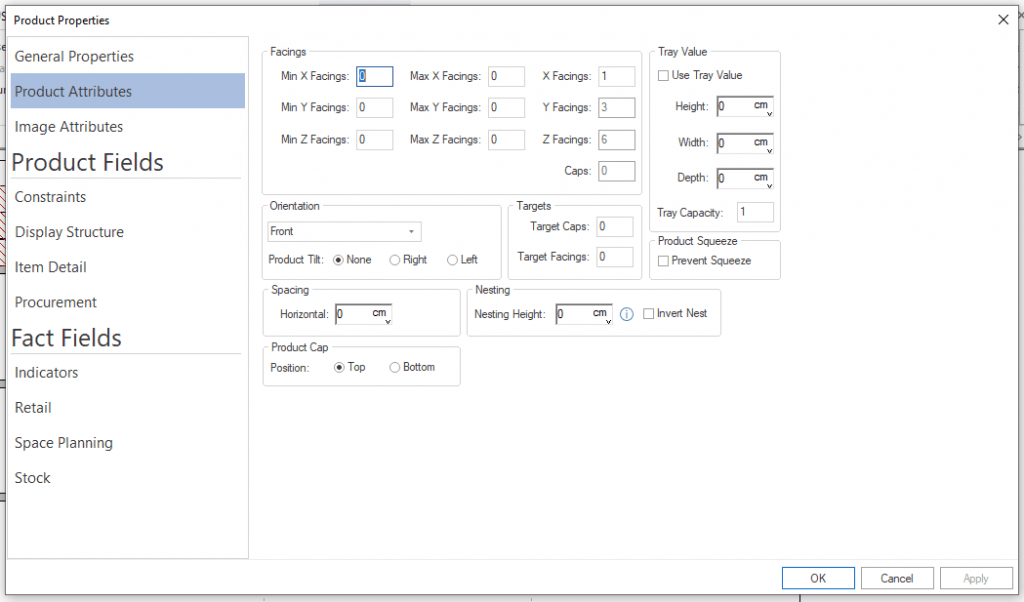
To add a product cap, first, double click on your chosen product on your gondola and select ‘Product Attributes’ from the ‘Product Properties’ window that opens.

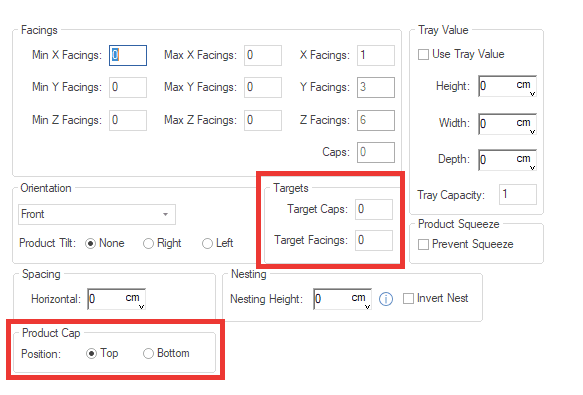
Next, change your Target caps to the desired number. Also, select whether you want the cap to appear at the top or bottom of the product.

Changing The Orientation Of Product Caps
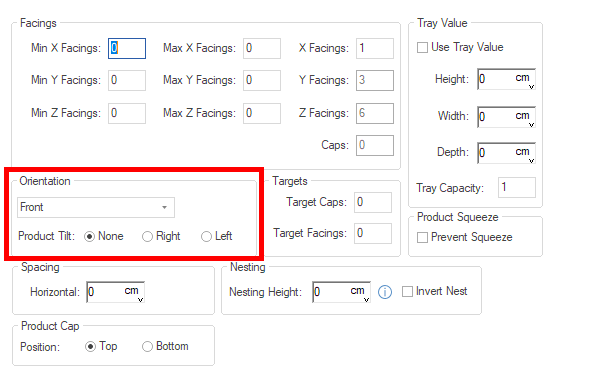
To change the orientation of your product caps, first, click on the drop-down menu in the ‘Orientation’ section.

Here, you have a choice between ‘Front’, ‘Side’ and ‘Top’. You can choose to tilt your product to the right or left. If you don’t want to tilt your product, select ‘None’.

Select ‘Apply’ and ‘OK’ to confirm your changes.
Once the cap has been added, you can adjust the orientation of the cap by right-clicking on the product and then selecting the cap position.
Below is an example of a top facing cap.
Caps can only be placed above or below a front-facing product.
How To Use The Nesting Function
Nesting is used for items that are placed within one another, like bowls, for example.
In the example below, we used frozen vegetable packets. The nesting function comes in handy here because there is a lot of empty packet space in these products and you can fit more product into the gaps and thereby optimize space.
If you would like to make use of this function, you can do so by simply double-clicking on the product you want to nest. The ‘Product Properties’ window will pop-up. In this window, navigate to the ‘Product Attributes’ tab, then type in the nesting height you want.
In the example below, the measurement is the number of cm’s the product goes into itself. You will also notice how the frozen chips are nested in the example below. This allows you to pack more products on the shelf and gives your planogram a neater look.
By selecting “Invert Nest” it will nest the product on the top of your front-facing, as indicated in the image below.
Should the above steps not work for you, please create a support ticket and DotActiv support will assist you in uncovering the issue.
