This article will explain how to transfer data to and from a database to a planogram, between a CSV and a planogram as well as between a CSV and a database using the DotActiv software.
Database to Shelf Plan
It is important to ensure that your product drill is set up according to your hierarchy.
Steps To Transfer Data From A Database To A Shelf Plan
Firstly, go to ‘File’, ‘Setup’, and then ‘Product Drill’.
The ‘Product Drill Setup’ window will open where you can then select the fields that you wish to display.
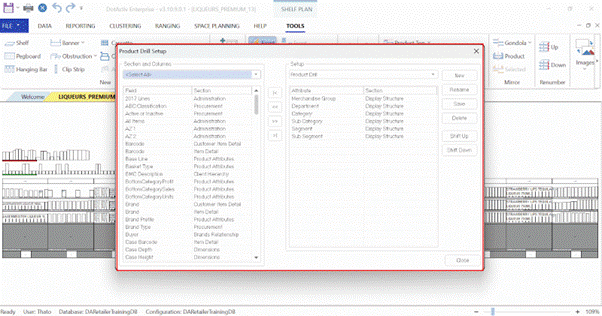
Click on a section from the drop-down menu under the ‘Section and Columns’ tab and select the fields within that section that you wish to include.
Click on the field and then click on the arrows to move it to the ‘Setup’ tab on the right-hand side of the window. You can also change the sequence in which these fields are displayed by choosing ‘Shift Up’ or ‘Shift Down’.
Fields organised under ‘Setup’ are exactly how your Product Drill will be displayed when opening it so it’s important that it reflects your category/product hierarchy.
When you are done setting up your Product Drill, click on ‘Save’ and name it.
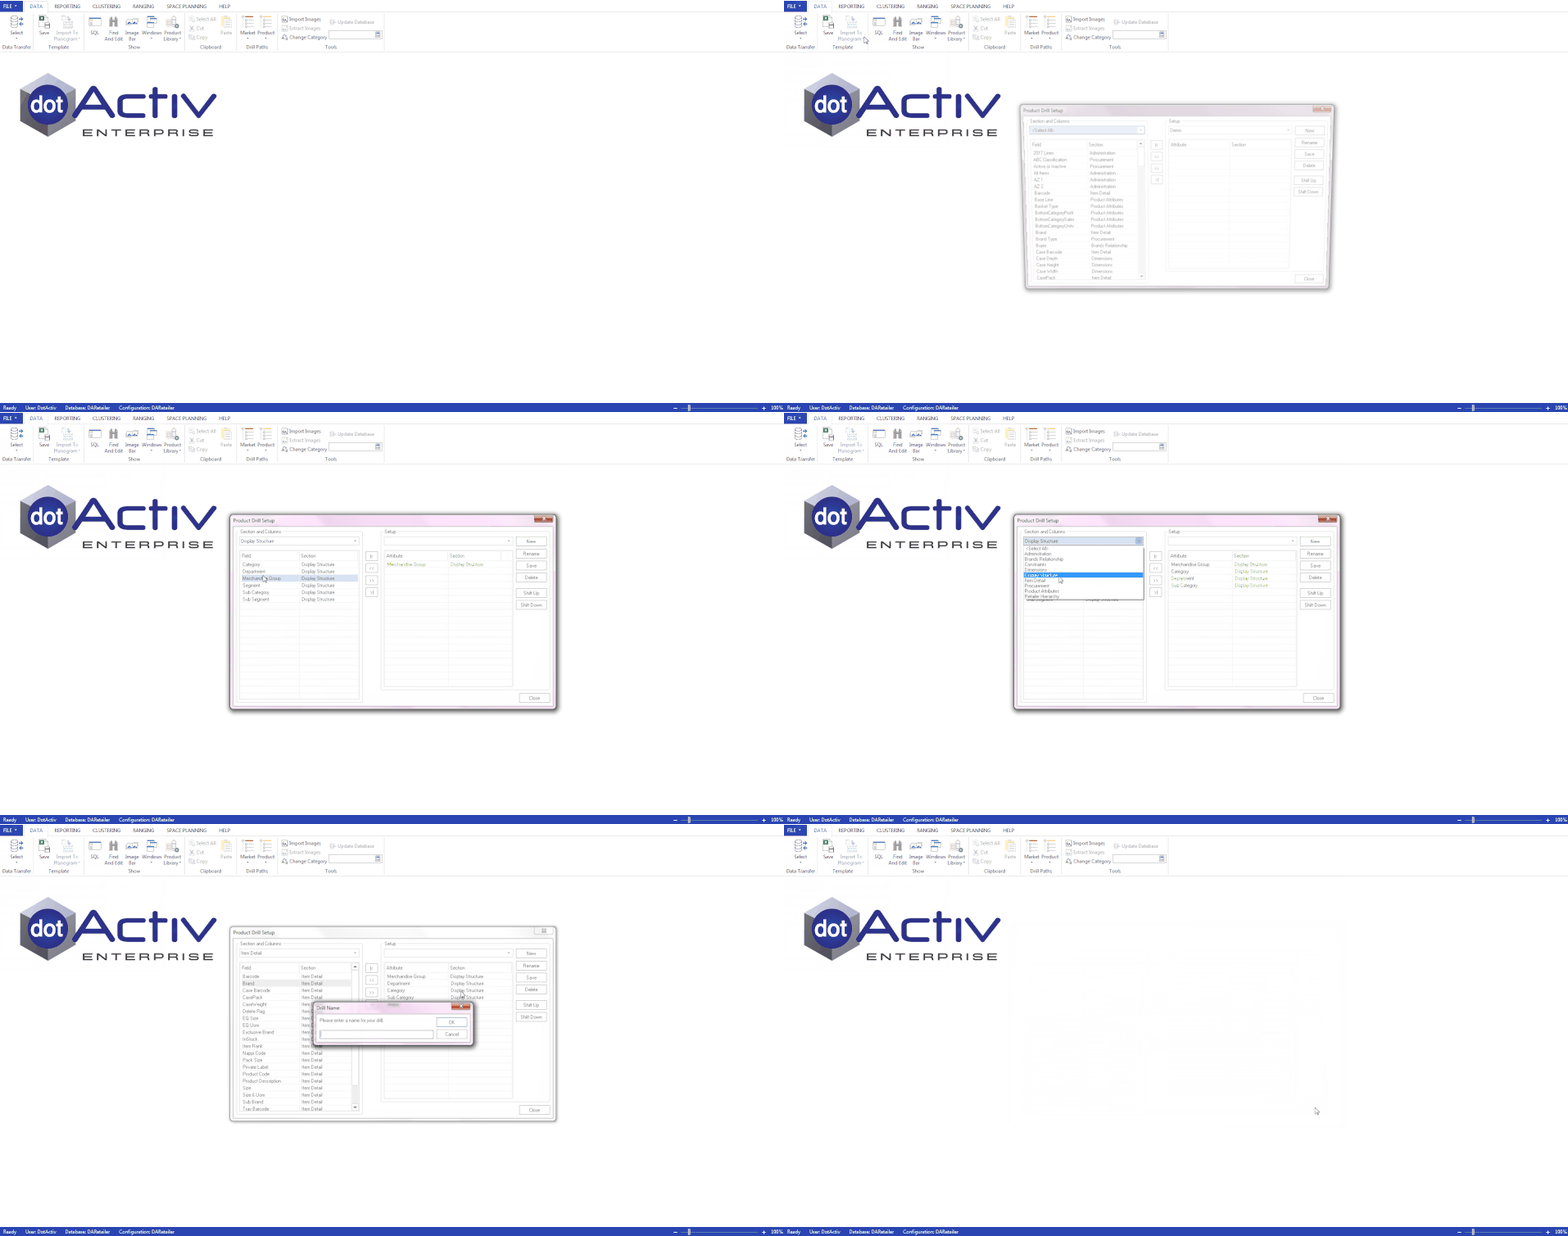
You can now select your saved Product Drill from the Product Drill menu. You can do this by going to the ‘Data’ tab and selecting the ‘Product’ icon.

You are now ready to import data from the database to a planogram. Open a new or existing planogram that you wish to populate or update with data from the database.
Still, in the ‘Data’ tab, you can now click on ‘SQL’ to open it. Click on ‘Product’ to display the product drill you just created.
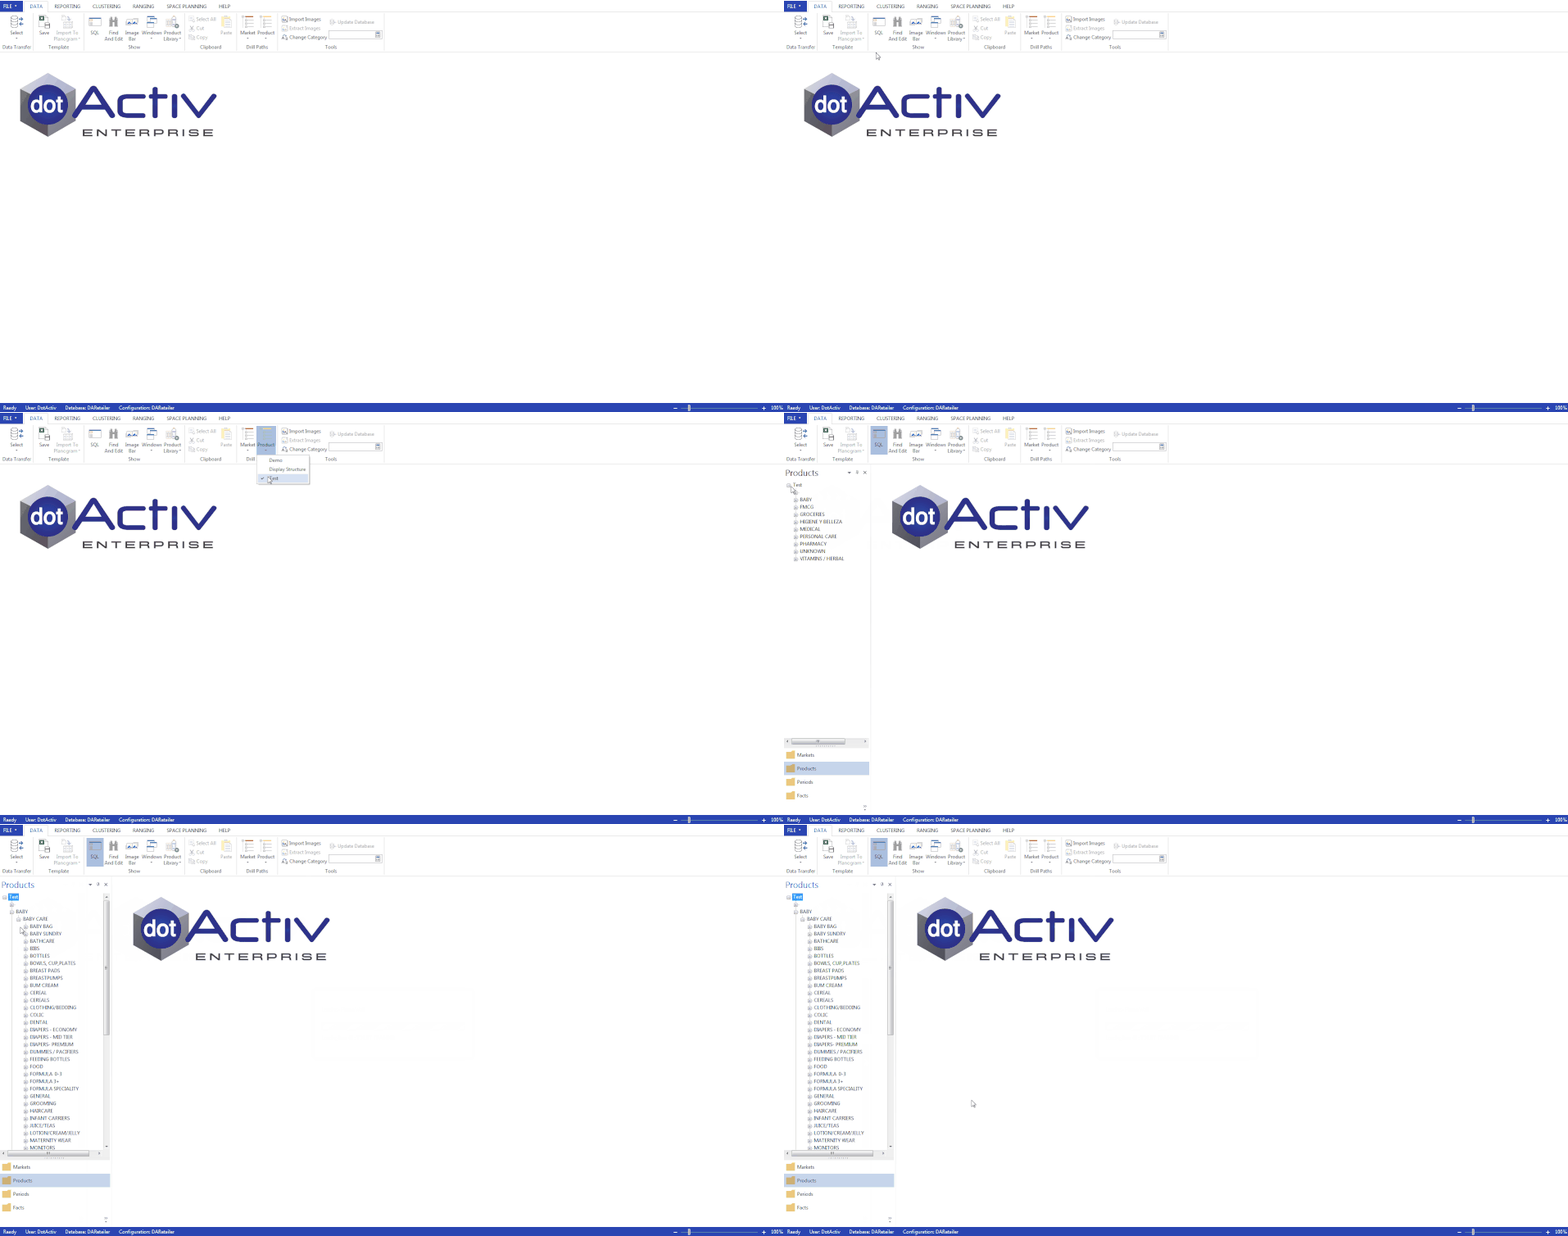
To import data onto the planogram, drill down into the appropriate filter level in the SQL view and then click and drag the relevant category, sub-category, segment etc. onto the planogram.
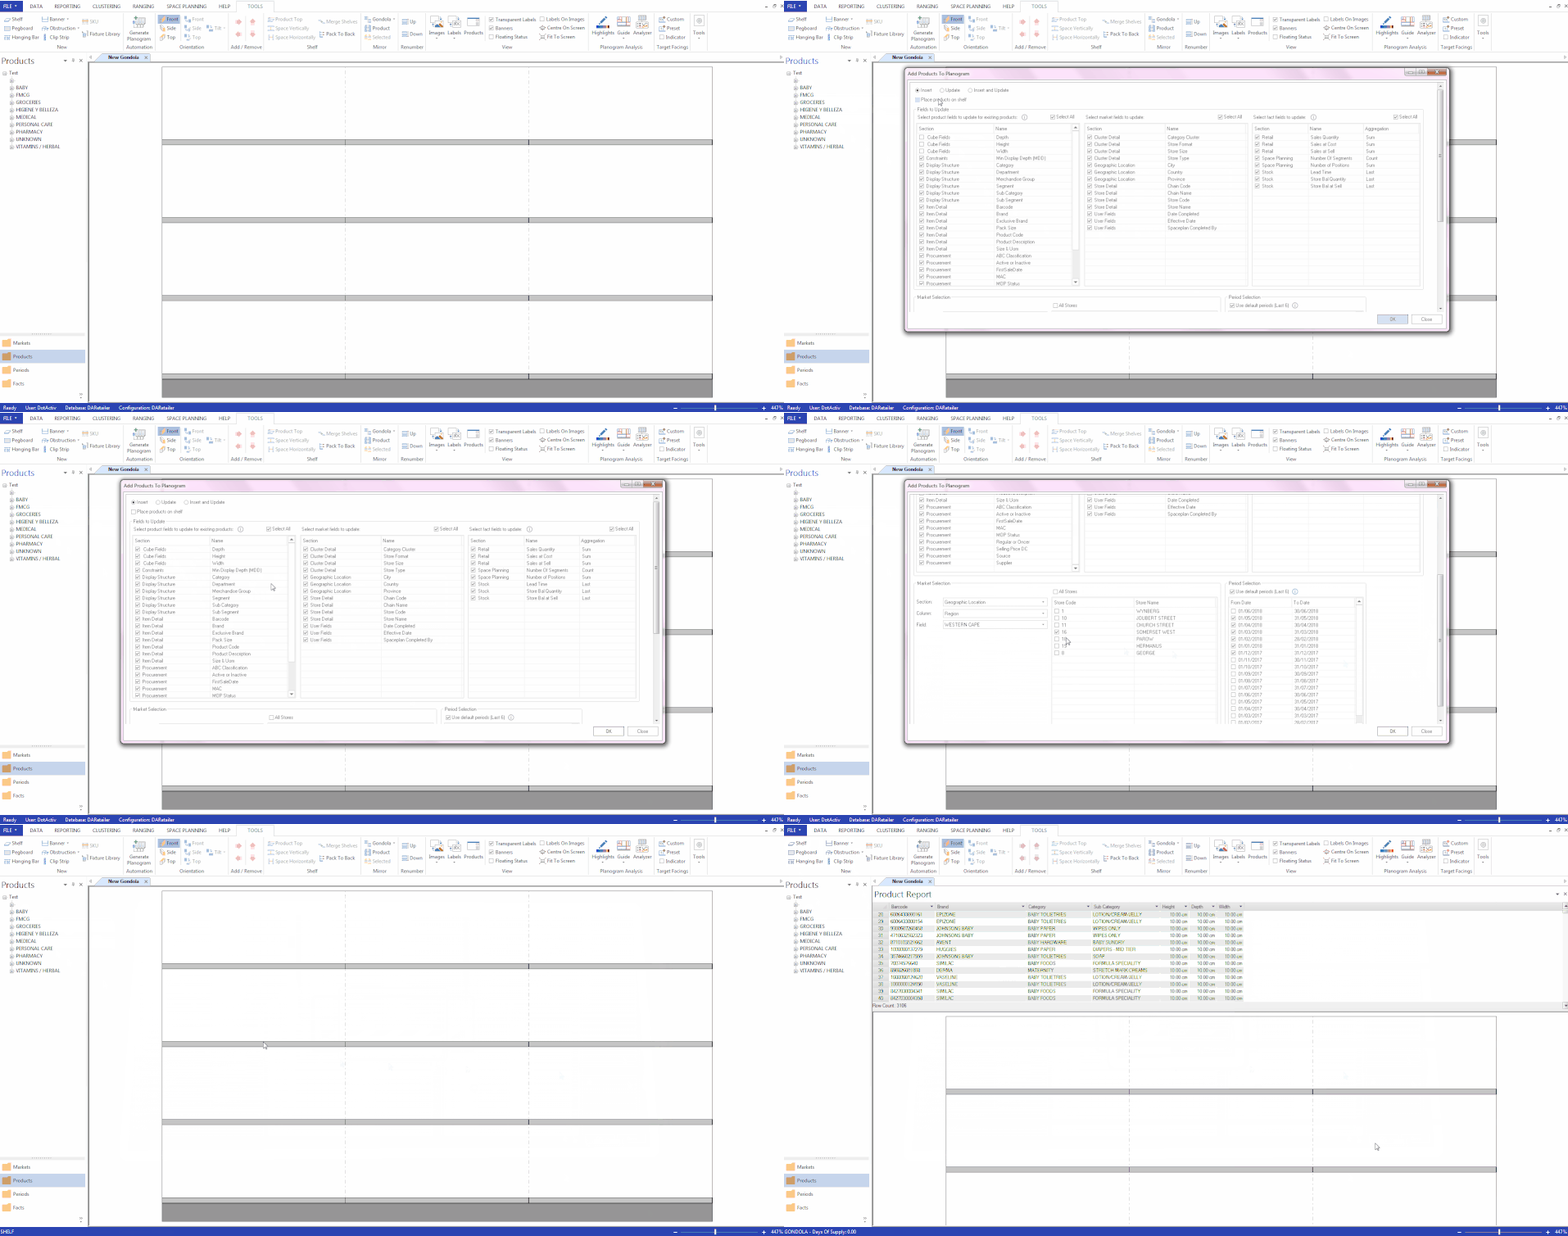
The ‘Add Products to Planogram’ window should now appear.

You will now need to choose whether you want to ‘Insert’, ‘Update’ or ‘Insert and Update’ the data onto the planogram. Below is a short explanation of each.
- Insert: Where the data is completely new and you wish to populate a new planogram with it, or, in the case of an existing planogram, new data such as new product lines that have been added.
- Update: Where you only wish to update existing data such as pulling through new sales data.
- Insert and Update: This is a combination of the above mentioned. By selecting this option, any new data will be added but all existing data will also be updated with new sales data for example.
You will then notice a checkbox – ‘Place Products On Shelf’ – that allows you to select or deselect the option to place products on a shelf. Should you wish to have all new lines imported/added to a shelf, you would select this box.
If you’d prefer that all new lines appear in the product report, do not tick this box.
Whichever shelf you chose to place the category/sub-category from the product drill on, will be the shelf where new products appear.
Next is the ‘Fields to Update’ window. In this window, there are multiple ‘Product’, ‘Market’, and ‘Fact’ fields that you can select to update.

When you scroll down this window, you will see the following fields that you need to select that would apply specifically to your planogram.
- Market Selection: The information pertaining to the geographic location as well as selecting any specific stores.
- Period Selection: You will have the option to default your selection to the most recent six months data on the database. You can also select the periods that you wish to pull data.

Please note that if you would like to refresh a planogram with more than one store’s worth of data, you will be presented with a pop-up. This pop-up alerts the user that the market fields (store detail) will not be updated. In essence, this only means that the store detail fields on the planogram will only reflect one store rather than all that was selected.
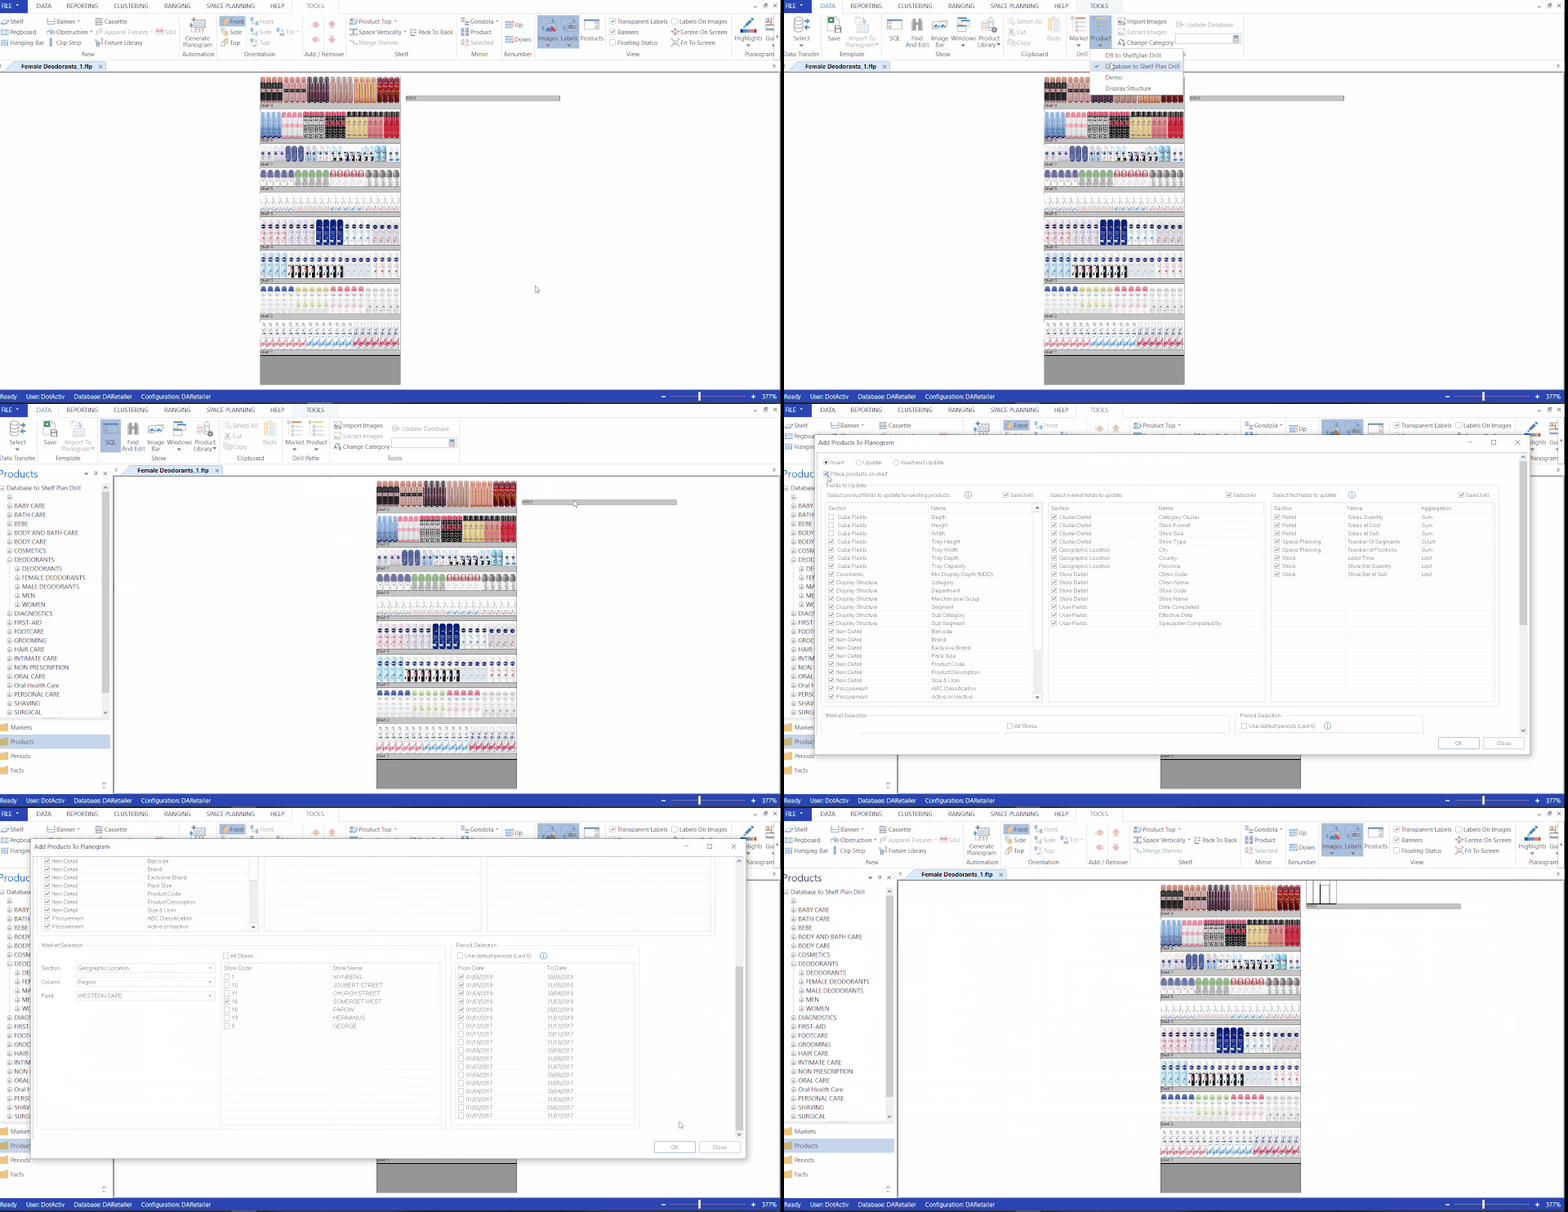
Below is an example of the process when importing data from a database to a planogram. In this particular example, we’ve chosen to ‘Insert Only’ so the new products appear on the floating shelf.
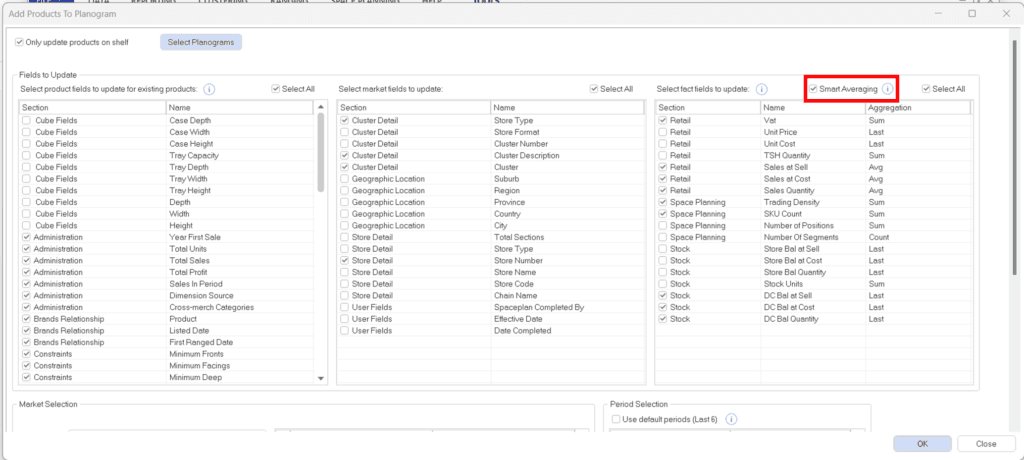
‘Smart Averaging’ can be used to populate planogram data specific to products, stores and the overall planogram. ‘Smart Averaging’ is a feature that populates a smart value for different fact fields, these include Sales, Units and Profit for example. The ‘Smart Averaging’ feature will provide the correct average data for the product for all fact fields influenced based on the specific store or cluster. This will assist in calculating the correct DOS and other space planning fields calculated based on the fact fields.
To make use of the ‘Smart Averaging’ feature select the ‘Smart Average’ tickbox displayed below.
You can now click ‘OK’ and a pop-up window will appear confirming that the planogram was updated successfully.
In the second example below, the planogram is updated using ‘Insert and Update’, without selecting the ‘Place Products On Shelf’ function.
Shelf Plan To Database
The second method of data transfer is from a shelf plan/planogram to a database. This is useful if you have changed data on the planogram such as the height, width, and depth of a product and you wish to now import this data into the database.
All data as it is in the Product Report will be imported into the database.
Steps To Transfer Data From A Shelf Plan To A Database
Firstly, open the DotActiv application and under the ‘Data’ tab, click on ‘Select’ in the ‘Data Transfer’ section and choose ‘Shelf Plan to Database’.
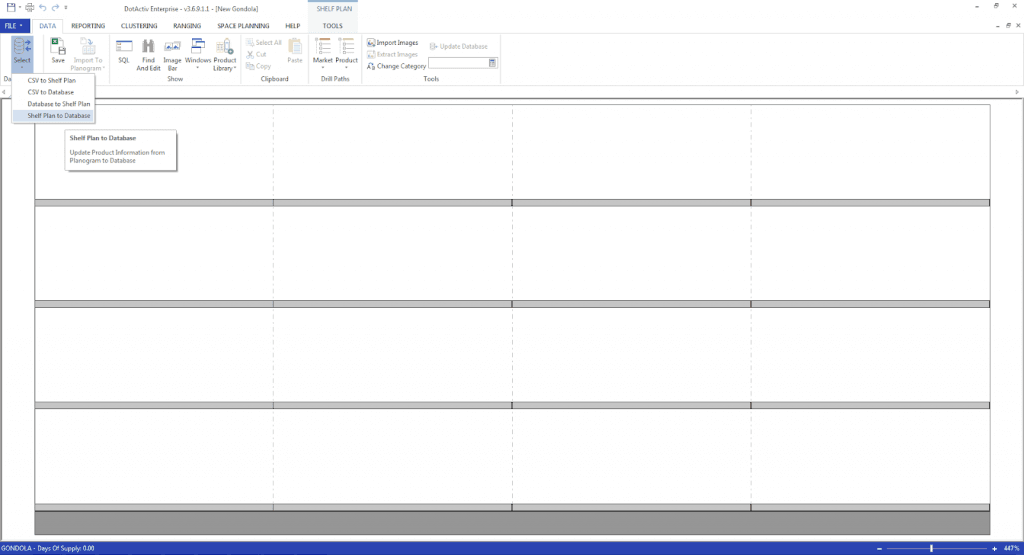
The ‘Update-Database’ window will then open where you can map the planogram fields to the corresponding database fields. Alternatively, you can choose to have the fields automap by clicking on the ‘Auto Map’ button at the bottom left of the window.
Once again, you can select whether you only wish to update existing data in the database, insert completely new data, or both.
The window below will appear when the update is complete.
CSV To Database
Sometimes you might need to import data from a CSV file to the database.
Steps To Transfer Data From A CSV To Database
Firstly, open the DotActiv application, and under the ‘Data’ tab, click on ‘Select’ in the ‘Data Transfer’ section and choose ‘CSV to Database’.
Alternatively, you can drag and drop the CSV file into the DotActiv application upon which the ‘Import’ window will open.
As seen in the gif below, the CSV file was saved onto the user’s desktop and dragged and dropped into the DotActiv application.
Map the fields from the CSV file displayed at the top to the correct fields available from the database on the bottom half of the window or alternatively, choose ‘Auto Map’.
You can also apply ‘Filters’, as seen in the gif below.
When all Market and Product fields have been correctly mapped and you have added filters should you wish to do so, select ‘Import’ and choose whether to only Update or Insert the data, or both. The data will now be imported into the database.
CSV to Shelf Plan
Transferring data from a CSV into a shelf plan/planogram is very similar to transferring data from a CSV to the database.
Please note that a gondola must be created first to be able to import data to a shelf plan. If you have not created a gondola, this option will be greyed out in the software.
Steps To Transfer Data From A CSV To A Shelf Plan
To follow this method of data transfer, click on ‘Select’ once again in the ‘Data Transfer’ section under the ‘Data’ tab and choose ‘CSV to Shelf Plan’.
Clicking on it opens the ‘Import’ window. Alternatively, you can also drag and drop the CSV file into the DotActiv application to open the window.
Like before, the fields in the CSV must be mapped manually to the corresponding fields or by clicking ‘Auto Map’.
In this instance, however, you can also map Fact and Period data in addition to Market and Product. Remember to indicate the Key Product and Key Market field.
Click on ‘Import’ and then choose whether you want to Update, Insert or Update and Insert the data onto the shelf plan/planogram.
Alternatively, you can also import a CSV to a shelf plan by using the ‘Import To Planogram’ button. Read more about how to use this method in this article.
Shelf Plan To CSV
If you have data on your shelf plan/planogram and you wish to export it to a CSV file you can easily export this by using the Product Report and saving it from there.
Steps To Transfer Data From A Shelf Plan To A CSV
Open the Product Report and right-click on the top left-hand corner of the grid and select ‘Save Grid’. Then select ‘CSV’.
A window will open prompting you to select where you would like the file to be saved. Make your selection and click on ‘Save’.
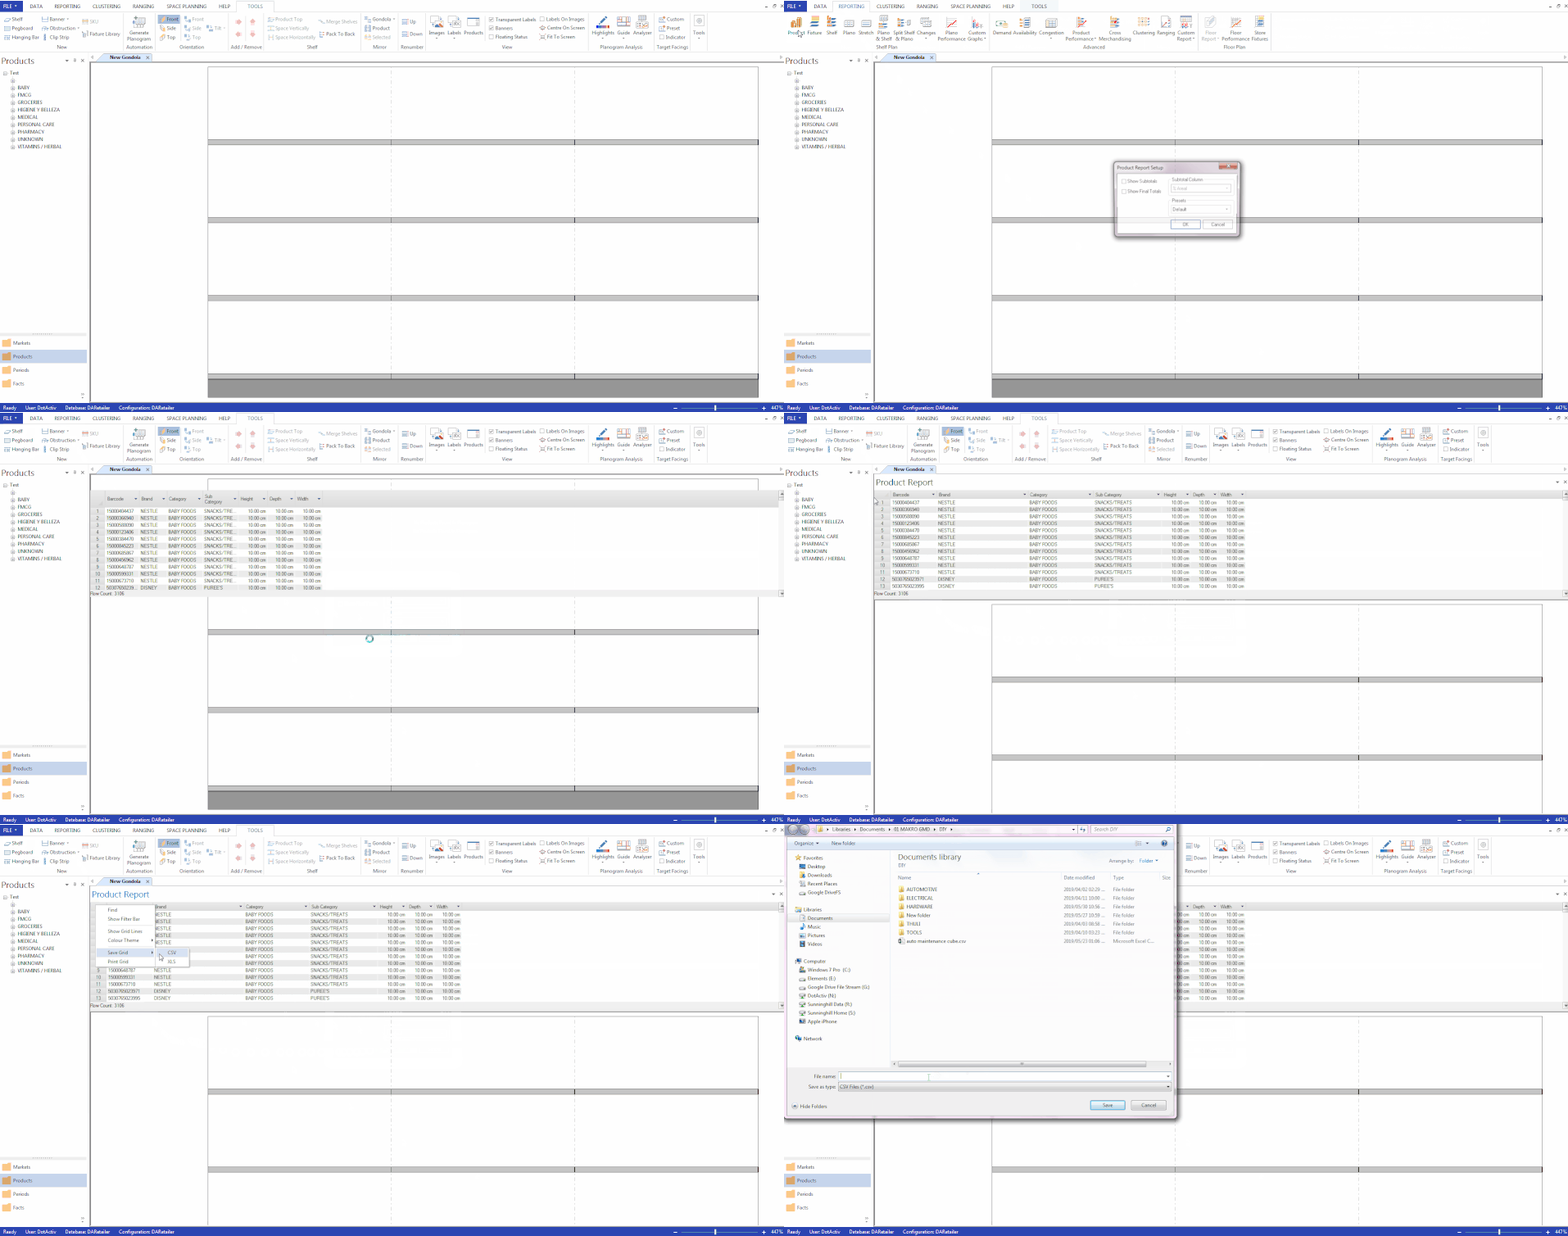
The CSV file is now saved on your computer and is ready to use.
Database To CSV
The last method of data transfer which can be used is the transfer from the database to a CSV.
Please note that if you would like to export sales data it would have to be done via a Data Cube. You can read more about how to do this in this article here.
Steps To Transfer Data From A Database To A CSV
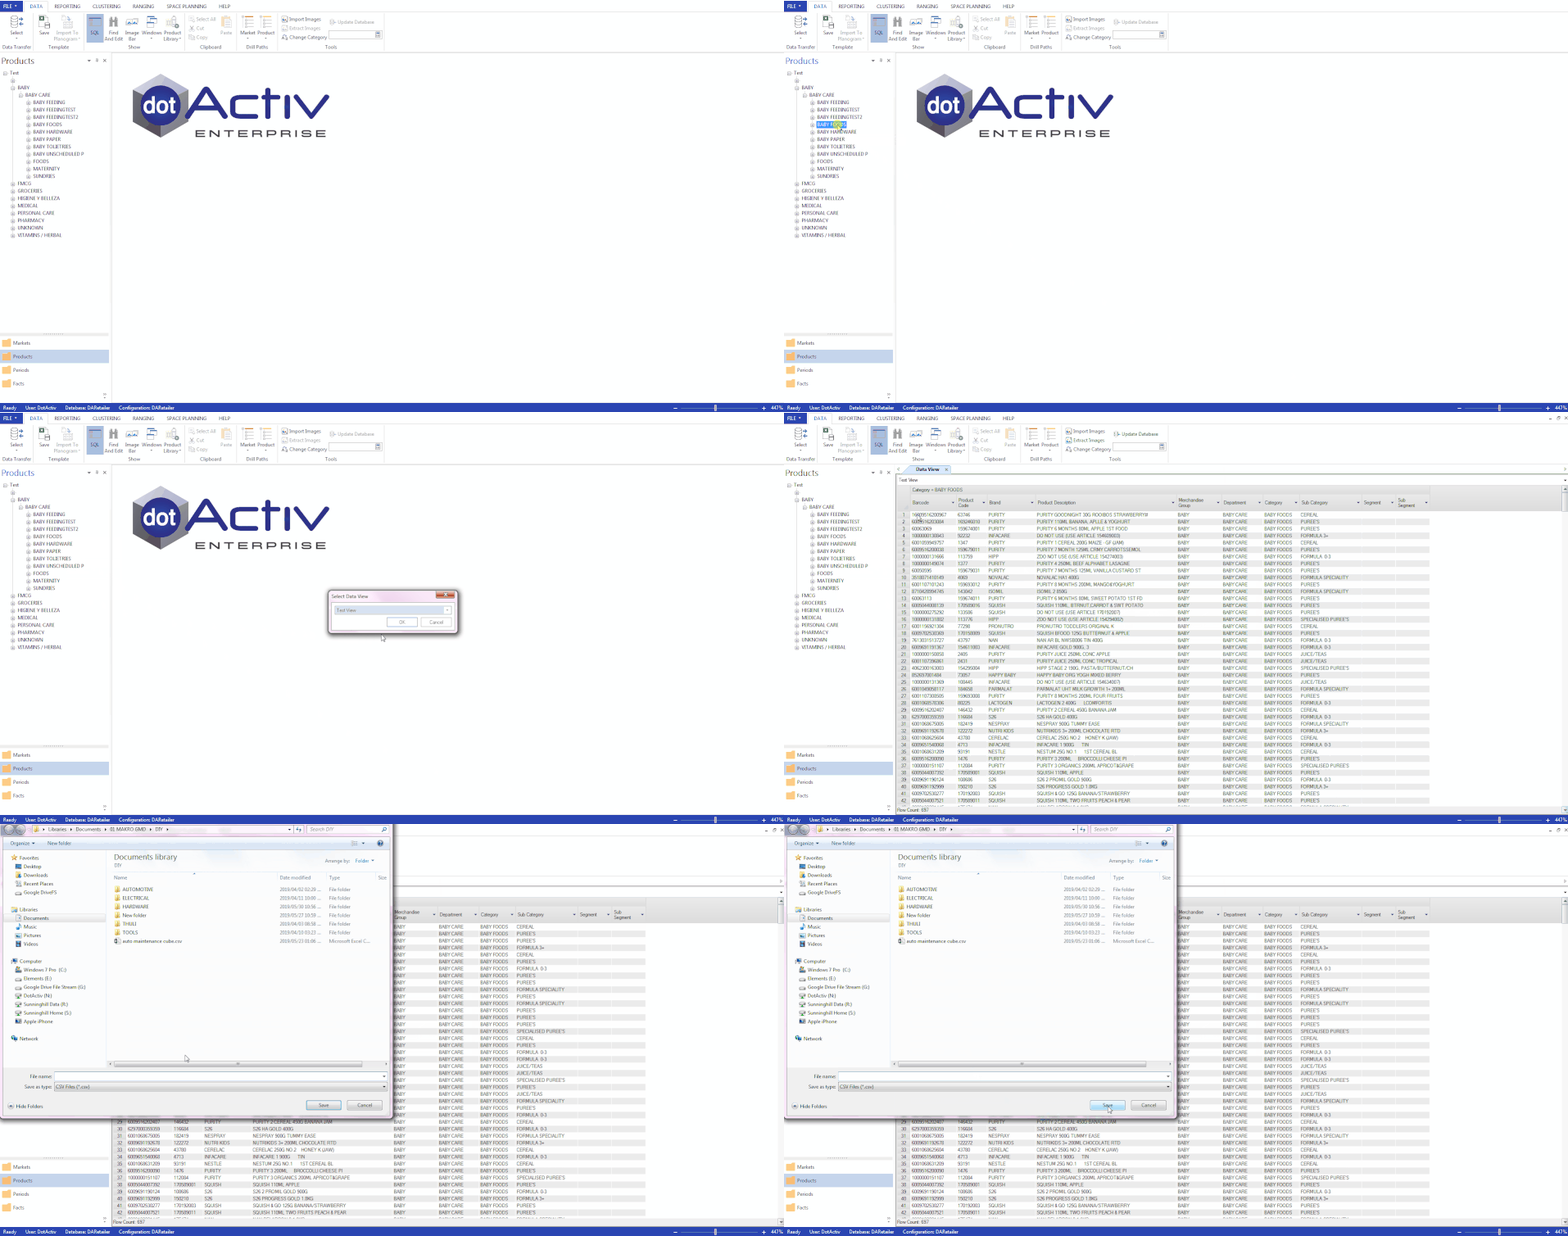
Open a specific department, category, brand etc. from the SQL database and click on the top left-hand corner. Just like before, click on ‘Save Grid’.
This time, CSV is the default file format so there is no need to select it.
Select where on your computer you wish to save the file and you’re good to go.
Once you have a thorough understanding of the various methods of data transfer, you will easily be able to use the DotActiv software to meet all your data transfer needs due to its versatility and ease of use.
