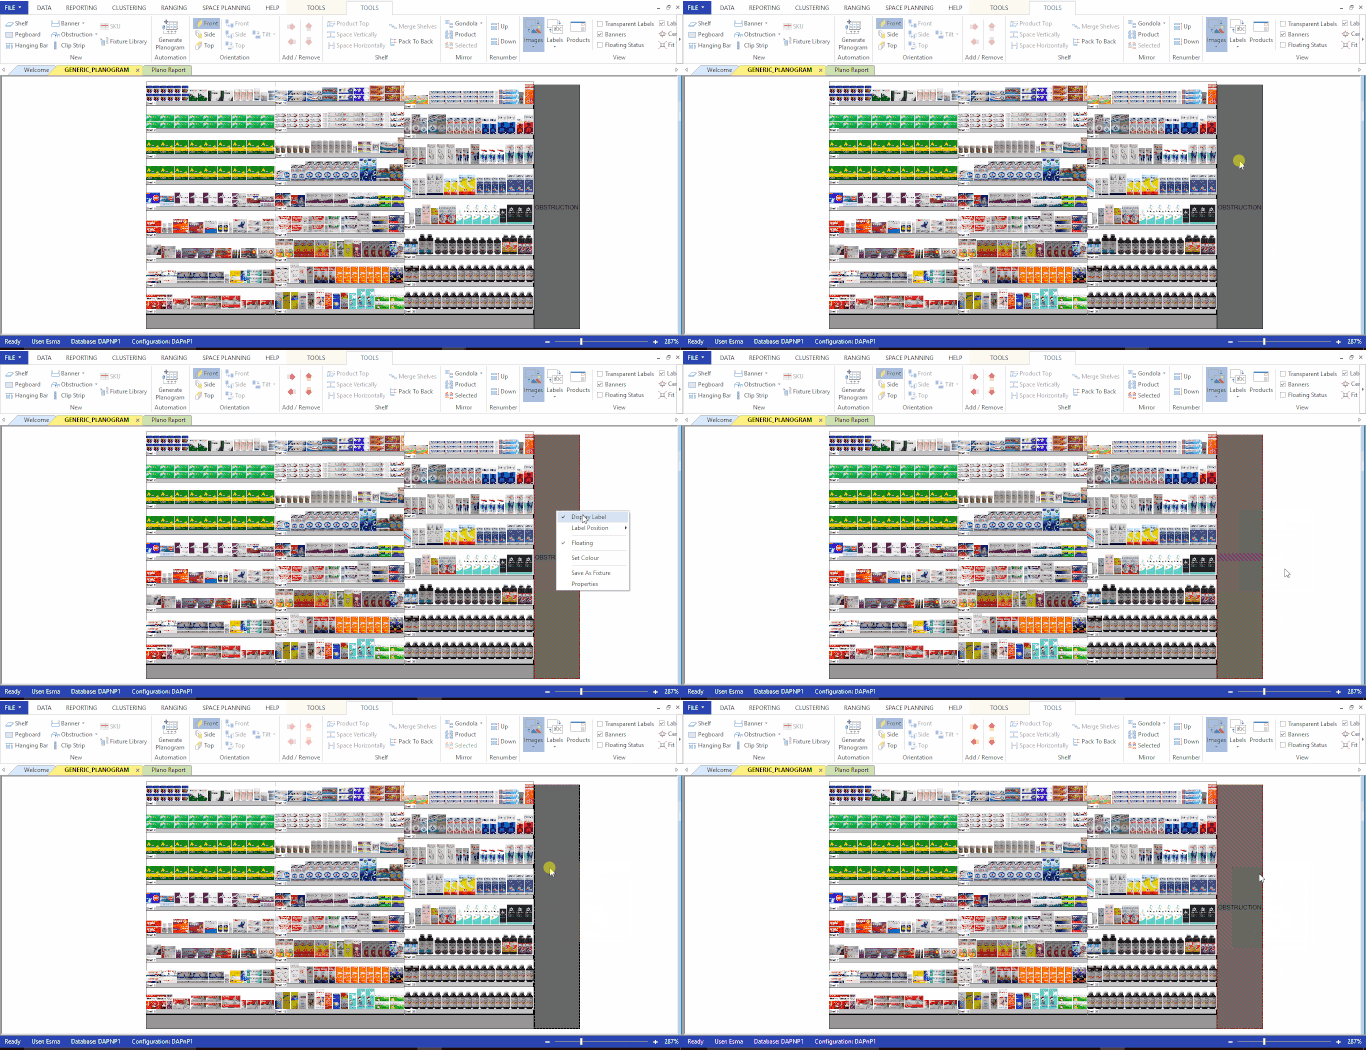
The purpose of this article is to explain how you can work with labels in the DotActiv software. That includes how to switch labels on and off, how to set transparent labels and how to show border lines around gondola labels.
Switching Different Labels On And Off
First, select a product, fixture, banner or obstruction on your planogram.
Next, right-click on the object and click on ‘Display Label’ from the context menu that pops up.
In the context menu, the tick on the left-hand side of the ‘Display Label’ will indicate if the labels are switched on or off.

If this has been switched on, click on ‘Display Label’ again to switch it off.
Setting Up Transparent Labels And Labels On Images
It is easy to get confused when your planogram has a lot of product images or when the images are not shown. Using labels helps. Within the DotActiv application, there are many popular labels, including product barcodes, descriptions, brands and facts like Days of Supply.
Setting Up Labels
First, select and double-click any product on your planogram to access the ‘Product Properties’ window. In the ‘General Properties’ section of the ‘Product Properties’ window, you can choose a name for your product label.

Next, click on the ‘Formula’ button to edit your product algorithm according to your project requirements.
For this example, we would like to show ‘Product Description’. This can be found under ‘Item Detail’ in the ‘Edit Algorithm’ window that pops up.

For this example, we would like to show ‘Product Description’. This can be found under ‘Product’ and then ‘Item Detail’ in the ‘Edit Algorithm’ window that pops up. This is what your ‘Product Description’ algorithm should look as follows:
[Product.Item Detail.Product Description]
Another common example would be to display a product’s ‘Category’ as the label. This can be found under ‘Product’ and then ‘Display Structure’ in the ‘Edit Algorithm’ window that pops up. This is what your ‘Category’ algorithm should look as follows:
[Product.Display Structure.Category]
If you would like to change your label algorithm please ensure that you remove the current algorithm as it will add whatever you have selected to the current algorithm. After you are satisfied with your selection you can click on ‘Ok’ and ‘Apply’ to apply the changed algorithm settings.

Ensure that the selected algorithm is active before selecting ‘OK’.
If some individual products on your planogram are not displaying their labels you can double-click on the product to bring up the ‘Product Properties’ pop-up window. In the ‘General Properties’ tab please ensure that the ‘Show Label’ checkbox is checked for that product’s label to be enabled. Here you can also choose your desired positioning of the label on the product.

Once you have set up your labels, you have the option of changing or adjusting the Font, Font Style, and Font Size. You can read more on how to change your fonts in the DotActiv application in this article.
Setting Up Gondola Labels For Floor Plans
Gondola Labels
When setting up labels for a floor plan, you can choose to show the relevant gondolas label. A gondola label can be set up by double-clicking on the specific gondola that is on your floor plan. The ‘Gondola Properties’ window will pop up.
Navigate to the ‘General Properties’ section and click on the ‘Formula’ button. Once you have done this the ‘Edit Algorithm’ window, as seen below, will appear. You can find ‘File Functions’ on the right-hand side of the window.
Next, expand the Tree Diagram (+) and double-click on the file function that you prefer i.e. ‘GetPlanoCategory()’, as seen below.

Once this is done, you can click ‘OK’ and your gondola label will be updated.
Gondola Block Number Labels
If you would like to show the relevant gondola block number within the Gondolas label, you can also do so by double-clicking on the Gondola. The ‘Gondola Properties’ window will pop up.
Navigate to the ‘General Properties’ section and click on the ‘Formula’ button. Once you have done this the ‘Edit Algorithm’ window, as seen below, will appear. You can find ‘Floor Planning’ on the right-hand side of the window.
Next, expand the Tree Diagram (+) and double click on ‘GetBlockNumber()’.
Once this is done, you will notice that this is added to the formula as seen in the bottom left corner of the image below.
Lastly, click ‘OK’ to display your gondola block numbers within your gondola label.
Setting Up Transparent Labels
Once you’ve set up the label, navigate to the ‘Tools’ tab and ensure that the box named ‘Labels On Images’ is ticked.

When ticking the ‘Transparent Labels’ box, as shown above on the left, it ensures your labels are see-through.
Showing Borders Around Gondola Labels
After opening a floor plan, ensure that you are in the ‘Tools’ tab. Under the ‘View’ section, you can find ‘Label Borders’ with a checkbox beside it.
Please note that only DotActiv Enterprise users have access to the floor planning function.
Selecting ‘Label Borders’, puts a border around your gondola labels. Leave the checkbox unticked if you don’t want borders.

Turning border labels on and off within the DotActiv application is simple and convenient.
Should the above steps not work for you, please create a support ticket and the DotActiv support team will assist you in uncovering the issue.
