The purpose of this article is to explain how to open and use the Fixture Report as well as the Product Report in the DotActiv software.
The reports listed in this article can be exported or printed to PDF. If you would like to know how to export or print the following reports, read this article here.
Accessing The Fixture Report
With your planogram open, ensure you are in the ‘Reporting’ tab. Once there, find the ‘Fixture’ icon in the ‘Shelf Plan’ section.
Clicking on it opens up your ‘Fixture Report’ in a dockable window beneath your planogram as seen below.
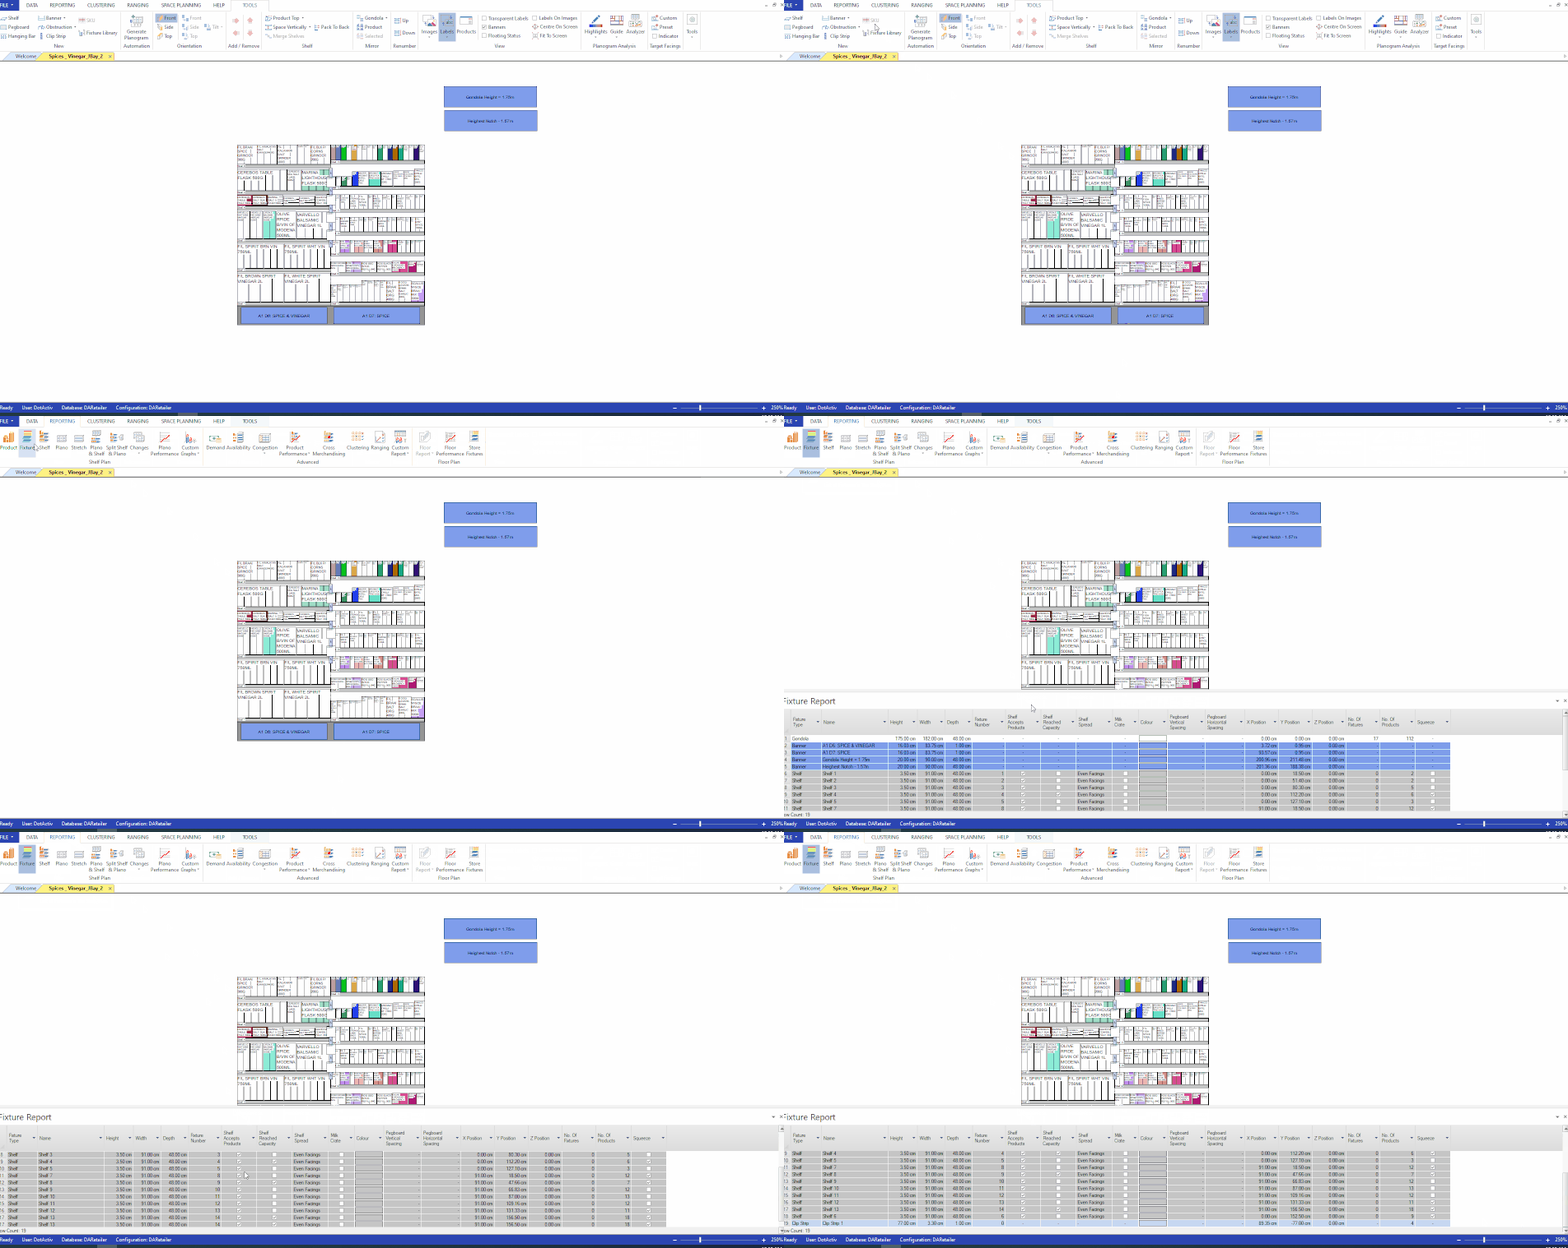
With your ‘Fixtures Report’ open, you can make changes to any fixtures on your shelf or floor plan.
It works the same for your floor plan as seen below.
Choosing Fields
Select the field you would like to display on the ‘Fixture Report’ by first right-clicking on one. Then click on ‘Select Columns’ from the context menu that pops up.
This opens the ‘Visible Columns’ window, which displays all possible fields for your shelf or floor plan. Select any fields by marking the checkbox.
There are two ways to view the total fixture linear space of the gondola.
Firstly, double-click on a blank space on a gondola to open ‘Gondola Properties’ window, navigate to the ‘Summary’ section where you will find the ‘Linear Space (Fixtures)’ field. This refers to the total fixture linear space of the gondola.
Alternatively, you can view the total fixture linear space per fixture. Simply open the fixture report. Once the report has opened, right-click on the column bar and select ‘Show Column’. The ‘Visible Columns’ pop-up window will appear. Lastly, navigate to ‘Linear Space (Fixture)’ field and tick the checkbox next to it.
You can also select all fields by ticking the checkbox next to ‘Column Name’. Alternatively, if you want to remove all current fields, untick the checkbox next to ‘Column Name’.
Once you have decided which fields you would like to display in your fixture report, click ‘OK’.
Your selected fields should now be displayed in the fixture report.
Making Changes
Once you have selected your fields, you can edit and change multiple fixtures simultaneously.
In the example below, we will change all the colours at once.
First, select the tab you want to edit by clicking on the drop-down arrow.
Next, choose the colour. Click on the tab and copy it (CTRL+C). Then, select all the fixtures to which you want to apply the colour. Paste it (CTRL+V). You can do this for all of the fields such as the size of products, positions, number of products, etc.
Besides being able to make bulk changes to your fixtures, the fixture report also allows you to audit all the fixtures placed on your planogram. As you can see in the example above, it provides you with a list of all the fixtures, their names, dimensions and placement on the planogram.
Accessing The Product Report
With your planogram open, ensure you are in the ‘Reporting’ tab. Once there, find the ‘Product’ icon in the ‘Shelf Plan’ section.
Clicking on it opens up your ‘Product Report’ in a dockable window above your planogram.
With your ‘Product Report’ open, you can make changes to any products on your shelf or floor plan.
Choosing Fields
Select the field you would like to display in the ‘Product Report’ by first right-clicking on one. Then click on ‘Select Columns’ from the context menu that pops up.
This opens the ‘Visible Columns’ window, which displays all possible fields for your shelf or floor plan. Select any fields by marking the checkbox.
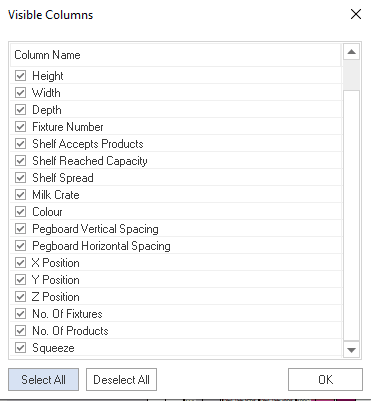
Again, you can also select all fields by clicking on ‘Select All’. If you want to begin fresh, click on ‘Deselect All’ before choosing your fields.
Once you have decided which fields you would like to display in your ‘Product Report’, click ‘OK’.
Suggested Space Allocation FLP Field
A new FLP field Called ‘Suggest Space Allocation’ has been added to the default configuration.
Steps to adding the suggested space allocation FLP field
Log in to DotActiv and connect to a database. This new field will automatically be created (if it doesn’t yet exist) and synced to your environment’s FLP format.
Next, open a planogram, it will prompt you to convert the planogram with the change which will then add this field to the planogram. Make sure to map the correct fields to ensure that the conversion does not incorrectly change any of the information on the planogram. The conversion is a mandatory step to ensure the Suggested Space Allocation field is added to the Product Report.
Lastly, open the Product Report and a fact field will shown in the Space Planning section. The field indicates the product’s suggested space allocation based on the space (number of shelves) the product is suggested to take up out of the current planogram shelf count based on the product’s average sales and unit contribution to the total on the planogram.

Making Changes
Once you have selected your fields, you can edit and change multiple products simultaneously.
In the example below, we will change all the colours at once.
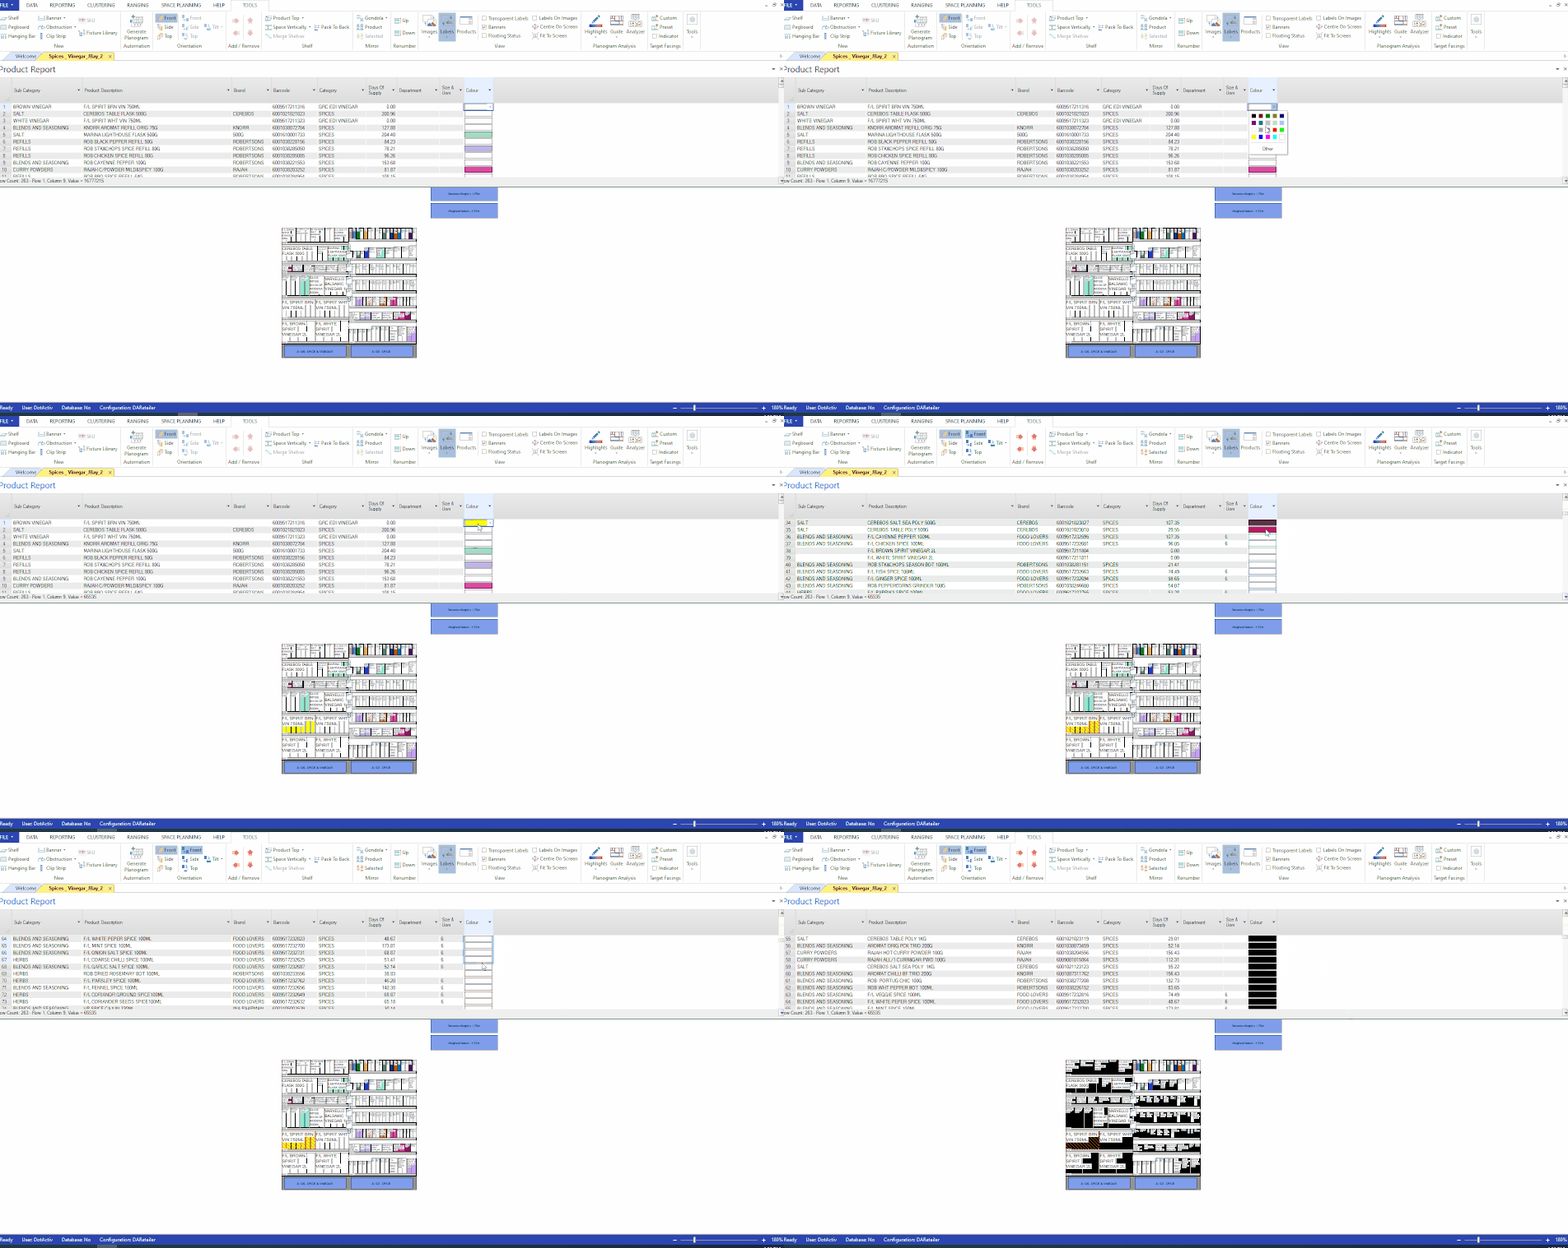
First, select the product you want to edit by clicking on the ‘Colour’ tab.
Choose the colour, copy it. Then, select all the products to which you want to apply the colour and paste. You can do this for all of the fields such as the size of products, positions, number of products, etc.
Products can also be updated on the shelf of the gondola by updating the “Actual facings” on the Product report. The X facings of the product will be changed when the ‘“Actual Facings” column is altered for that product on the Product report. This is done by typing in a new value or pasting values in that column, a single cell at a time or pasting in bulk.
Please note that the actual object facings will not update if the new value is 0 or if there are multiple instances of the relevant product on the shelf.
Saving And Using A Preset
Within the Product Report, you have the option to save a preset of the columns displayed in the report. This might be useful when you would like to save multiple different views that you use on a regular basis.
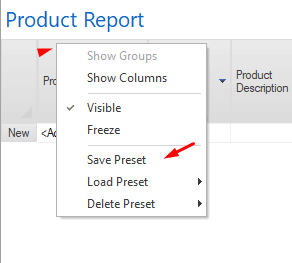
Firstly, you would need to save your preset. You can do so by opening the product report with the setup that you would like to save and reuse. Once the report is open, right-click on the headings and select ‘Save Preset’ as seen in the screenshot below.
Once you have clicked on ‘Save Preset’, another window will pop-up in which you will need to enter a name for the new preset, as seen in the screenshot below. Once happy, click ‘OK’.

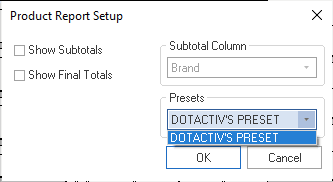
Now that you have saved your preset, you can simply access it whenever you click on the ‘Product Report’. Within the ‘Product Report Setup’ window below you can select your preset from the list.
And there you have it, you now know how to use the Product and Fixtures report for quick and efficient editing.
Should the above steps not work for you, please create a support ticket and DotActiv support will assist you in uncovering the issue
