The purpose of this article is to explain the steps on how to create and use the Split Shelf And Plano Report.
The Split Shelf and Plano Report is a report on product positioning and allows you to see the gondola segments together with the Shelf Report on the same page, listing each product on every shelf for each segment.
Creating The Report
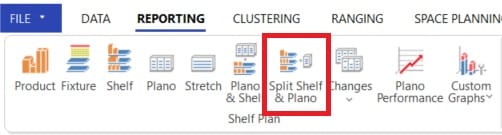
Step 1: In your DotActiv application, open the planogram that you want to create the Split Plano and Shelf Report with. Then navigate to the ‘Reporting’ tab and select the ‘Split Shelf and Plano’ icon.
Step 2: A window will pop up where you can select what is shown on the Split Shelf and Plano Report, for example, if you would like to include images, labels, or product colour. There is a pre-selected list which is normally best to use as is.
You can enable the Overview Page option. This will show the full planogram on the first page of your report.
If you are using a planogram with pegboards, you also have the option to split the report by the different pegboard rows.
The products do not have to be on a specific peg row to pull through but it uses a ‘buffer’ range to include products that are on a similar height. When analysing the report, a row number will be included to indicate which products are lined up on the pegboard in the same row.
Simply navigate to the ‘Split pegboard per row’ and tick the checkbox next to it to enable this feature.

Once you are happy to continue, click ‘OK’.
Step 3: You have the option to select the columns you would like to view in the report by right-clicking on any of the headings and then selecting ‘Show Columns’.
A list of all the information on the planogram will pop up and you can select the headings you want to include by ticking the box next to the heading(s) of your choice.
There is also the option to select and deselect all and this can be done by ticking or unticking the checkbox next to ‘Field’.

Step 4: If you are happy with your headings, you can adjust the width of the columns and print the Split Shelf and Plano Report into a PDF by pressing ‘Ctrl’ and ‘P’ and a window will pop up asking in which format you would like to print to. Here you select the ‘PDF’ format.
Alternatively, you can click on ‘File’, and then select ‘Print’.
A directory window will pop up where you can choose the folder you would like to save the PDF in and then it is ready to be sent and shared. Please see the GIF below.
Below is an example of what a Split Shelf and Plano Report will look like once you have printed it to PDF.

In the DotActiv software, you have the option to print multiple reports that you’ve created at the same time. This is especially useful when you have to print a lot of planograms as it may save you a lot of time just printing once. If you would like to learn how to print a single report or multiple reports at the same time, you can also read more about how to do so in this article here.
If the above steps do not work for you, please log a ticket for our Support Team who is always willing to help.
Pegboard Item Ordering On Different Shelf and Plano Reports
Open the Shelf report, Split Plano & Shelf report or Plano & Shelf report for a planogram.
The software feature enables you to group the pegboard in different rows.
The product information is ordered per fixture in a vertical or horizontal manner. This can be left to right, right to left, bottom to top or top to bottom depending on your selected setting.
Having products lined up in consistent rows can create a visually appealing image of the pegboard and enable you to make use of the new grouping functionality to report on the products per row.

To further assist with the practical use of this report for merchandisers who pack out the shelves, there is a new column to this report called ‘Peg Position’ (which will initially be a hidden column), which will show the actual X and Y peg position of the peg the product is on.
