The purpose of this article is to explain how to apply for an ad-hoc check-in from within Activ8 software. We also explain why you might not be able to apply for an ad-hoc check-in.
Applying for An Ad-Hoc Check-In
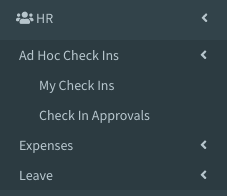
After opening the Activ8 application, navigate to ‘HR’ in the left-hand panel. From the drop-down menu, select ‘Ad-Hoc Check-Ins’ and then ‘My Check-Ins’.

Clicking on ‘My Check Ins’ takes you to a ‘My OnSite Check Ins’ webpage where you can click on the following button:

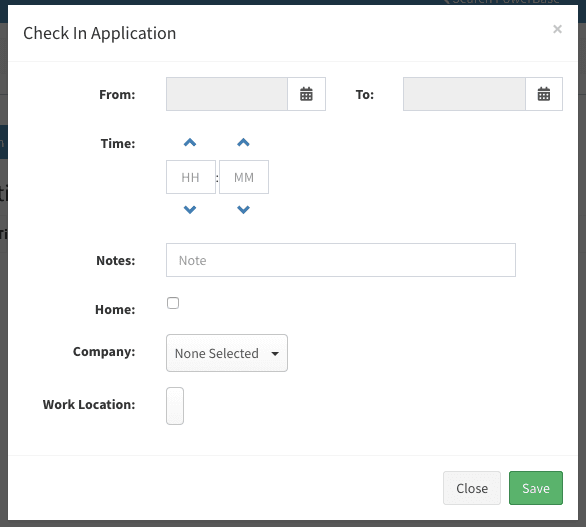
Doing so opens the ‘Check In Application’ window (seen below) where you can add your information.

Once you have filled in all the necessary information, click on ‘Save’.
Your application will then go to your line manager or the authorised user who can either accept or reject your request.
I Am Unable To Create An Ad-Hoc Check-In
When applying for an ad-hoc check-in in the Activ8 application, it is important that you fill out all the necessary information.
To help you understand which fields to fill in, click on ‘Save’. A red box will appear around the fields where you need to add information.
From the top, the date is always needed as we need to know for when your ad-hoc check-in is. You will also need to fill out your time of check-in so it can be updated on Activ8 once approved.
Adding a note is essential as it will be used to approve and confirm the ad-hoc check-in. The check-in will not be able to go through if there is no note filled in.
Please note that you must also include a company and a location before applying for an ad-hoc check-in. If you are checking in from home, select this option.
Once you’re done filling out all your check-in information, you can click ‘Save’ again. Your ad-hoc check-in will be sent to the authorised user who can approve it.
