The purpose of this article is to explain how to create a task in Activ8 software. We also unpack how to reassign tasks, change task owners, update tasks deadlines and cancel existing tasks.
Creating A Task
To create a new task, navigate to the ‘New Task’ tab found in the Activ8 ribbon. You will be able to find this tab regardless of where you are in Activ8.

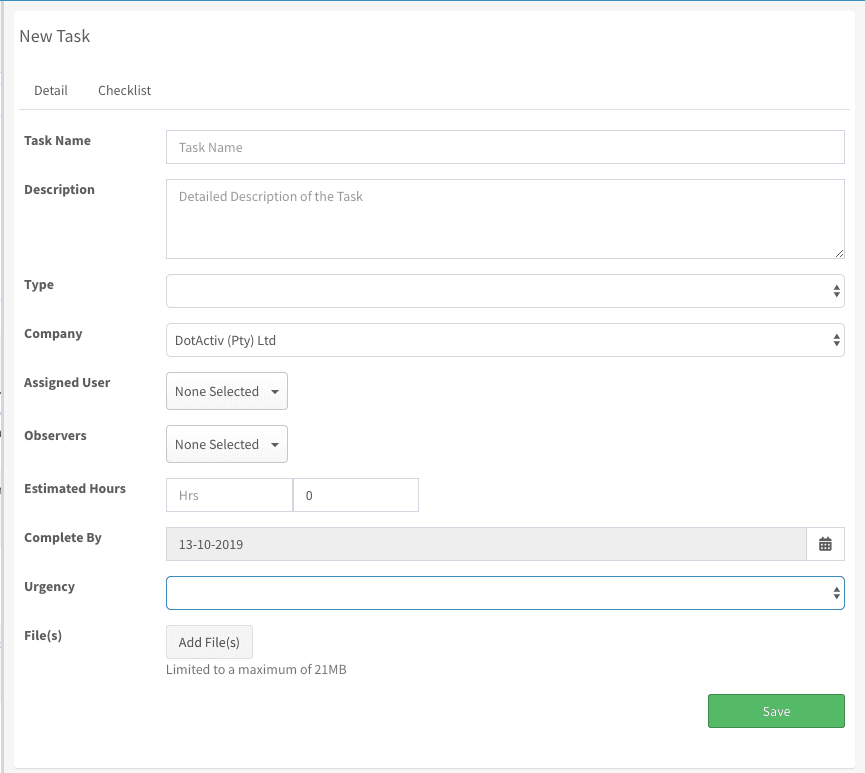
Clicking on this tab opens up the ‘New Task’ window as seen in the image below.
Filling In The Information
To create a task successfully, you must include information in the following fields:
- Task Name;
- (Task) Description;
- Type;
- Company;
- Assigned User;
- Estimated Hours; and
- Completed By.
In the ‘Urgency’ field, you can choose between ‘Low’, ‘Medium,’ ‘High’ and ‘Critical’. If you don’t select an option, it will default to ‘Low’. Each option is colour-coded. Green for Low, Blue for Medium, Orange for High and Red for Critical.
You can also add files to the task to better explain what you need if it’s a support task, for example.
If you want to assign a task to more than one person, you can create and add a checklist. Learn how to create a checklist here.
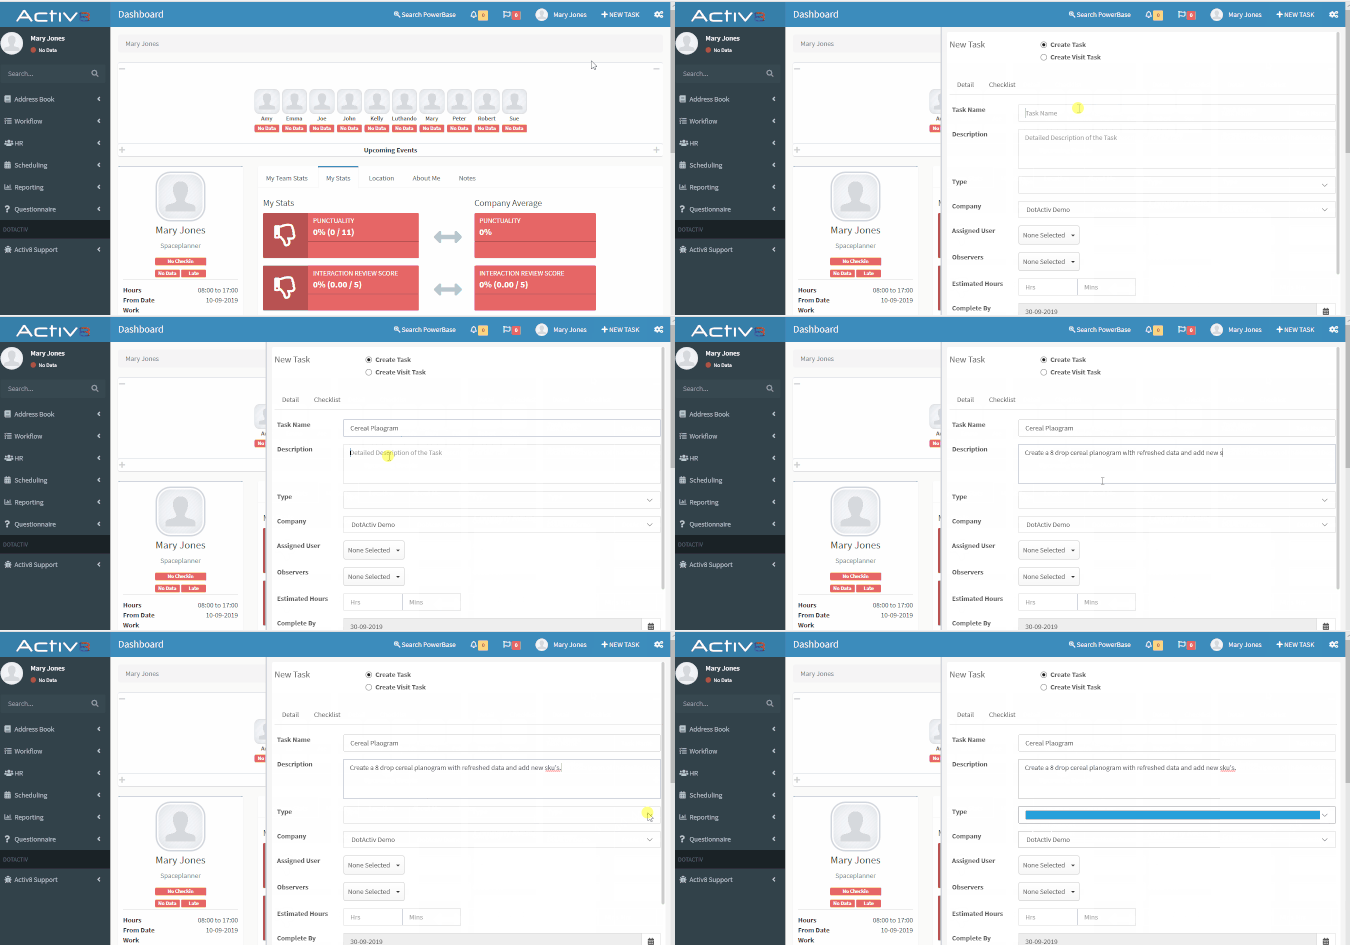
After you have added all the necessary information, click ‘Save’ to create the task.

You can also add comments to any task that you create or those that are assigned to you. To comment on a task, navigate to the ‘Comments’ tab. There is a text box at the bottom of the task where you can input your comments. You can also add any files when necessary.
I Am Unable To Create A Task
If you don’t fill in all of the above fields, you will be unable to create a task. The fields that require information will be outlined in red as seen below.
Email Notifications
As soon as you create the task, the assigned user will receive a notification in Activ8, as seen below. The user will receive an email confirming the creation of the task.

The assigned user will also receive an email notifying them that a new task as been created for them.
Reassigning A Task
If you want to reassign a task to a different user, first open up the task. Next, click on the ‘Assigned User’ button to change the assignee. A pop-up list of all employees will appear where you can select the new task assignee.
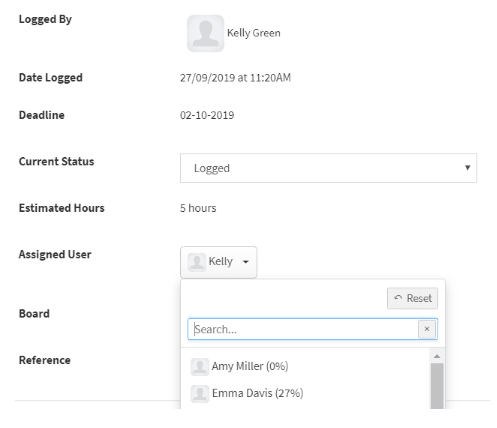
You can also type the name of the employee into the search bar to assign them to complete the task.
Changing The Task Owner
If you’d like to change the owner of the task, click on the name next to the ‘Task Owner’ and choose the appropriate user from the drop-down menu.
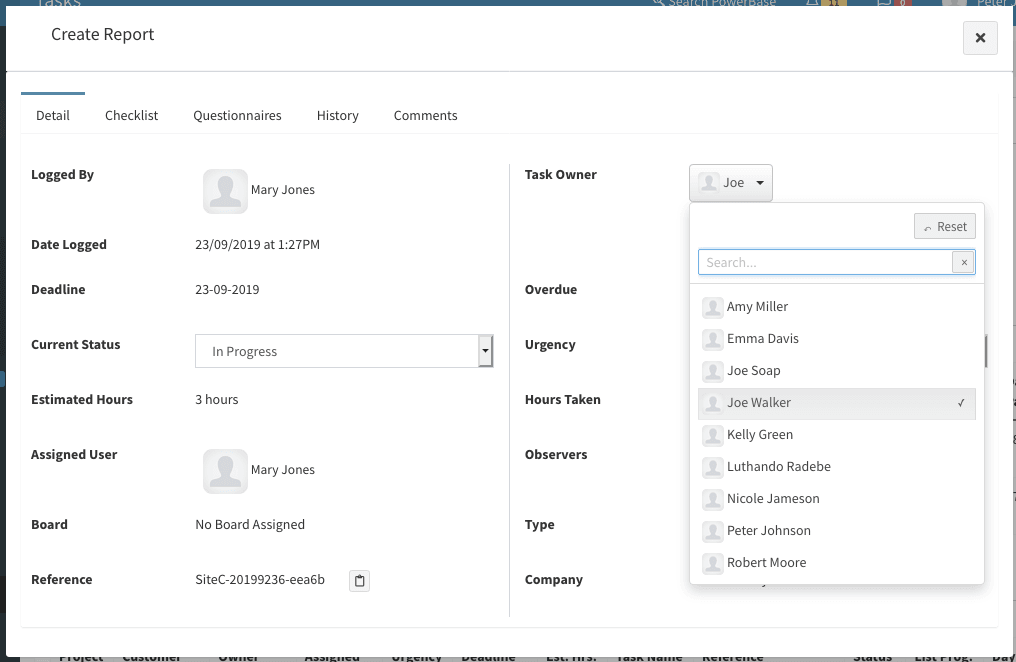
You can also type the new owner’s name into the search bar to assign them to manage the task.
Please note that eventhough you might have created a task, once you change the task owner, you can’t make any edits. Only the task owner can make changes.
Changing Task Deadlines
To change the deadline of a task, first, open the task.
Next, find the ‘Deadline’ drop-down menu and click on the date. As seen below, a calendar will appear where you can select a new deadline for the task.
A ‘Task Deadline Change’-up window will appear after you select a new date.
If you want to change a task deadline, you must select the user responsible for the deadline extension. You must also include a reason.
Reopening A Completed Task
To reopen a completed task, navigate to the task in question.
Once open, next to ‘Current Status’, you’ll see two clickable buttons – ‘Confirm as Closed’ and ‘Re-open Task’.
If you click on ‘Confirm as Closed’, it will make the task as complete and close the task.
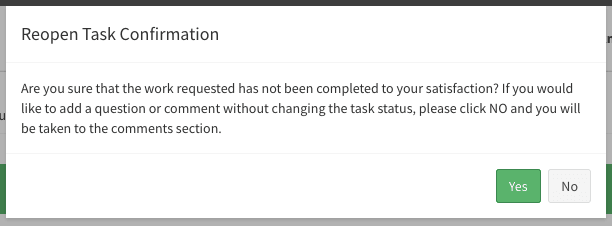
If you are unsatisfied with the feedback or require additional work, you can click on ‘Re-Open Task’. The above window will pop-up.
Cancelling A Task
Step 1: If you’d like to cancel a task, click on the task you want to cancel and navigate to the ‘Detail’ section as seen below.
Step 2: Navigate to ‘Current Status’ and select ‘Cancelled’ from the drop-down menu.

Step 3: After you have clicked on ‘Cancelled’, the below window pops-up, asking you to confirm the task as cancelled. Click Yes.
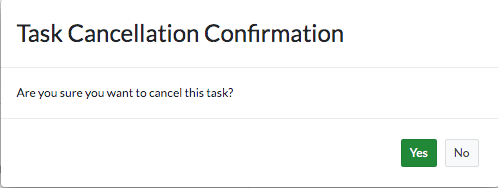
Step 4: Then click on ‘Confirm as Cancelled’ to move the task to ‘Closed’.
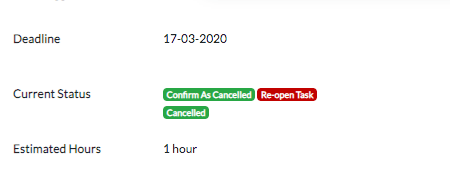
Please note after you have cancelled a task, the task will automatically be moved to closed.

