The purpose of this article is to provide you with a clear step-by-step process to create, customise and read planogram reports in the DotActiv software.
What Is A Shelf Plan Report
The shelf plan or planogram report is a detailed summary of the products listed on each shelf.
Please don’t get confused with the Product Report (below), which is a list of all the products imported into a shelf plan, whether in the back end or on the shelf.

Each planogram must have a shelf report. Each report includes fields such as Barcode, Product Code, Product Description, Number Of Facings and Capacity to assist merchandisers to identify the correct product when stocking shelves.
Where To Find The Shelf Report
After opening a planogram, navigate to the ‘Reporting’ tab. Here, under the ‘Shelf Plan’ section, you can select ‘Shelf’.

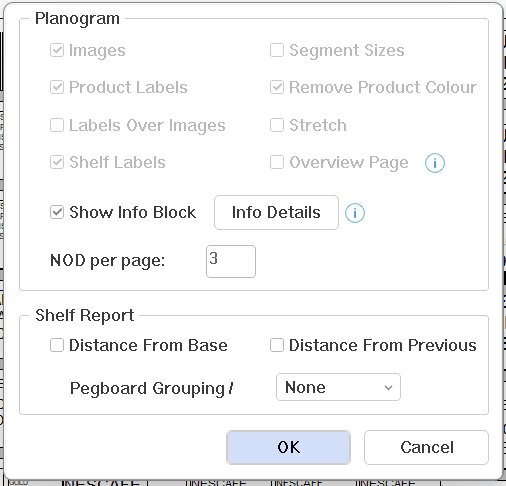
A Planogram window popup will show where you can select the number of drops that should show per page and if you want to show the information in a block as seen below. If you are happy with your selection of how the report should be set up, select ‘OK’.

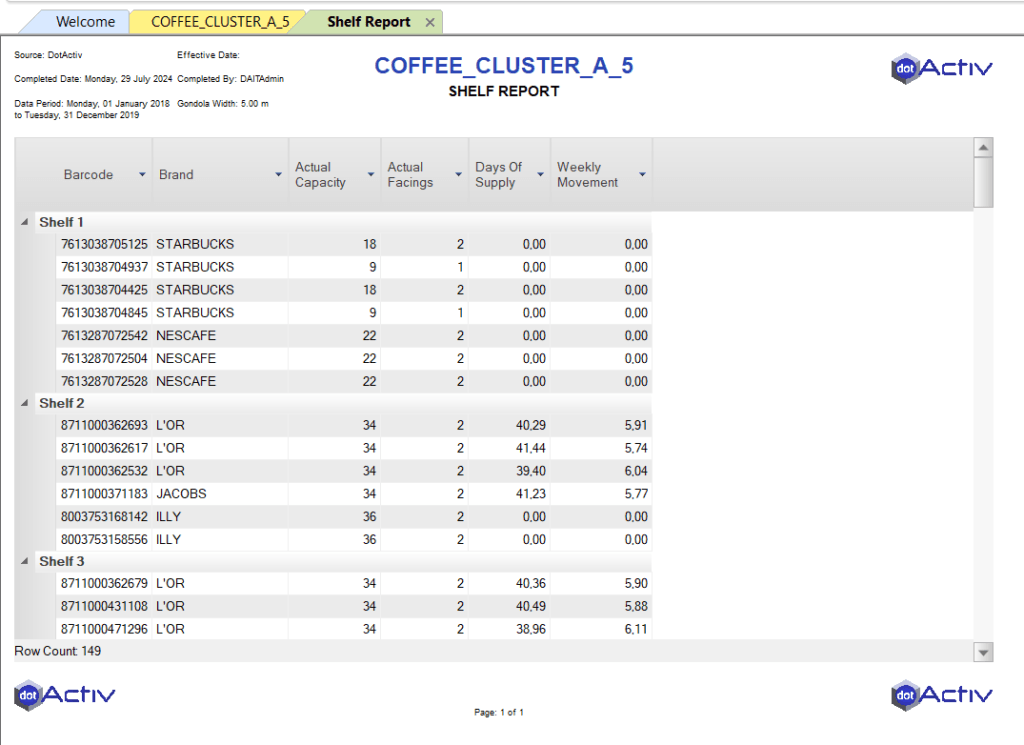
Doing so brings up a Shelf Report of your open planogram, providing you with all sorts of information about the products on your shelf.

Shelf Report Contents
Upon opening your Shelf Report, in the top left-hand corner, you’ll find all the information about the report. That includes the name of the report. Besides that, the information includes:
- Source,
- Completed Date,
- Data Period,
- Effective Date,
- Completed By, and
- Gondola Width.
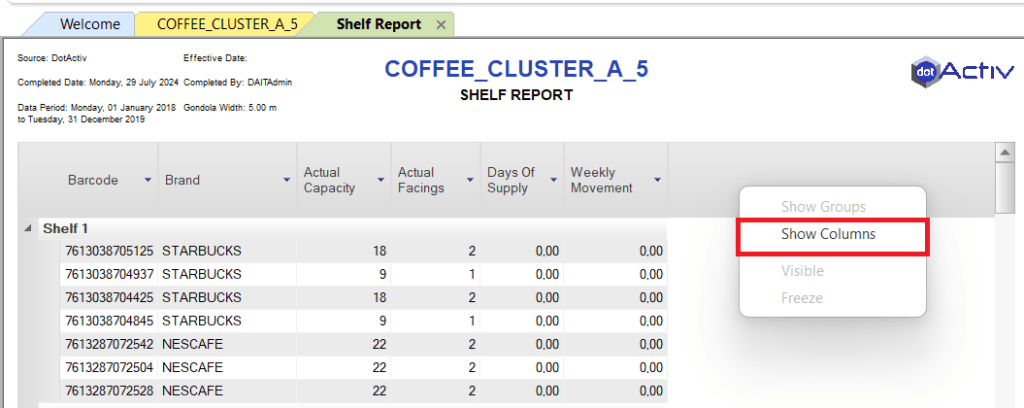
Beneath this information, you’ll find various columns detailing what is in your report. To add or remove columns, right-click on the heading of the column to bring up the ‘Visible Columns’ window.
After right-clicking on the heading, select ‘Show Column’ from the context menu.

In the ‘Visible Columns’ window, you can tick or untick which fields to add to the report.
Recommended columns to include are Barcode, Brand, Description, Facings, Capacity, Days Of Supply and Weekly Movement. These fields are unpacked in this article here.
Above the report is the ‘General’ section where you can add all the necessary logos. You can include a maximum of three logos.

To add a logo, click on the ‘Logos’ icon to bring up the file directory.
To print, go to ‘File’, then click on ‘Print’. Select your printer option from the window that pops up.
In the DotActiv application, you have the option to print multiple reports that you’ve created at the same time. This is especially useful when you have to print a lot of planograms as it may save you a lot of time just printing once. If you would like to print a single report or multiple reports at the same time, you can read more about how to do so in this article here.
If the steps above do not work for you, please log a ticket to our Support Team who is always willing to assist.
