The purpose of this article is to guide you on how to report on planogram congestion by store or cluster in DotActiv software.
What Is The Congestion Report?
The Congestion Report gives you an indication of how many products are placed on any given planogram. It can be set up either by store, cluster or category.
The benefit of the Congestion Report is that it enables you to understand how each of your categories is positioned relative to other categories at a shelf level.
Using The Congestion Report
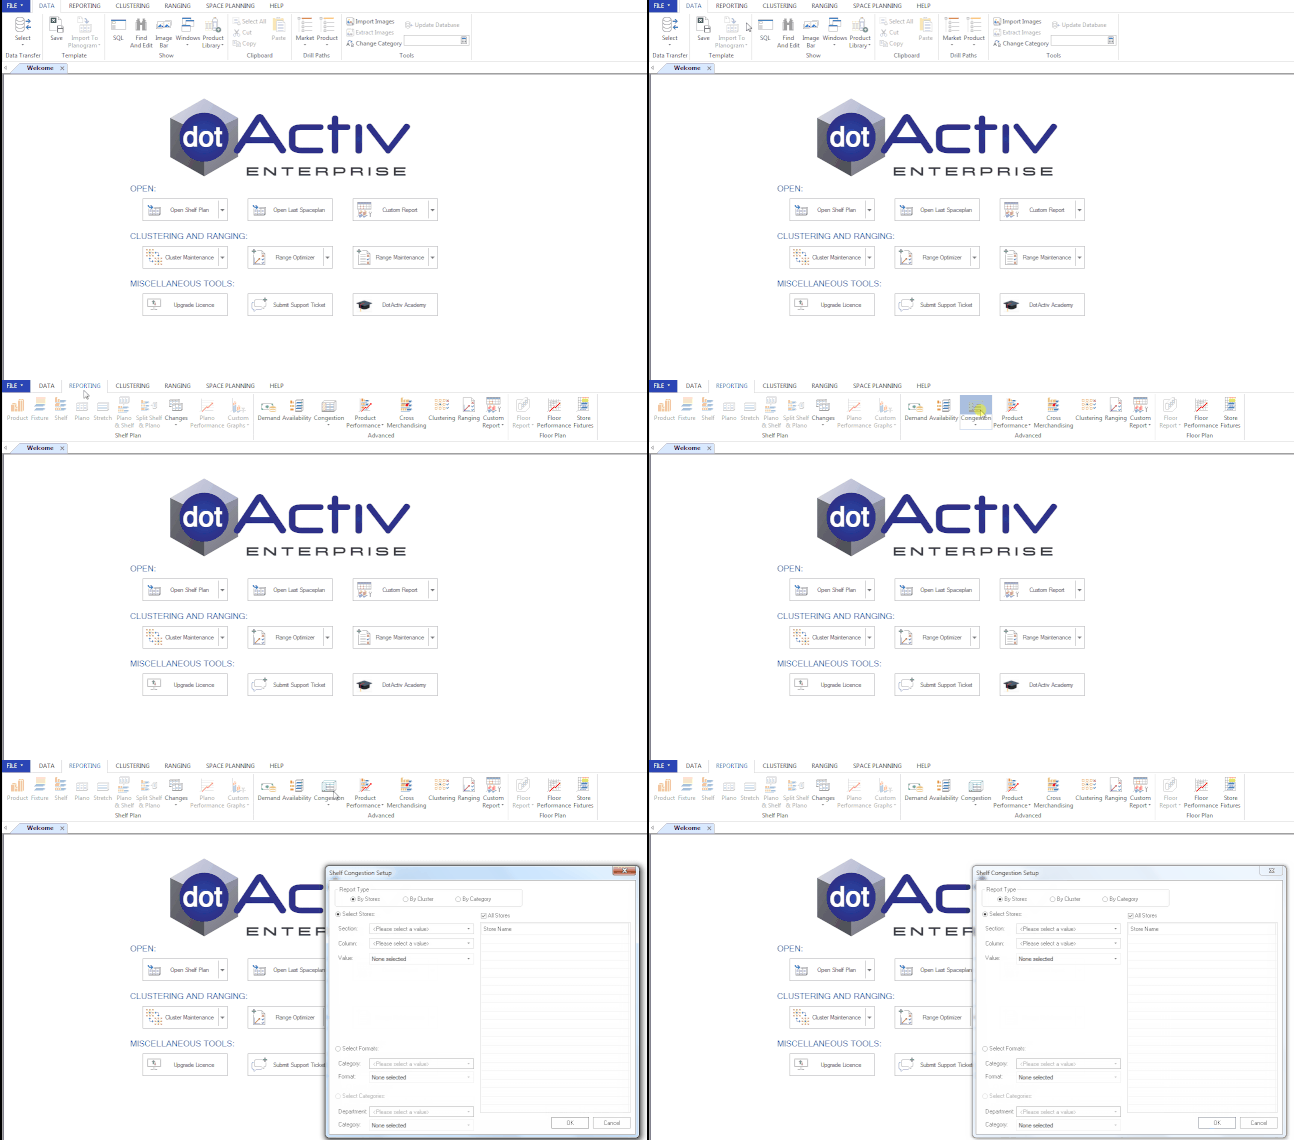
After opening DotActiv, ensure you are in the ‘Reporting’ tab. Next, select the ‘Congestion’ icon in the ‘Advanced’ section.
The ‘Advanced’ section consists of reporting functions that use a database. Therefore, you can only access these reports when you are logged into a database.
For the Congestion Report to work, it’s imperative that all the information is accurate and correct. That includes no duplicate data and correct naming conventions.

After selecting the ‘Congestion’ icon, the ‘Shelf Congestion Setup’ window appears. In it, you’ll find that you have three options from which to choose when completing a congestion report:
- By Stores;
- By Cluster; or
- By Category.

Reporting By Stores
After selecting ‘By Stores’, click on the drop-down menu. Here, you’ll have a few options from which to select. For the purpose of this example, we selected ‘Category – Format’.

Once you have selected the section, click on the drop-down arrow for the column and select the category you want to view.
Next, click on the drop-down arrow for ‘Value’ and select the cluster you want to view. You can either select all stores or select specific stores. Once selected, click ‘OK’.

A Shelf Congestion Report will appear (as seen below). From this report, you can see all the stores that you selected.

The report includes:
- Store Code;
- Store Name;
- Merchandise Group;
- Department;
- Category;
- Format;
- NOD (Number of Drops);
- FWD SME (Forward Standard Modular Equivalent). This is a numeric representation of the planograms forward space in relation to what its business deems as the standard size. ;
- Cube SME (Cubic Standard Modular Equivalent); This is the same as the above but it uses cubic space. And,
- Average Congestion.
Reporting By Cluster
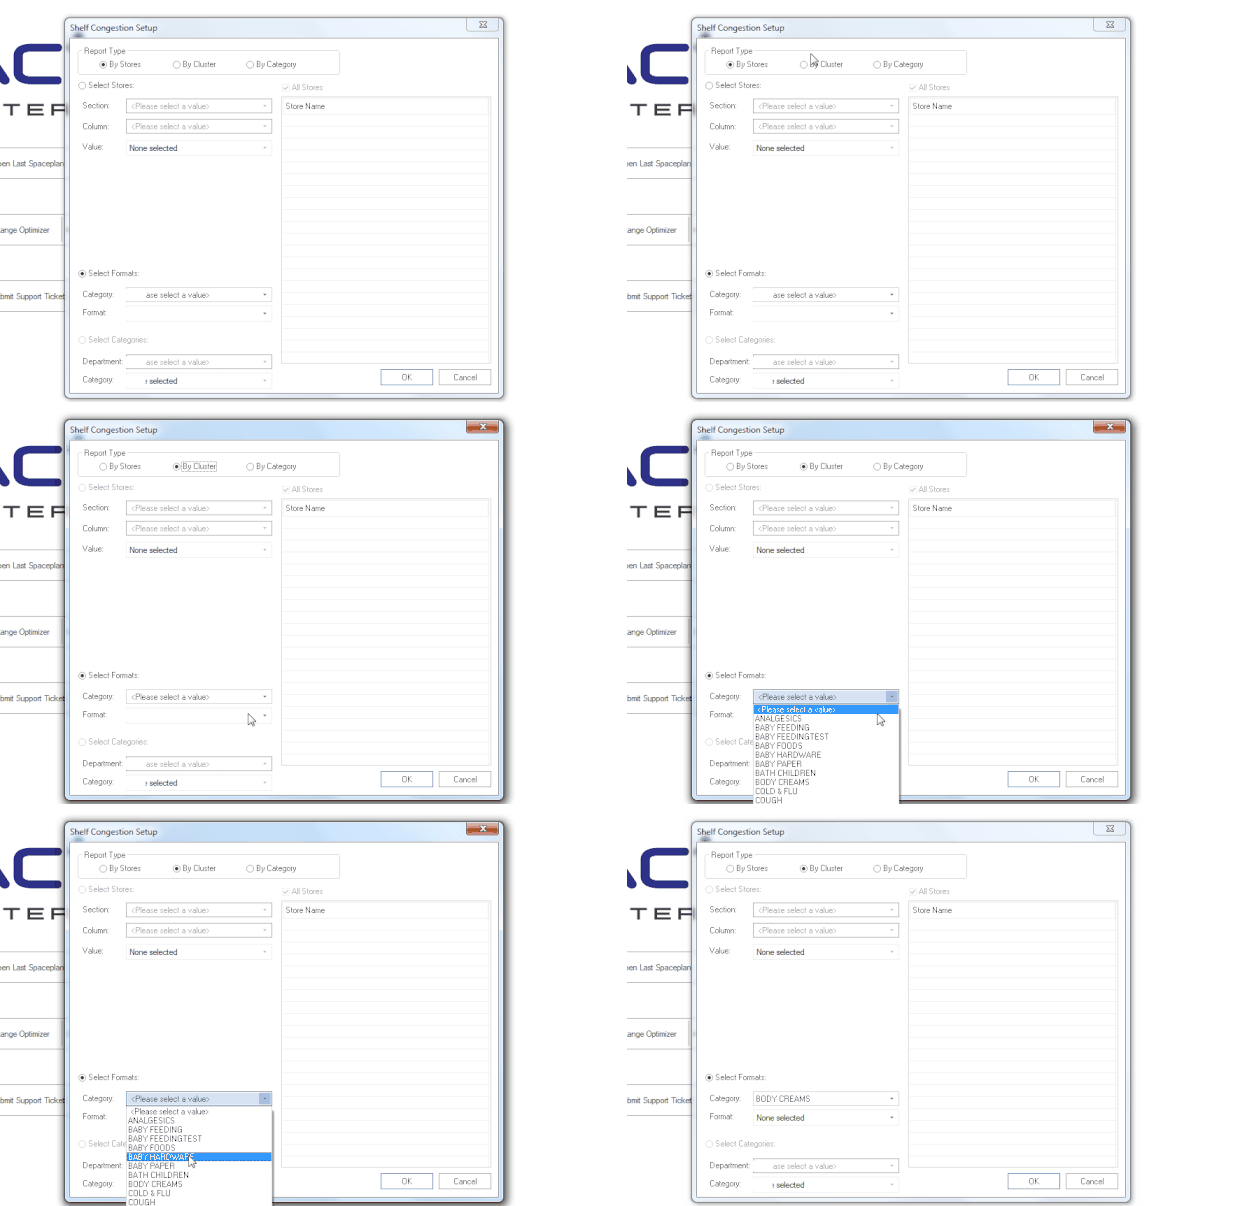
From the ‘Shelf Congestion Setup’, select the option ‘By Cluster’ under ‘Report Type’. The ‘Select Formats’ section is then highlighted.

From here, you can select your category by clicking the drop-down arrow next to ‘Category’.
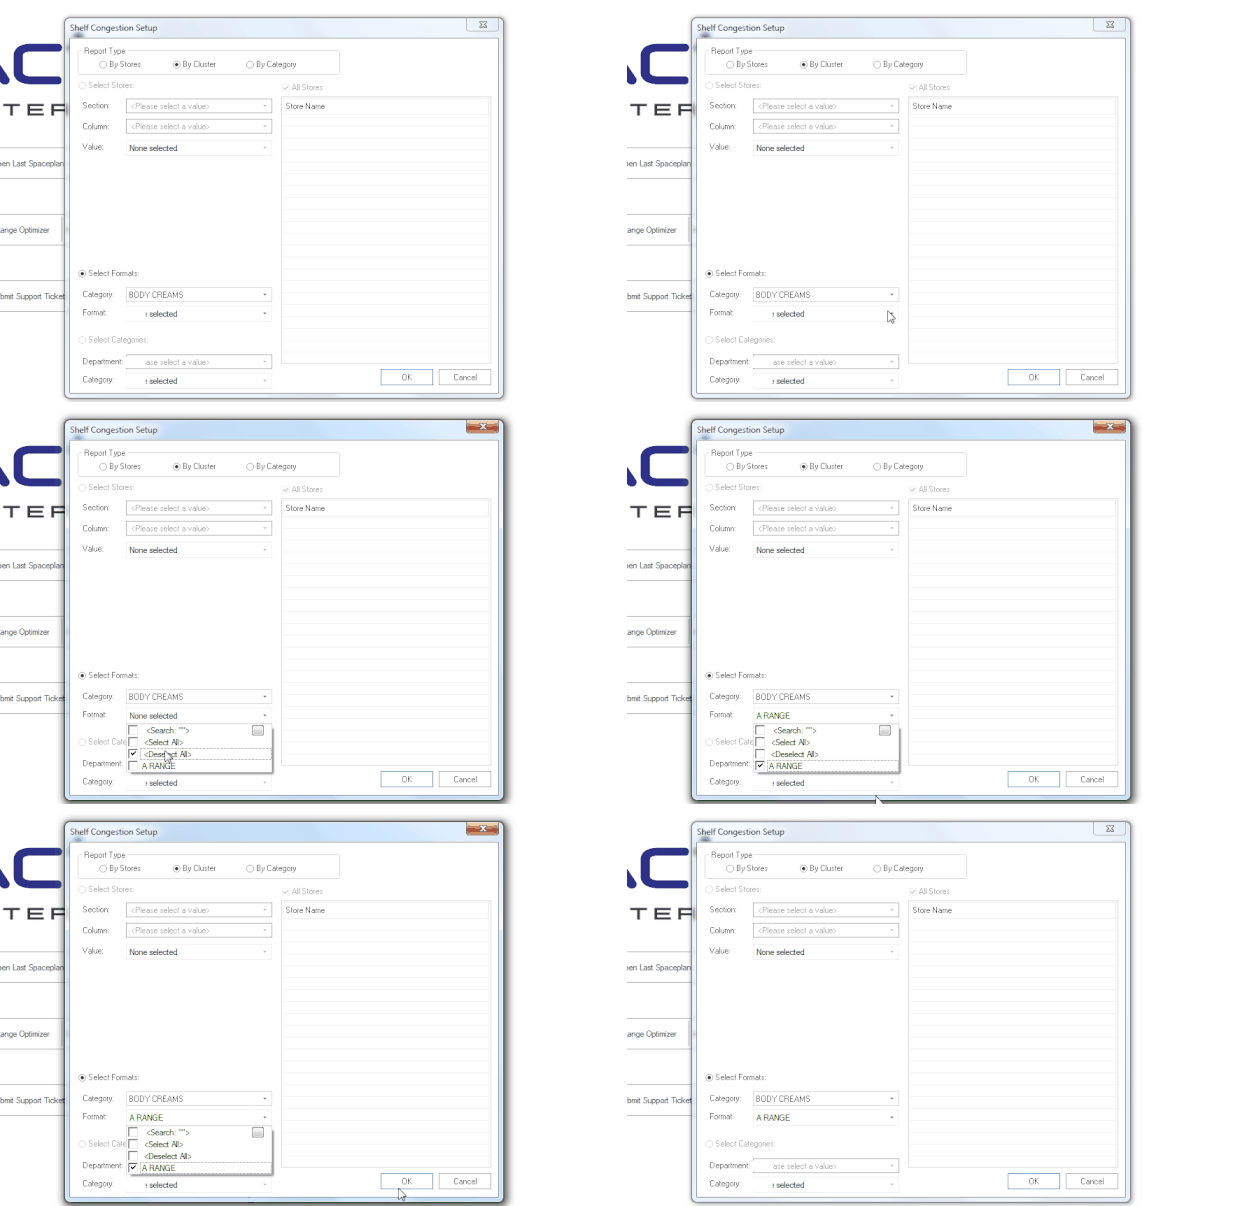
Once you have selected your desired category, you need to choose the format. You can do that by clicking on the drop-down arrow next to ‘Format’.

As soon as you have selected all fields, you can click on ‘OK’.
Doing so opens the Shelf Congestion Report. This report shows all the stores average congestion for one specific category or selected categories.
Reporting By Category
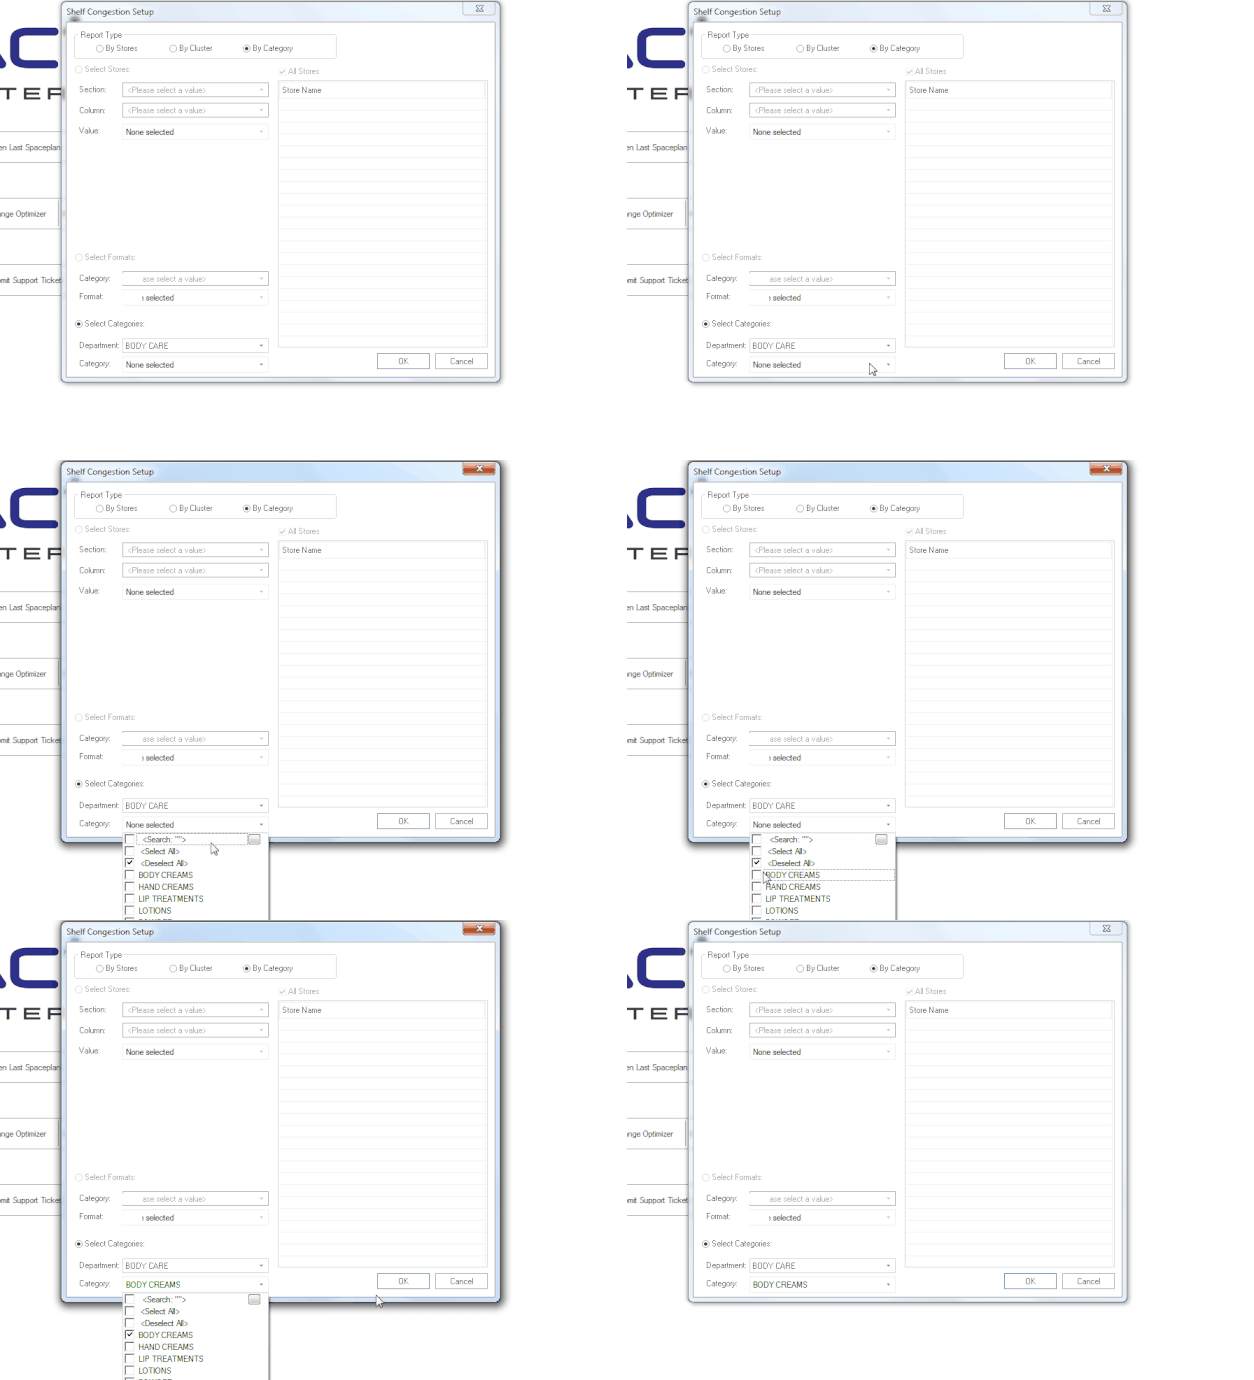
From the ‘Shelf Congestion Setup’, select the option ‘By Category’ under ‘Report Type’. The ‘Select Categories’ section is then highlighted.

From here, you can select your department by clicking the drop-down arrow next to ‘Department’.
Once you have selected your desired department, you need to choose the category. You can do that by clicking on the drop-down arrow next to ‘Category’.

As soon as you have selected all the necessary fields, you can click ‘OK’.
A shelf congestion report should appear.

As seen above, in this report you can see the Merchandise Group that you selected.
The report also contains the following fields:
- Merchandise Group;
- Department;
- Category;
- FWD SME (Forward Standard Modular Equivalent);
- Cubic SME (Cubic Standard Modular Equivalent); and
- Average Congestion.
Please note that this report doesn’t show specific stores.
Should the above steps not work for you, please create a support ticket and DotActiv support will assist you in uncovering the issue.
