The purpose of this article is to help guide you on how to use the floating status while working in DotActiv software. It covers how to show and manage the floating status.
Showing The Floating Status
The Floating Status shows valuable information about a shelf and is active when hovering over your product.
First, navigate to ‘File’, then ‘Setup’, and select ‘Application Settings’. Here, select ‘Status Text’ and then ‘Floating Status’.

You can adjust the floating status to show different fields, like ‘Market’, ‘Product’, ‘Fact’ and ‘Period’. The fields are applied to show on different variables, including on the product, gondola, shelf, CAD objects and floor.
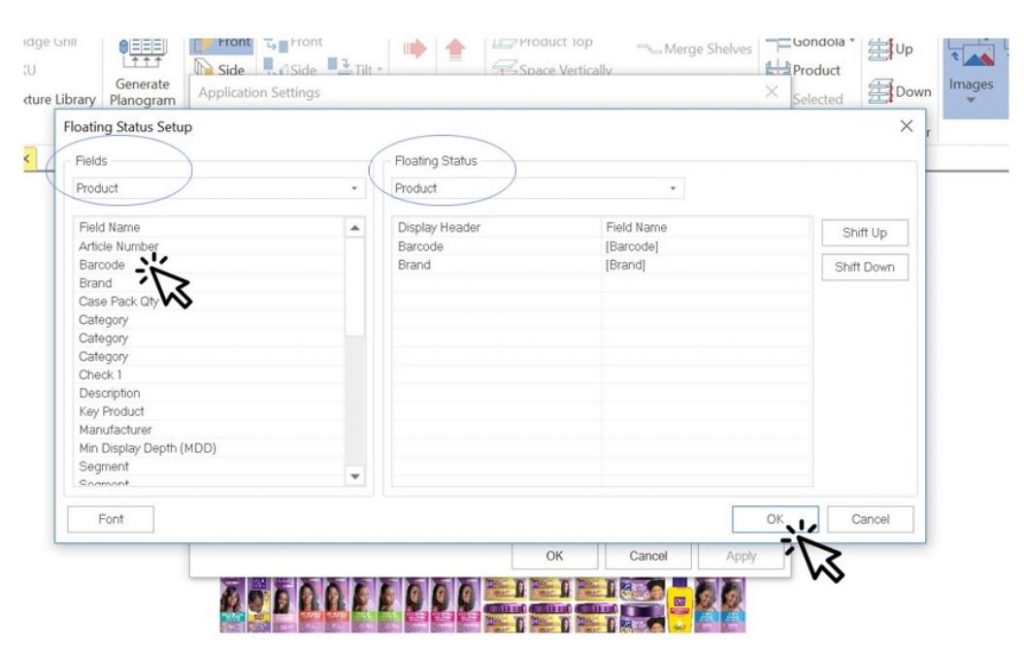
After clicking on ‘Floating Status’, the ‘Floating Status Setup’ window appears.
For this example, we’ll select the ‘Product’ field and double-click on the fields that we want to see on the floating status.

The selected fields appear in the right-hand box of the ‘Floating Status Setup’ window.
Select ‘OK’ to apply your changes.
Once you have set up your floating status, when you position your mouse cursor over a product, your selected fields will appear.
This is very useful, especially when someone else is working on or adjusting your planogram and would like to see key fields, like product barcode or description without pulling any reports.
