The purpose of this article is to explain how you can add new leave types in Activ8 software. You can have multiple leave types in Activ8 as well as multiple ways of calculating them.
Adding A New Leave Type
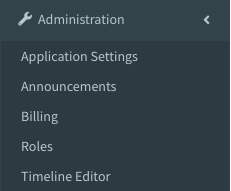
To get started, first navigate to ‘Administration’ in the left-hand panel and click on ‘Application Settings’ from the drop-down list.

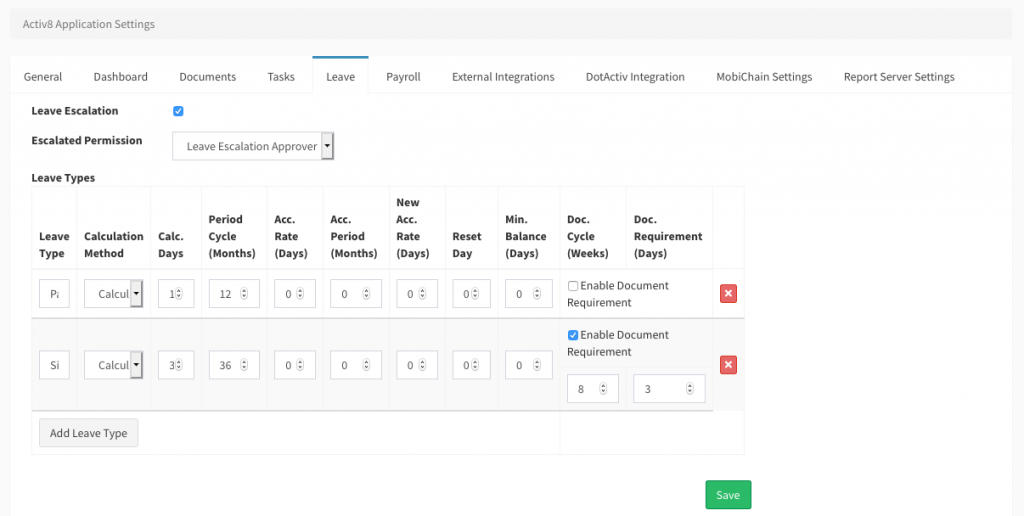
After clicking on ‘Application Settings’, find the ‘Leave’ tab in the ‘Activ8 Application Settings’ window.

Click on ‘Add Leave Type’ to get started.

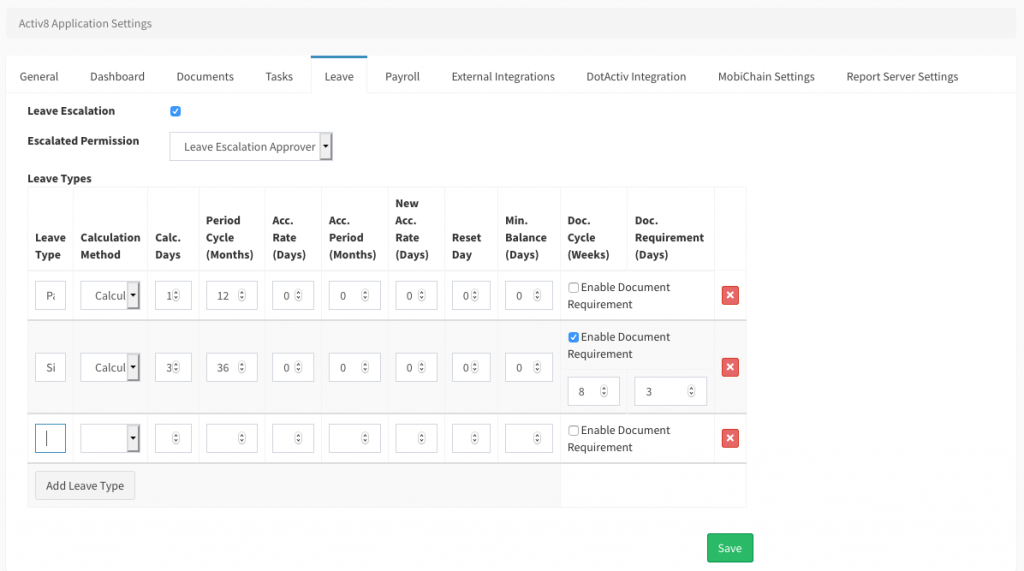
A blank list will appear under each tab for a new leave type (seen below) where you can begin filling in all the necessary information.
Adding New Leave Type Information

Here, you can include:
- Leave Type: This will be the name and the type of leave when filling out a leave application. For example, ‘Personal Day’;
- Calculation Method: This will be the way that the leave is calculated. There are three options for this on Activ8: Calculated, Accumulated, and Hybrid;
- Calc./Calculation Days: This will be the maximum amount of days this leave type will be able to grow to in the set period. For example, two days;
- Period Cycle (Months): This is the number of months it takes for you to go through a full cycle of this specific leave type. For example, 12 Months;
- Acc./Accumulation Rate (Days): This is the number of days you accumulate per month for this specific leave type;
- New Acc./Accumulation Rate (Days): This is the tab you use when the specific leave type gets updated to a different accumulation rate when you need to make any changes;
- Reset Day: This will be the day that this leave type would reset. The default is 0, which is the last day of the said cycle;
- Min./Minimum Balance: This is the minimum amount of this leave than you can have in days. The default is 0; and
- Doc./Documentation Cycle (Weeks): This is only if you want to enable a documentation requirement for the specific leave.
The ‘Doc./Documentation Requirement (Days)’ field is not needed for all leave types. If you do not want a documentation requirement option, you can untick the ‘Enable Documentation Requirement’ box when added a new leave type.
Once completed, your new leave type will look something like the below.

Click ‘Save’ to add the new leave type. When next you apply for leave, you can choose this option from the leave type drop-down list.
